戚風蛋糕 Chiffon Cake
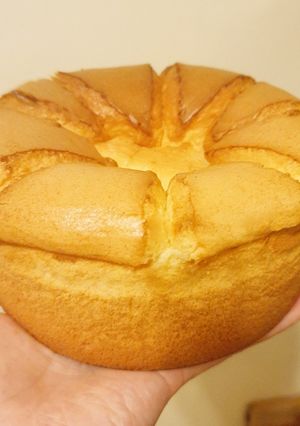
戚風蛋糕做法很簡單,但做的好真的不容易,即便參考教學十分的詳盡,我仍舊烤了三次才成功😩,剛烤好的戚風蛋糕濕潤柔軟,像雲朵一樣超好吃😍😍😍
Chiffon cakes may seem simple to make, but mastering them is truly a challenge — even with detailed tutorials, it still took me three tries to get it right! 😩
Fresh out of the oven, the chiffon cake is moist, soft, and fluffy like a cloud — absolutely irresistible!
※製作戚風蛋糕的模具不可抹油、灑粉或舖烘焙紙。
※室溫可放3天,密封冷凍可放10天。
※食譜參考心手作烘焙坊。
※ Do not grease, flour, or line the chiffon cake mold with parchment paper.
※ Can be stored at room temperature for 3 days, or frozen (sealed) for up to 10 days.
※ Recipe adapted from Heart Handmade Bakery.
戚風蛋糕 Chiffon Cake
戚風蛋糕做法很簡單,但做的好真的不容易,即便參考教學十分的詳盡,我仍舊烤了三次才成功😩,剛烤好的戚風蛋糕濕潤柔軟,像雲朵一樣超好吃😍😍😍
Chiffon cakes may seem simple to make, but mastering them is truly a challenge — even with detailed tutorials, it still took me three tries to get it right! 😩
Fresh out of the oven, the chiffon cake is moist, soft, and fluffy like a cloud — absolutely irresistible!
※製作戚風蛋糕的模具不可抹油、灑粉或舖烘焙紙。
※室溫可放3天,密封冷凍可放10天。
※食譜參考心手作烘焙坊。
※ Do not grease, flour, or line the chiffon cake mold with parchment paper.
※ Can be stored at room temperature for 3 days, or frozen (sealed) for up to 10 days.
※ Recipe adapted from Heart Handmade Bakery.
料理步驟
- 1
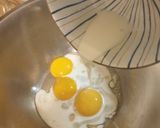
將材料準備好,將蛋白和蛋黃分開(蛋白盆要無油無水的)。Prepare all the ingredients, then separate the egg whites and egg yolks
(Make sure the bowl for the egg whites is completely free of oil and water.) - 2
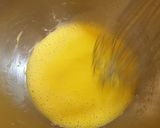
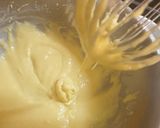
將牛奶和油倒入蛋黃盆中與,馬上用打蛋器攪拌至均勻乳化。Pour the milk and oil into the bowl with the egg yolks, then whisk immediately until the mixture is smooth and emulsified.
- 3
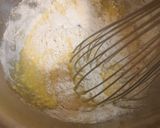
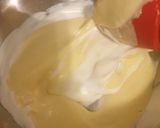
加入過篩麵粉,以輕柔的切拌方式混合,防止起筋(完成應是流動性的順滑狀態,如果太稠可以再加一點牛奶)。Add the sifted flour and gently fold it in to prevent gluten from forming. The mixture should be smooth and flowy; if it’s too thick, add a little more milk.

- 4
預熱烤箱350度F/176度C。Preheat the oven to 350°F (176°C).
- 5
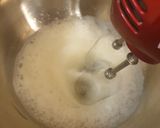
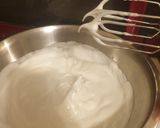
將蛋白以電動打蛋器打發至粗泡後,加入檸檬汁和一半的糖繼續打發,蛋白變白後,再加入剩下的糖繼續打發至中性至乾性發泡(成功的蛋白霜即便傾斜鋼盆都不會滑動)。Beat the egg whites with an electric mixer until foamy, then add the lemon juice and half of the sugar. Continue beating until the mixture turns white, then add the remaining sugar and whip until medium to stiff peaks form. The meringue is ready when it stays in place even if the bowl is tilted.
- 6
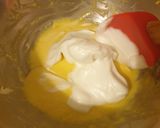
挖兩勺蛋白霜進蛋黃糊中混合,再將混合後的蛋黃糊倒入蛋白霜中,以翻拌手法混合均勻。Scoop two spoonfuls of meringue into the yolk batter and mix gently. Then pour the yolk mixture back into the meringue and fold until evenly combined.
- 7
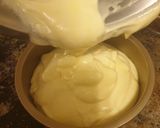
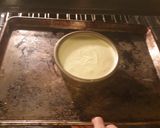
將完成的蛋糕糊倒入模具中,用竹籤在蛋糕糊中畫圈趕出氣泡,並連同模具摔兩下震出氣泡(成功的麵糊濃稠,倒入模具會產生紋路)。Pour the finished batter into the mold. Use a skewer to draw circles through the batter to release air bubbles, then tap the mold twice on the counter to remove any remaining bubbles. A well-made batter should be thick enough to form gentle ribbons as it’s poured.
- 8
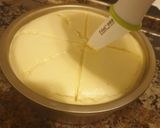
進烤箱烤10分鐘後取出,用小刀畫米字線幫助排氣。Bake for 10 minutes, then remove the cake and use a small knife to score a star-shaped pattern on top to help release steam.
- 9
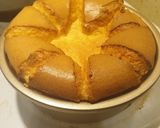
回烤箱360度F/180度C烤33分鐘 (取出後可以用牙籤插蛋糕中心,牙籤上沒帶麵糊就是烤好了),將蛋糕摔一下,將中心熱氣散出。用兩個杯子將蛋糕倒扣放涼一小時,這樣可以防止蛋糕塌陷。Return the cake to the oven and bake at 360°F (180°C) for 33 minutes. (You can test for doneness by inserting a toothpick into the center—if it comes out clean, it’s ready.) After removing from the oven, tap the pan lightly to release the steam from the center.
- 10
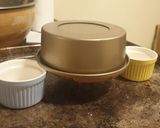
用兩個杯子將蛋糕倒扣放涼一小時,這樣可以防止蛋糕塌陷。Invert the cake onto two cups and let it cool for about an hour; this helps prevent the cake from collapsing.
- 11
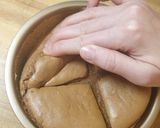
待蛋糕全涼時再脫模,成功的戚風蛋糕有很好的彈性,用手沿著模具將蛋糕向中心剝一圈後就能輕鬆脫模(如果蛋糕還熱就脫模,蛋糕形狀容易變形破損)。Remove the cake from the mold only after it has completely cooled. A successful chiffon cake should be springy and elastic—run your fingers gently along the sides to loosen it toward the center, and it should come out easily. (If you unmold it while still warm, the cake may deform or tear.)
關鍵字
相似食譜
更多推薦食譜

留言 (3)