
Focaccia
I wanted to eat a really soft and tender focaccia rather than the usual type, so I adjusted a recipe I had for pizza crust.
Bake it at a high temperature for a short time.
In my gas oven, it's browned in about 2 minutes, so I take it out then. It's very soft.
If you use a bread machine for all the steps up to Step 8, it's ultra-easy. Recipe by Pitarou
Steps
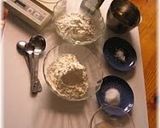
- 1
These are the ingredients.
- 2
Combine the bread and cake flours, yeast, salt and sugar in a bowl. Add lukewarm water. Start by mixing it in with cooking chopsticks or something, then switch to folding the dough with your hands.
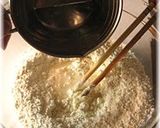
- 3
When the dough is more or less mixed, add the olive oil. Knead to incorporate the flour in the bowl.

- 4
Take the dough out onto a work surface and knead and stretch for about 10 minutes.
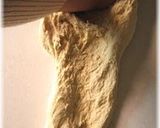
- 5
Ideally you want the dough to form a thin, translucent film when stretched (as they say often in cookbooks), but you don't have to knead it that long really.

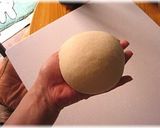
- 6
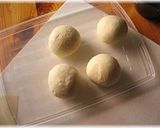
Round the dough off into a ball with a smooth, taut surface.
- 7
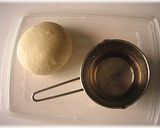
This is how the dough looks before the 1st rising. (Put the dough on the lid of a large storage container, and invert the container over the dough. Leave it to rise.)
- 8
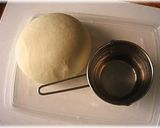
After about an hour. (The measuring cup full of hot water is there to maintain the temperature.)
- 9
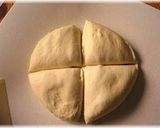
Today I just divided the dough into 4 pieces. Usually I divide it into 5 to 6 pieces, which may be easier to bake.
- 10
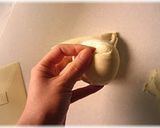
Round off each piece of dough into a ball with a smooth surface.
- 11
This dough doesn't need to be rested much. Once each piece is formed into a smooth ball, go to the next step.
- 12
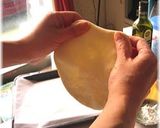
Flour your hands before pressing each dough ball flat. Use the weight of the dough itself to help stretch it out. Make the edges a bit thicker than the middle. This is a better way to stretch the dough than rolling it out with a rolling pin--the dough is puffier this way.
- 13
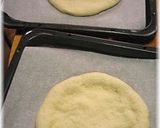
Line a baking tray with parchment paper and put the dough on top. Go on to the 2nd rising. Put the whole baking tray in a plastic bag or something to proof. In the meantime, preheat the oven to 230°C. If you have an electric oven, set it to the highest setting.
- 14
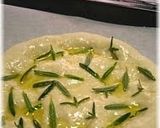
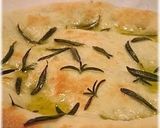
The dough will become puffy in about 30 minutes. Top with olive oil and coarse rock salt and so on. Add rosemary or other herbs to taste.
- 15
It depends on your oven, but basically just bake at 230°C for 3 to 5 minutes until lightly browned, and it's done.
- 16
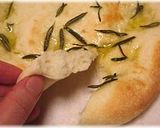
The surface is soft too, not hard. For a cinnamon flavored version, top with butter before baking, and sprinkle with granulated sugar and cinnamon powder.
- 17
Spread on pizza sauce, top with cheese, and you have a simple pizza.

- 18
Here are some plain round buns made with the same dough.

- 19
Variation: Salad pizza! I put an arugula and cured ham salad on top of a baked focaccia, with mayonnaise diluted with yogurt.

- 20
Variation: Light pizza! No tomato sauce, topped with bacon and sliced bell peppers, mozzarella cheese and olive oil.

- 21
Variation: Dessert pizza! Sprinkle cinnamon powder on sliced banana and bake. Add lots of chocolate sauce to finish.

- 22
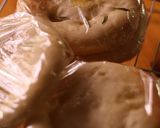
Once the foccacia have cooled, wrap up any that you won't eat right away and store in the refrigerator or freezer. Mist with water and warm in a toaster oven before eating.
Cooksnaps
Did you know that you can import recipes from anywhere into Cookpad with one click?
https://blog.cookpad.com/us/cookpad-recipe-import-feature-save-recipes-from-anywhere/
Download Cookpad app to plan your meals and store your cooking ideas in one safe place! https://cookpad.wasmer.app/us/download
Similar Recipes
More Recipes
-

Chicken Pesto Stuffed Portobello Mushrooms

-


-
")
Aloo Paratha (Stuffed Flatbread)

-


-

Refreshing Summer Onion & Tomato Salad

-


-


-


-


-


-


-


-

Nanohana and Squid with Gochujang

-


-

-


-

-

Bright Yellow Turmeric Udon Noodles
-

Korean Simmered Chicken Wings and Daikon Radish
-

-


")


 Fluffy Egg Drop Soup")

Comments