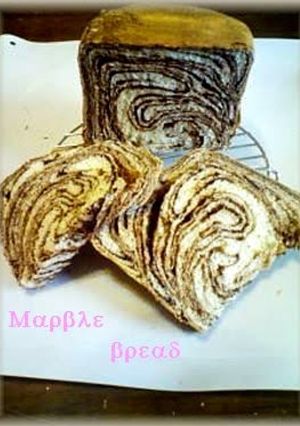
Chocolate Marble Bread Made in a Bread Machine
I made this chocolate marble bread at my children's request.
An important point of Step 8 is to leave space for the dough to rise after you put it back in the bread pan.
The second rising may not be long enough when made in a bread machine so the pattern may come out a bit checkered.
Personally, I think it might be better to let the dough rise for a second time, then bake it in the oven, but it tastes just as good made in a bread machine, and you can still see a nice marbled pattern. Recipe by Nagiry
Steps
- 1
Put all of the dough ingredients in the bread machine. Start the dry yeast course for "melon bread."
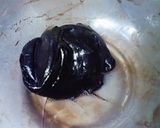
- 2
Make the insert sheet. Add the dry ingredients, which have been sifted together, to the milk and mix well with a whisk. Microwave for 1 minute, then microwave again for another minute.
- 3
When it begins to thicken, switch to a spatula, microwave for 30 seconds at a time and mix until it becomes heavy and sticky. Blend in the butter with the spatula just before it starts to get dry.
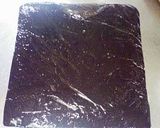
- 4
Adding butter will make it less sticky and hold together well. Put it on a sheet of plastic wrap, place another sheet on top and make it into a 15 cm square. Chill.
- 5
When the timer on the bread machine goes off to signal that the kneading is done, dust a work surface with flour, take out the dough and remove the kneading blade.
- 6
Finish the following steps of putting in the insert sheet within 15 minutes of taking the dough out of the bread machine.
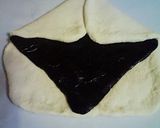
- 7
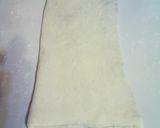
Punch down the dough and roll it out into a 25 cm square. Place the insert sheet on top so that it is in a diamond shape, and fold the 4 corners of the dough to the center of insert sheet. Tightly close the seams.
- 8
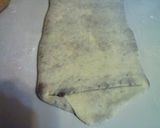
Roll out the dough, fold it in thirds, and repeat. The second time you roll out the dough, make it twice the length of the sides of the bread pan, minus 4 cm.
- 9
See Steps 9-14 offor detailed instructions on how to roll the dough. For a 14 cm bread pan, you should roll the dough to 24 cm (14 × 2 - 4 = 24 cm).
https://cookpad.wasmer.app/us/recipes/145079-buttery-and-fragrant-croissants
- 10
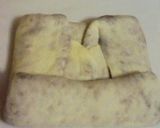
Fold the top and bottom of the dough to the center, turn the dough around 90 degrees, and roll it up.
- 11
Place the dough back in the bread pan seam-side down, and restart the bread machine.

- 12
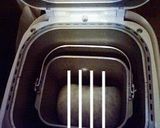
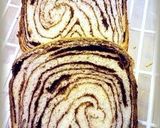
When the bread is done, if you slice it in the direction of the white lines as shown in the photo, the marbled pattern comes out well.
- 13
This photo shows a loaf I made on a different day.
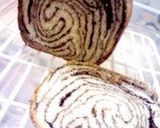
- 14
The pattern on the bread comes out differently each time, even though you think you're making it the same way, so each time you slice it is a surprise.
Linked Recipes
Cooksnaps
Did you know that you can import recipes from anywhere into Cookpad with one click?
https://blog.cookpad.com/us/cookpad-recipe-import-feature-save-recipes-from-anywhere/
Download Cookpad app to plan your meals and store your cooking ideas in one safe place! https://cookpad.wasmer.app/us/download
Keywords
Similar Recipes
More Recipes
-


-

-


-


-


-


-
")
Ghormeh Sabzi (Persian Herb Stew)

-
")
Persian Saffron Rice (for Garnishing Rice Dishes)
-
 – Boiled Method")
Homemade Verjuice (Abghooreh) – Boiled Method
-


-


-

Chicken Curry Soup with Soy Beans and Chicken

-

Apple Cake made with Pancake Mix in a Frying Pan
-

Chicken Breast Meat in Nanban Sauce
-

Sweet Potato Snack With Caramel in the Center
-

Character Bread - Funasshii Anpan
-


")
")
 *")


")

Comments