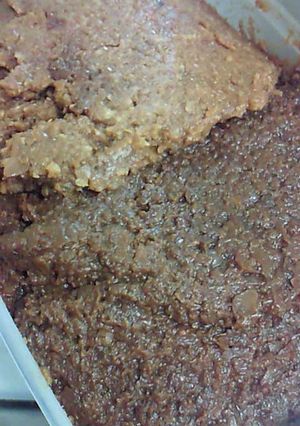
Homemade Miso Made In a Plastic Storage Container (Salty Version)
My husband doesn't like sweet miso, so I make salty miso, too. It's left to mature for about a year, longer than for sweet miso. I use it along with sweet miso.
Seefor my sweet miso recipe.
The amount of salt to add is calculated based on the following: The cooked soybeans weigh 2.5 times the dried soybeans, 450 ml of seed water, and 14% salt content.
Shima maasu is about 92% sodium, so I re-calculate with that in mind.
The ratio of soybeans to dried rice koji is 1000 : 500 to 800 or so. The more koji you add, the better tasting your miso will be. Recipe by Toyoto
Steps
- 1
Soak the soybeans in water overnight. Drain off the water the next day, and cook in fresh water slowly for about 4 to 5 hours. Skim off the scum that comes out of them carefully.
- 2
When the soybeans are soft enough that you can crush one between the thumb and forefinger of your opposite hand (your left hand if you're right-handed, and vice versa), put them in a container that you have sterilized with ethanol and mash them.
- 3
Reserve about 2 handfuls of the salt. Mix the remaining and salt and the rice koji together. (This mixture is called koji cut with salt.)
- 4
Mix the soybeans and the salt-koji together well. Add the cooking liquid from the soy beans until the mixture has a soft doughy texture, about the same as your earlobe feels.
- 5
Form the mixture from Step 4 into balls about the size of baseballs.
- 6
Spray a plastic storage container with ethanol, and sprinkle the bottom with 1/2 of the salt that was reserved in Step 3. Press the balls from Step 5 tightly into the container, leaving no gaps.
- 7
Cover the top with the remaining salt and spray lightly with ethanol. Cover with a piece of plastic wrap, spray with more ethanol and put on another layer of plastic wrap.
- 8
Wipe off any soy beans that are stuck to the sides of the container, spray with more ethanol and put the lid on. Wrap in newspaper and leave in a cool dark place.
- 9
Open it up in about 5 months to check on it. Mix it up from the bottom with a clean paddle.
- 10
Spray lightly with ethanol and cover with 2 sheets of plastic wrap.
- 11
It's ready to eat after about a year.
Cooksnaps
Did you know that you can import recipes from anywhere into Cookpad with one click?
https://blog.cookpad.com/us/cookpad-recipe-import-feature-save-recipes-from-anywhere/
Download Cookpad app to plan your meals and store your cooking ideas in one safe place! https://cookpad.wasmer.app/us/download
Similar Recipes
More Recipes
-


-
")

-


-


-
")
Summer Season Mini Lunch Thali (Aam Ras, Padvali rotli, Val Ni Dal & Fajeto)

-


-

Sausage, Shrimp and Tortellini

-

Morir Sonando Drink/Die Dreaming dominican Drink

-


-


-


-


-

 pattij424
 -
Scarface (chicken mushroom Alfredo)
brase.evan -

15-minute Blueberry Cheesecake

-


-


-


-


")

Comments