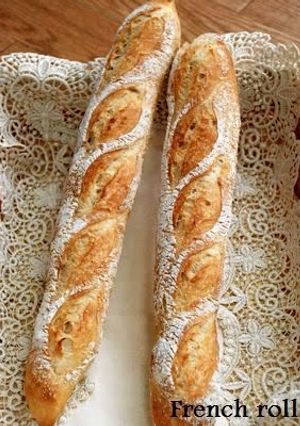
French Bread Made with Ingredients On Hand
When I went to buy some French bread flour, it was sold out. So, since I couldn't do anything about it, I did my best and combined regular bread flour with cake flour!
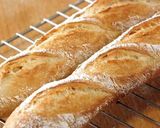
It doesn't look very nice, but it is definitely French bread.
・ All Purpose flour is okay too.
・ It's important to make sure the dough has risen completely in order for the bubbles to form. Also, cutting the slashes and getting the edges to stand up helps release excess moisture and creates a very bubbly finished product.
・ This is just a basic recipe, so feel free to roll in herbs, sesame, cheese, etc. Recipe by itarunrun
French Bread Made with Ingredients On Hand
When I went to buy some French bread flour, it was sold out. So, since I couldn't do anything about it, I did my best and combined regular bread flour with cake flour!
It doesn't look very nice, but it is definitely French bread.
・ All Purpose flour is okay too.
・ It's important to make sure the dough has risen completely in order for the bubbles to form. Also, cutting the slashes and getting the edges to stand up helps release excess moisture and creates a very bubbly finished product.
・ This is just a basic recipe, so feel free to roll in herbs, sesame, cheese, etc. Recipe by itarunrun
Steps
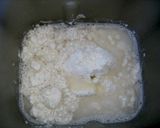
- 1
Place the ingredients marked ◎ into the bread maker case. Put the yeast into the yeast compartment and let it work until the first rising.
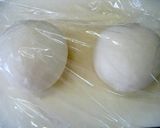
- 2
Remove the dough and use a scraper to divide into 2 halves. Form into smooth balls, cover with plastic wrap and a wrung out damp cloth, and let rest for 20 minutes.
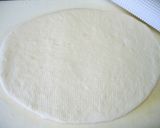
- 3
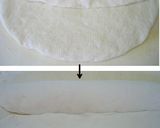
Place the dough from Step 2 onto a flour coated surface. Use the palms of your hands to lightly press down and deflate the dough while spreading it out into an oblong rectangle (25cm x 15cm).
- 4
Fold over the dough from the far edge 1/4 by 1/4 until it reaches the middle, do the same with the closer side until they meet in the center. Use your thumb to close the seam.
- 5
Then fold it in half and close the seam with the heel of your hand.
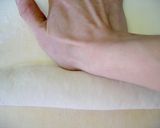
- 6
Gently roll it around so that it looks like a cucumber. Cover with a damp cloth, place in a warm place, and let rise a second time.
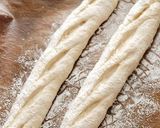
- 7
Use a strainer to dust the dough with bread flour. Use a knife or razor to score the tops of the dough and pour a small amount of oil into the cuts.
- 8
Preheat the oven to 250°C. Lower the temperature to 230°C and bake the bread for 12 minutes. Then lower the oven to 200°C and bake for another 10 minutes. They're done.
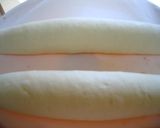
- 9
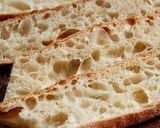
This picture shows the bubbles in the bread when sliced vertically. The goal is to get various sized bubbles throughout the bread.
- 10
If you decrease the amount of yeast, the bubbles will form easier in the matured dough. I recommend 1/8 teaspoon. - 11
Combine the ingredients marked ◎ and the yeast (1/8 ~ 1 teaspoon), put into the bread maker, and remove after 7 minutes of mixing.
- 12
After that, place into a bowl, cover with plastic wrap, and place in a warm place for the first rising, until the dough doubles in size.
Cooksnaps
Did you know that you can import recipes from anywhere into Cookpad with one click?
https://blog.cookpad.com/us/cookpad-recipe-import-feature-save-recipes-from-anywhere/
Download Cookpad app to plan your meals and store your cooking ideas in one safe place! https://cookpad.wasmer.app/us/download
Keywords
Similar Recipes
More Recipes
-

Refreshing Summer Onion & Tomato Salad

-


-


-

-
")
Ayam Pelalah Bongkot (Balinese Shredded Chicken with Torch Ginger)
-

-

Biscuits with Yolk and Brown Sugar 🍪 🍪 🥚

-


-


-


-

-


-


-

Slow Cooked Beef Stew for Adult Tastes

-
")
Authentic Chijimi (Korean Pancakes)
-
")
How To Proof Bread Dough (Rise)
-

-

-

-

-

-

-

")


Comments