Bread (Sourdough) Starter
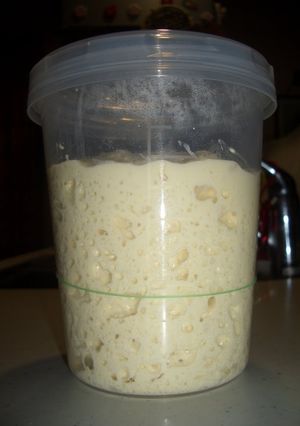
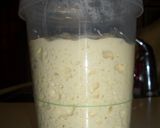
The method for making a sourdough starter sponge is the same, regardless of which starter you use! The sponge puffs up and becomes filled with air bubbles, and it's just fun to watch it grow.
The method is the same whichever starter liquid you use! I used raisin starter this time.
Add the same amount of starter liquid and flour.
You can use water instead of starter liquid from the 2nd day onwards, but if you use starter liquid you'll have a more fragrant, robust starter sponge. Recipe by Hirochan
Bread (Sourdough) Starter
The method for making a sourdough starter sponge is the same, regardless of which starter you use! The sponge puffs up and becomes filled with air bubbles, and it's just fun to watch it grow.
The method is the same whichever starter liquid you use! I used raisin starter this time.
Add the same amount of starter liquid and flour.
You can use water instead of starter liquid from the 2nd day onwards, but if you use starter liquid you'll have a more fragrant, robust starter sponge. Recipe by Hirochan
Cooking Instructions
- 1
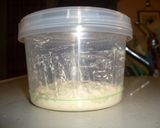
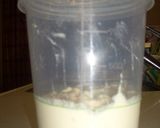
Day 1: Make Sponge 1 by combining the starter liquid and flour. Mix together lightly, and mark the liquid level with a rubber band. The liquid can be a bit floury.
- 2
Leave in a warm place for 8 to 12 hours to ferment.
- 3
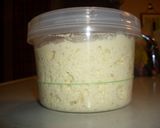
When the sponge has doubled in volume and there are air bubbles in the bottom, it's done. Rest for 12 hours in the refrigerator.
- 4
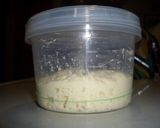
Day 2: Add the entire amount of Sponge 1 that was made in Step 3 with the Sponge 2 starter liquid and flour, mix lightly, and mark the liquid level with a rubber band.
- 5
When the sponge has doubled in volume and there are air bubbles in the bottom, it's done. Rest for 12 hours in the refrigerator.
- 6
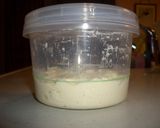
Day 3: Add the entire amount of Sponge 2 that was made in Step 6 with the Sponge 3 starter liquid and flour, mix lightly, and mark the liquid level with a rubber band.
- 7
When the sponge has doubled in volume and there are air bubbles in the bottom, it's done. Rest for 12 hours in the refrigerator.
- 8
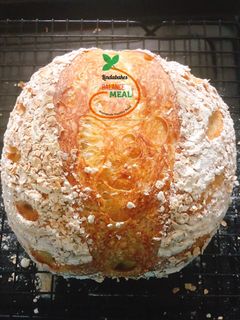
Use the completed starter sponge to make delicious bread or waffles.
- 9
Use up the starter sponge within 2 weeks. If the sponge loses its oomph, use in pizza dough or waffle batter.
Cooksnaps
Did you make this recipe? Share a picture of your creation!

Similar Recipes
-

Senatore Cappelli Semolina Bread with Sourdough Starter Senatore Cappelli Semolina Bread with Sourdough Starter
I love getting my hands into dough... I've always made bread at home, and this is the traditional "perfect" recipe...
 Translated from Cookpad Italy
 -

Sourdough Bread Sourdough Bread
Recipe makes one large loaf of bread. Sourdough starters can be made at home or bakeries sometimes will give some of their starter away. I have a recipe for Sourdough starter if you're interested in making your own from scratch.Adapted from Bon Appétit test kitchen: It's alive with Brad, S2 • E8 GB cooks
 -

Sourdough Bread Sourdough Bread
This is a recipe from King Arthur Flour. It comes with the sourdough starter that can be ordered from them as well as finding it online in their website. It is a very good base recipe for making sourdough breads.Maintaining a proper sourdough starter is definitely a commitment. If you keep starter out at room temperature you will have to feed it every day. If you keep it refrigerated like I do, you will only have to feed it once a week to maintain it however you have to remove from fridge and feed it at least 8 to 12 hours before you want to make bread with it. And with both ways; always feed after use.Making a starter from scratch takes a lot of time before you can use for first time. I suggest getting a few ounces of a established starter from someone who has one already or order it from King Arthur Flour.Sourdoughs have different flavors depending on where you live. The sourdough bread I make in New York will taste different than a sourdough made in San Francisco.
-
Basic Sourdough Bread Basic Sourdough Bread
After making natural yeast, I try to make this one! Love the crust and crumb! So tasty: fluffy and airy! Recipe adapted from Foodbod Sourdough.#mycookbook
-

French Bread with Homemade Bread Starter French Bread with Homemade Bread Starter
I don't like hard bread... but I really love french breads where you can taste the wheat. That's why I decided to make a soft version.Adjust the water content of the bread starter to control the texture of your bread. Recipe by moss green 7
-
Sourdough bread Sourdough bread
Sourdough bread is a newer bread that i learned to make by trial and errors but I'm getting better by the day
-

Black Baguette (Homemade Sourdough Starter Version) Black Baguette (Homemade Sourdough Starter Version)
I love black baguettes. They taste so good made with natural leaven.I also have a yeast version of black baguettes as well. See. Recipe by Panko625 -
-

Pita Bread Using Homemade Bread Starter Pita Bread Using Homemade Bread Starter
I challenged myself to create a recipe for pita bread using my homemade raisin bread starter.Be patient rolling out the dough, letting it rise evenly.If the dough doesn't rise properly, open it up with a knife. Recipe by yukina007 -

Soft Focaccia with Sourdough Starter Soft Focaccia with Sourdough Starter
For everyone like me who wants to use their own sourdough starter whenever possible. This focaccia is delicious and really fluffy. Translated from Cookpad Italy
 -

Sourdough Sandwich Bread Sourdough Sandwich Bread
Very soft sourdough bread with stylish angel shape.Use a hint of dry-yeast enable to cook faster:)
-

Mini Focaccia with Sourdough Starter Mini Focaccia with Sourdough Starter
Crispy and perfectly oily 😅These mini focaccias remind me of the snacks from elementary school, which I used to buy at the bakery near my house...a trip down memory lane, a real emotion with every bite!The sourdough starter can be replaced with 1 teaspoon of fresh yeast.Mini focaccias, olives, and a nice glass of ice-cold beer make for a great appetizer 😉 Translated from Cookpad Italy

More Recipes

Comments