CookpadCookpad
Guest
Register or Log In
Save and create recipes, send cooksnaps and more
  • Search
  • Premium
    • Top Cooksnapped Recipes
    • Top Viewed Recipes
  • Premium
  • Challenges
  • FAQ
  • Send Feedback
  • Region
  • Your Collection
Your Collection
To start creating your recipe library, please register or login.
Milk Bear Loaf
Save this recipe to come back to it later.
  • Add Cooksnap
  • Add to folders
  • Print
  • Share
    • Copied!
    • Email
    • Facebook
    • Pin it
    • Twitter
  • Report Recipe
  • See report
  • Edit recipe
  • Delete
CookpadCookpad
A picture of Milk Bear Loaf.

Milk Bear Loaf

Michiyo
Michiyo @michiyo
UK

I made these bear-shaped bread loaves for my six-year-old neighbour to cheer her up, as she told me she’d been feeling really bored lately due to the lockdown. I created them in the hope that they would bring a smile to her face.

A cute milk bear loaf made with an angel-soft milk dough—wonderfully light and fluffy!

I made these bear-shaped bread loaves for my six-year-old neighbour to cheer her up, as she told me she’d been feeling really bored lately due to the lockdown. I created them in the hope that they would bring a smile to her face.

A cute milk bear loaf made with an angel-soft milk dough—wonderfully light and fluffy!

Read more

Milk Bear Loaf

Michiyo
Michiyo @michiyo
UK

I made these bear-shaped bread loaves for my six-year-old neighbour to cheer her up, as she told me she’d been feeling really bored lately due to the lockdown. I created them in the hope that they would bring a smile to her face.

A cute milk bear loaf made with an angel-soft milk dough—wonderfully light and fluffy!

I made these bear-shaped bread loaves for my six-year-old neighbour to cheer her up, as she told me she’d been feeling really bored lately due to the lockdown. I created them in the hope that they would bring a smile to her face.

A cute milk bear loaf made with an angel-soft milk dough—wonderfully light and fluffy!

Read more
Saved
Save this recipe to come back to it later.
Edit recipe
See report
Add to folders
Add CooksnapAdd Cooksnap
ShareShare
  • Copied!
  • Email
  • Facebook
  • Pin it
  • Twitter
PrintPrint
  • PrintPrint
  • Add CooksnapAdd Cooksnap
  • Report Recipe
  • See report
  • Delete
Share
  • Copied!
  • Email
  • Facebook
  • Pin it
  • Twitter
Save this recipe to come back to it later.
  • Add Cooksnap
  • Add to folders
  • Print
  • Report Recipe
  • See report
  • Edit recipe
  • Delete

Ingredients

3 hours
6 bearbread
  • 92 gwhole milk
  • 1.5 gdry yeast
  • 125 gstrong flour or wholemeal flour (If you use strong flour, it become beautiful white bread.)
  • 15 gsugar or 1 tablespoon
  • 1.5 gsalt
  • 10 gunsalted butter, room temperature (If you use salted butter, reduce the salt amount.)
  • For decorations:
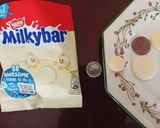
  • 6Millkybar small buttons. I think that 30g ones are good size for this
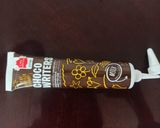
  • Choco Writer – Milk
  • https://mycakedecor.co.uk/shop/choco-writer-milk/
Cookpad Open in Cookpad App
Saved
Save this recipe to come back to it later.

Steps

3 hours
  1. 1

    The video of this recipe is at: https://youtu.be/sgdRLsDiVVU

  2. 2

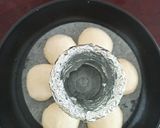
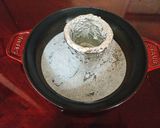
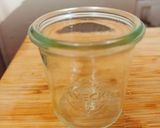
    Prepare the tin by greasing it and lining the base with baking parchment. I use a 20cm tin, and I’ve also fashioned a tube using foil and a small ovenproof glass — just make sure to grease the foil as well.
    A picture of step 2 of Milk Bear Loaf.
    A picture of step 2 of Milk Bear Loaf.
  3. 3

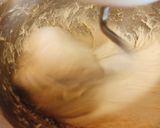
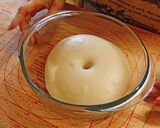
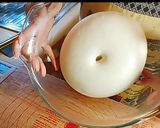
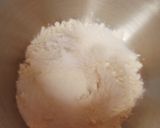
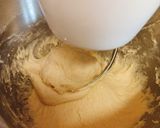
    Prepare the milk loaf up to Step 7, the end of the first proving. https://cookpad.wasmer.app/uk/recipes/11955346-japanese-angel-soft-milk-loaf
    A picture of step 3 of Milk Bear Loaf.
    A picture of step 3 of Milk Bear Loaf.
    A picture of step 3 of Milk Bear Loaf.
  4. 4

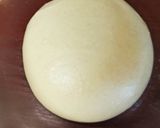
    Once the dough has finished proving, gently knock it back and reshape it into a smooth ball.
    A picture of step 4 of Milk Bear Loaf.
    A picture of step 4 of Milk Bear Loaf.
    A picture of step 4 of Milk Bear Loaf.
  5. 5

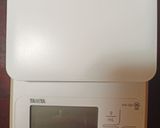
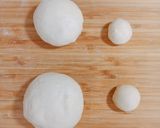
    Divide the dough into four equal portions using a scale. I recommend using one that measures to 0.1g for accuracy — I use a precise one I bought in Japan.
    ① 84g for the heads (Feel free to adjust the size of the heads to create different expressions. In this version, the head is approximately 66% the size of the body.)
    ②15g for the back paws
    ③ 15g for the ears and front paws
    ④ The remaining dough for the bodies
    A picture of step 5 of Milk Bear Loaf.
    A picture of step 5 of Milk Bear Loaf.
  6. 6

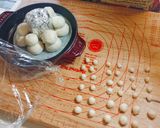
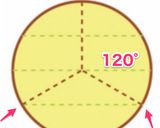
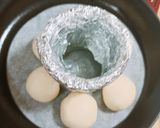
    【Bodies, 6 balls】Divide ④ into 6 balls. I would cut it half first and round them. Then, divide them into 3. When I cut dough into 3, I usually make a ball and divide into 3 with 120° with the help of the imaginary line of the green line in the first picture. Make balls. Place in the tin. Cover with a damp cloth in order not to dry out when you are doing these steps. (about 21g each)
    A picture of step 6 of Milk Bear Loaf.
    A picture of step 6 of Milk Bear Loaf.
    A picture of step 6 of Milk Bear Loaf.
  7. 7

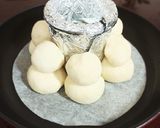
    【Heads, 6 balls】Divide portion ① into six equal pieces. Start by dividing the 84g of dough in half (42g each), then divide each half into three (approximately 14g each).

    Place the heads on top of the bodies and cover with a damp cloth or cling film to prevent them from drying out.
    A picture of step 7 of Milk Bear Loaf.
  8. 8

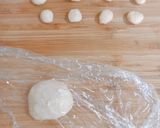
    【Back paws, 12 balls】Divide the 15g of dough (portion ②) into four equal pieces (about 3.75g each). Shape them into balls, then divide each ball into three (approximately 1.2g each).

    Leave them on the board and cover them. I used cling film.
    A picture of step 8 of Milk Bear Loaf.
  9. 9

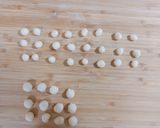
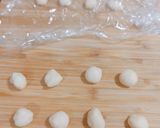
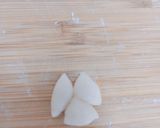
    【Ears and front paws, 24 balls】Repeat the same process as in Step 7 to make 12 balls.

    First, divide portion ③ (15g of dough) into four equal pieces (about 3.75g each). Shape them into balls, then divide each ball into three (approximately 1.2g each). Finally, divide each piece in half (about 0.6g each).
    A picture of step 9 of Milk Bear Loaf.
    A picture of step 9 of Milk Bear Loaf.
    A picture of step 9 of Milk Bear Loaf.
  10. 10

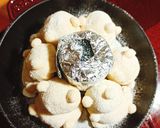
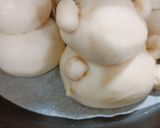
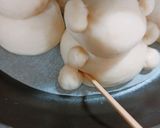
    Assemble small parts (ears and paws). Use scissors to cut the dough, and then tuck it with a skewer to ensure it stays in place. You can gently press the faces to help shape them better.
    A picture of step 10 of Milk Bear Loaf.
    A picture of step 10 of Milk Bear Loaf.
    A picture of step 10 of Milk Bear Loaf.
  11. 11

    Start to preheat the oven at 180℃.

  12. 12

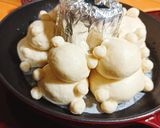
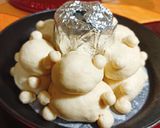
    Leave the dough in a warm place until it has risen to 2-2.5 times its original size. The rising time will depend on how quickly or slowly you divide and assemble the dough, so you may not need to wait too long.
    A picture of step 12 of Milk Bear Loaf.
    A picture of step 12 of Milk Bear Loaf.
  13. 13

    Dust them with flour.

    A picture of step 13 of Milk Bear Loaf.
  14. 14

    Put the bread in the oven and turn down the temperature as 160℃.
    Then, bake at 160℃ for 18-20 mins.

  15. 15

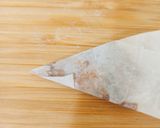
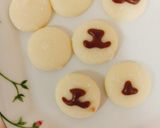
    While baking the bread, prepare the decorations with white chocolate buttons. I used Milkybar buttons for the faces and Choco Writer Milk in parchment to draw, as it’s easier to create small details with it. Follow the instructions on the Choco Writer Milk packaging for how to melt it. I also used the small 30g bag of Milkybar buttons, as they are the perfect size—about the same size as a 5p coin.
    A picture of step 15 of Milk Bear Loaf.
    A picture of step 15 of Milk Bear Loaf.
    A picture of step 15 of Milk Bear Loaf.
  16. 16

    After about 18 minutes, remove the bread from the oven and leave it to cool on a cooling rack.

  17. 17

    Once the bread has cooled, use Choco Writer Milk to draw the eyes and paws, as it’s perfect for adding small details. If the bread is still warm, the chocolate will melt, so make sure to wait until it has completely cooled.
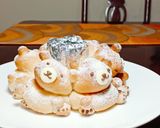
    A picture of step 17 of Milk Bear Loaf.
    A picture of step 17 of Milk Bear Loaf.
    A picture of step 17 of Milk Bear Loaf.
  18. 18

    Even if they lean or end up in a funny position, they’ll still look cute, so you really can’t go wrong. You could also make them with wholemeal flour, and they’d still look adorable! 💕
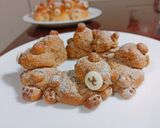
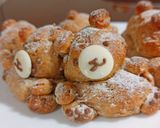
    A picture of step 18 of Milk Bear Loaf.
    A picture of step 18 of Milk Bear Loaf.
    A picture of step 18 of Milk Bear Loaf.
  19. 19

    Store the loaf in a plastic bag to retain moisture, keeping it soft and fresh.

Saved
Save this recipe to come back to it later.
Edit recipe
See report
Add to folders
Add CooksnapAdd Cooksnap
ShareShare
  • Copied!
  • Email
  • Facebook
  • Pin it
  • Twitter
PrintPrint
  • PrintPrint
  • Add CooksnapAdd Cooksnap
  • Report Recipe
  • See report
  • Delete

Cooksnaps

Saved
Save this recipe to come back to it later.
  • Add Cooksnap
  • Add to folders
  • Print
  • Share
    • Copied!
    • Email
    • Facebook
    • Pin it
    • Twitter
  • Report Recipe
  • See report
  • Edit recipe
  • Delete

Copied!

Michiyo
Michiyo @michiyo
on May 01, 2020 13:41
UK
I am Japanese who lives in the UK and loves cooking and baking cakes and bread. Most of my recipes are for one to two people as I live alone. https://linktr.ee/England_
Read more

Comments

Kanaaneko
Kanaaneko @kanaaneko
September 17, 2022 21:46
This is too cute to eat!!❤️😍🐻
Guest
Add a comment
0/0

Similar Recipes

More Recipes

  1. A picture of Chicken Biryani.

    Chicken Biryani

    Shaik Hajira Shaik Hajira
  2. A picture of Garlic beef fried rice.

    Garlic beef fried rice

    Alex Alex
  3. A picture of Loaded Rainbow Rice Bake!.

    Loaded Rainbow Rice Bake!

    Vada Heroux Vada Heroux
  4. A picture of Sushi at home.

    Sushi at home

    Elanor Elanor
  5. A picture of Slow Cooker Goat Curry (myheartbeets.com).

    Slow Cooker Goat Curry (myheartbeets.com)

    Cluelesskitty Cluelesskitty
  6. A picture of Cowboy Soup.

    Cowboy Soup

    cindybear cindybear
  7. A picture of Deluxe Cheeseburger Soup.

    Deluxe Cheeseburger Soup

    Maggie Conlon Maggie Conlon
  8. A picture of Coconutty Peanut Sweet Sip/ Coconut Banana Smoothie (For Vrat And Upwas).

    Coconutty Peanut Sweet Sip/ Coconut Banana Smoothie (For Vrat And Upwas)

    Navnita Jaiswal Navnita Jaiswal
  9. A picture of Peanut masala raita.

    Peanut masala raita

    Shivani gori Shivani gori
  10. A picture of Fruit salad!.

    Fruit salad!

    Annike !:) Annike !:)
  11. A picture of Chicken teriyaki.

    Chicken teriyaki

    Eric • Eric •
  12. A picture of Ooey gooey cheesy crab bake 🦀.

    Ooey gooey cheesy crab bake 🦀

    Chef Nena Chef Nena
  13. A picture of Sweet and Spicy Chicken Breast.

    Sweet and Spicy Chicken Breast

    Meme Meme
  14. A picture of Bacon Mac and Cheese.

    Bacon Mac and Cheese

    Air Fry with Me Air Fry with Me
  15. A picture of Easy chocolate chip cookies with only 5 ingredients.

    Easy chocolate chip cookies with only 5 ingredients

    lynnbadaoui lynnbadaoui
  16. A picture of Steak, one of the tastiest you'll have #mycookbook.

    Steak, one of the tastiest you'll have #mycookbook

    Sonia Duthie Sonia Duthie
  17. A picture of Rose falooda.

    Rose falooda

    Vidhi agarwal Vidhi agarwal
  18. A picture of Homemade pasta sauce.

    Homemade pasta sauce

    Lilian Bird Lilian Bird
  19. A picture of Chana chilli.

    Chana chilli

    Vidhi agarwal Vidhi agarwal
  20. A picture of Chestnut Mushroom, Garlic & Porcini Sauce #mycookbook.

    Chestnut Mushroom, Garlic & Porcini Sauce #mycookbook

    Sonia Duthie Sonia Duthie
  21. A picture of Spanish torrija cake.

    Spanish torrija cake

    Sara Ekmen Sara Ekmen
  22. A picture of Veg kolhapuri in red gravy.

    Veg kolhapuri in red gravy

    Vidhi agarwal Vidhi agarwal
  23. A picture of Carrot - Coriander Idli With Sambar.

    Carrot - Coriander Idli With Sambar

    Ayur Home Cooking Lab (AHCL) Ayur Home Cooking Lab (AHCL)
  24. A picture of Simply the BEST Vegan Chocolate Brownies (in my opinion!).

    Simply the BEST Vegan Chocolate Brownies (in my opinion!)

    Sonia Duthie Sonia Duthie
  25. A picture of Bacon Mac and Cheese.

    Bacon Mac and Cheese

    Air Fry with Me Air Fry with Me
https://cookpad.wasmer.app/us/recipes/12351787
Cookpad Open in Cookpad App

About Us

Our mission at Cookpad is to make everyday cooking fun, because we believe that cooking is key to a happier and healthier life for people, communities and the planet. We empower home cooks all over the world to help each other by sharing their recipes and cooking experiences.

Subscribe to Premium for exclusive features & benefits!

Cookpad Communities

🇺🇸 United States 🇬🇧 United Kingdom 🇪🇸 España 🇦🇷 Argentina 🇺🇾 Uruguay 🇲🇽 México 🇨🇱 Chile 🇻🇳 Việt Nam 🇹🇭 ไทย 🇮🇩 Indonesia 🇫🇷 France 🇸🇦 السعودية 🇹🇼 臺灣 🇮🇹 Italia 🇮🇷 ایران 🇮🇳 India 🇭🇺 Magyarország 🇳🇬 Nigeria 🇬🇷 Ελλάδα 🇲🇾 Malaysia 🇵🇹 Portugal 🇺🇦 Україна 🇯🇵 日本 See All

Learn More

Cookpad Premium Careers Feedback Blog Terms of Service Community Guidelines Privacy Policy Frequently Asked Questions

Download our app

Open Cookpad App on Google Play Open Cookpad App on App Store
Copyright © Cookpad Inc. All Rights Reserved
close