Authentic home cooking from Spain, with US measurements.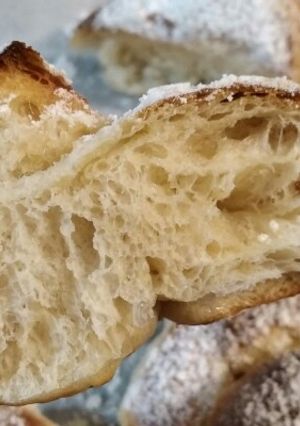
Homemade Ensaimadas

One thing I love is taking on challenges... and these ensaimadas were definitely a challenge. The first batch was a flop, but the second was a total success. If you love ensaimadas, having them freshly baked on a Sunday—maybe for an upcoming holiday weekend—with some good hot chocolate... oh, I'm already drooling! I hope you enjoy them, and if you have any questions, I'll be here to help. Keep in mind that you need to let the shaped ensaimadas rise overnight, so you'll need about a day and a bit to make them.
Homemade Ensaimadas
One thing I love is taking on challenges... and these ensaimadas were definitely a challenge. The first batch was a flop, but the second was a total success. If you love ensaimadas, having them freshly baked on a Sunday—maybe for an upcoming holiday weekend—with some good hot chocolate... oh, I'm already drooling! I hope you enjoy them, and if you have any questions, I'll be here to help. Keep in mind that you need to let the shaped ensaimadas rise overnight, so you'll need about a day and a bit to make them.
 Open in Cookpad App
Steps
- 1
STARTER: Mix the ingredients together, knead lightly, and place the dough in a bowl covered with plastic wrap. Let it rise in a draft-free place until doubled in size, about 3.5 hours.
- 2
Once the starter is ready, mix in the remaining ingredients and knead by hand or with a stand mixer. After all the ingredients are combined, knead several times. Knead for a couple of minutes, then let the dough rest for 10 minutes between kneading sessions to help develop the gluten.
- 3
At the end of kneading, the dough will still be a bit sticky, but do not add more flour. I kneaded for over an hour using a stand mixer. Grease a bowl, cover, and let the dough rise until doubled in size, about 1.5 to 2 hours.
- 4
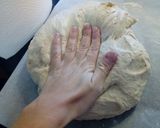
Punch down the dough to release air, then divide it into equal portions. Lightly oil each portion, cover, and let rest for about 15 minutes.
- 5
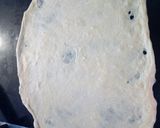
Now it's time to shape the ensaimadas using butter or lard. Take each portion and stretch it by hand into a thin, elastic rectangle—almost see-through. The dough should not tear; you can use a rolling pin at first, but use your hands to stretch it thin.
- 6
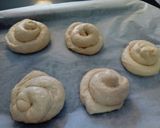
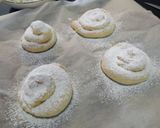
Spread with butter or lard, then roll up tightly from the top toward you to form a log. Stretch the ends a bit more and coil the log into a spiral. This takes some practice! Place each spiral directly onto a baking sheet lined with parchment paper. Leave space between them, as they will rise a lot.
- 7
Once all are shaped, cover them. I put the whole baking sheet inside a large bag. Mist them with water using a spray bottle and let them rise overnight.
- 8
The next morning, preheat the oven to 430°F (220°C). Dust with powdered sugar before and after baking.
- 9
Bake for about 9 minutes or until golden brown. Hope you enjoy them!


Cooksnaps

Keywords
Similar Recipes
More Recipes
-

 Kendall Sampson
 -
 Kendall Sampson
 -
 Kendall Sampson
 -

Apple Cake with Cinnamon & Ginger ~ Tao / Vegetarian

-
Delicious tasty coconut milk powder Barfi

-
Easy Weeknight Reverse Sear Porterhouse

-

-

-

-


-


-
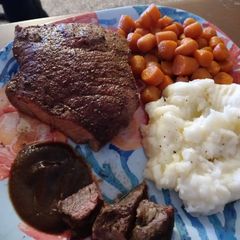
Seasoned Swiss Steak w/ Glazed Carrots and Ranch Mashed Potatoes

-


-
 Mofya Munshilingwa
 -
-
-

【Chawan-Mushi】Non-sweet steamed egg custard

-


-

-

A chocolate dessert in Grenada😜😝

-
-
-


- Michael Dovahkiin