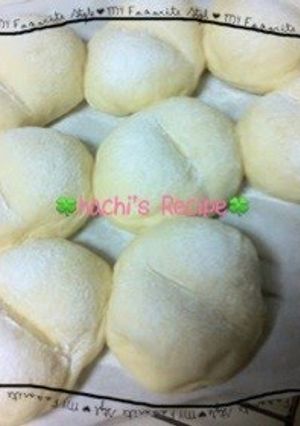
Fluffy and Springy White Bread Made Easily in a Bowl
I could finally make my favorite white bread.
Using a recipe that calls for the use of a bread machine is also easy, but I made a recipe that calls for my hands to do the kneading.
You will be kneading in a bowl, so it is very easy to clean up afterwards.
The point is to Knead and to Pound.
Knead well, pound the dough well, and shape the dough gently when your are shaping it.
If you make 9 pieces, the bread might not raise depending on the oven you have, so adjust how many pieces to put in the oven and try to make a fluffy bread. Recipe by kittygetty
Steps
- 1
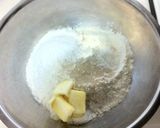
Put all ( A ) ingredients in a big bowl in the order on the ingredients list and add milk. Mix quickly to avoid clumps and mix while mashing the butter.
- 2
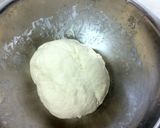
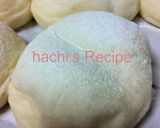
When the dough is almost in one piece, repeat kneading then pounding inside the bowl until the dough becomes smooth.
- 3
When the dough becomes smooth, transfer the dough into a smaller bowl. Cover the bowl loosely with a plastic wrap and let the dough sit for proofing ! If you are using the oven system for proofing, let it sit for 30 minutes.
- 4
After letting the dough sit, coat a finger with strong bread flour and stick your finger into the dough. If the dough maintains the shape of your finger, then the dough is ready to move to the next step.
- 5
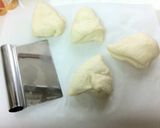
Press the dough 3 to 4 times to deflate and divide the dough into 9 pieces using a scraper. Pull the cut edges and tuck it into the middle 3 to 4 times to smooth out the surface.
- 6
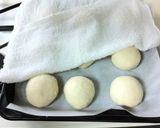
Line the pieces with the tucked in part facing down. Cover the dough with a moistened and firmly wrung out kitchen towel and let it sit for 15 minutes.
- 7
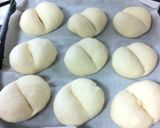
Turn the pieces upside down. Tuck the outside parts of the dough into the middle part once again and shape the dough round. Smooth out the surface Place the dough with the tucked in part facing down and shape it into barrel shapes.
- 8
Make a dent in the middle using a rolling pin. Don't forget to shape the dough after making a dent.
- 9
When Step 8 is ready, line the pieces on a baking sheet lined with kitchen parchment paper. Cover with a firmly wrung out kitchen towel and let it sit again for the 2nd proofing ! Let it sit for 20 minutes if you are using the proofing system on the oven.
- 10
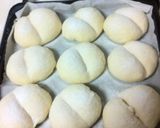
After the 2nd proofing, sprinkle rice flour on the surface of the dough using a tea strainer!
- 11
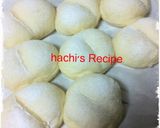
Preheat the oven to 180℃ and bake for 7 to 8 minutes. Open the oven once and place an aluminum foil on the pieces so that they will not get burned. Then bake for another 8 to 10 minutes.
- 12
How long to bake depends on the oven you have, so make this bread few times and find the best time to bake.
Cooksnaps
Did you know that you can import recipes from anywhere into Cookpad with one click?
https://blog.cookpad.com/us/cookpad-recipe-import-feature-save-recipes-from-anywhere/
Download Cookpad app to plan your meals and store your cooking ideas in one safe place! https://cookpad.wasmer.app/us/download
Keywords
Similar Recipes
More Recipes
-


-


-


-

-

Banana Chocolate Chip Mini Loaves
-


-


-


-


-

-


-


-

Foolproof Smooth and Flawless Boiled Eggs

-

Chocolate Cream & Cocoa Swiss Rolls
-

Brown Sugar Cafe Au Lait Rolls
-

Indian Home-style Curry with Potatoes and Chickpeas
-

Chewy Rice Flour Olive Focaccia
-

-

-

-

Chewy-Thick and Genuine Warabi Mochi


Comments