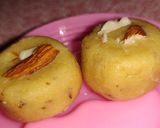
Kesar Milk Peda
Festival or no festival, Indians love sweets! And, with the festival season just around the corner, the search for easy but tasty sweets like Kesar Milk Peda only becomes more intense.
Well, here is one recipe that is sure to make it to your book of favourites. The traditional, hygienic mithai - Kesar peda made with homemade chenna you can use readymade chenna to.
Kesar peda is quicker than most other pedas but retains its authenticity and traditional charm. It will last for a month if stored in the refrigerator in an airtight container.
#special #mithai #sweet #festive #mouthwatering #kesarpeda #cookpad
Steps
- 1
Method for preparing chenna
- 2
Take 1 litre of whole milk in a pan and keep it to boil on a low to medium flame.I have used organic cow milk
- 3
When the milk comes to a boil, then reduce the flame to its lowest. Add 1 to 3 tbsp lemon juice. First add 1 tbsp lemon juice and stir very well. If the milk has not curdled completely, then add 1 tbsp more. Keep the lemon juice handy with you. Depending on the quality of milk, you may need to add 1 to 3 tbsp of lemon juice. Stir after adding the lemon juice.
- 4
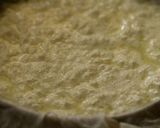
As soon as the milk curdles, switch off the flame. The milk should curdle completely with the green watery whey.
- 5
Now pour the curdled milk in the cheese cloth/muslin lined strainer or bowl.
- 6
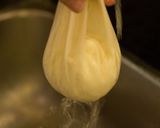
Gather the muslin from the sides and rinse the chenna or coagulated milk solids very well in running water. This brings down the temperature of chenna as well as removes the lemony flavor and tangy taste from the chenna.
- 7
Now squeeze the muslin with your hands very well, so that excess water is drained from the chenna. Remember there should not be excess water or moisture in the chenna otherwise your peda will get cracks
- 8
Place a heavy weight on the chenna for 7 to 8 minutes. You can also hang the chenna for about 30 minutes.
After 7 to 8 minutes, remove the cheesecloth from the chenna. Note that the chenna should not have too much moisture nor be too dry. - 9
While kneading Cheena If you see that it is moist or watery, then this means that there is more water then remove water by using step8 method.
If it looks too crumble or dry add 2 tbsp water/milk and knead. - 10
With the heels of your palms mash the chenna and knead. Keep on collecting the chenna from the sides and continue to mash and knead. This kneading process is very important and also decides the texture of chenna.
- 11
Knead to a smooth dough now add powder sugar as per the sweetness you required and knead it again into a smooth dough
- 12
Now let's start with cooking process
- 13
Take a nonstick pan/pan heat 1½ tbsp ghee now add 100 gm milk powder and roast until it's colour changes
- 14
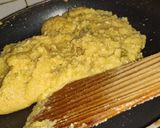
Add Cheena in pan and mix well make sure that there should be no crumble
mash the chenna with spatula and Keep on collecting the chenna from the sides and continue to mash so there will be no crumbles - 15
Now add 50 grams grated khoya and mix property and keep on stiring make sure that mixture may not stick at the bottom of pan
- 16
Add the cardamom powder, 2tbsp kesar milk and roasted dry fruits powder (dryfruits of your choice) and mix well for the flavour
- 17
Mix the mixture until it becomes dry and leaves its side
Take little mixture in your hand and make a ball if you see the ball is perfect without any cracks then switch off the flame.
If the mixture is wet so cook it for more some time
If the mixture has become too dry then add 1 Tbsp milk and cook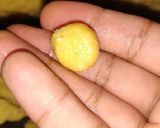
- 18
Transfer this mixture to a clean and dry plate. Spread it with the help of a flat spatula and keep aside to cool for about 30 minutes or it is cool enough to touch.
- 19
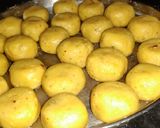
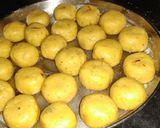
Divide the peda mixture in equal into equal portions
- 20
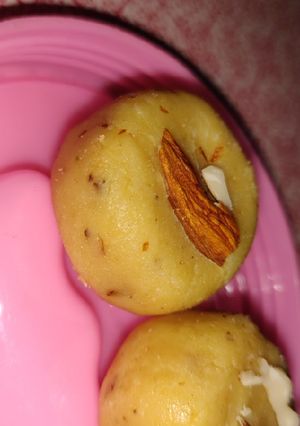
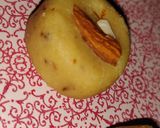
Shape each portion of peda like ball and slightly press in between your palm into a flat round disk
- 21
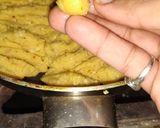
You can garnish your Kesar milk peda with dryfruits.
- 22
Serve kesar milk peda immediately or store in a refrigerator till use. The shelf life of pedas is about 30 days if kept refrigerated.

Similar Recipes
More Recipes
-


-

Green Chillies Egg Butter Masala

-

Green Chillies Pickle - Instant and Delicious

-


-


-

Tangy Besan-Stuffed Green Chilli Pakoras

-
")
Curry Leaves Flavoured Sev Mamra (Karuvepille Pori)

-


-
")
CURRY BUNS (Japanese Deep-fried Curry Buns, Kare-Pan)

-
")
PARISIAN MACARONS (chocolate macarons)
-

-
")
Strawberry Jam Butter Cookies (Spritz Cookies)
-

Christmas ☆ Strawberry and White Chocolate Mousse Cake
-


-


-

*ALCOHOL FREE* Delicious fruit sorbet

-

 Komal Negi
 -


-

-
 Nandani Singh
 -
 Mansi Singh
 -

Moong DaaL Without drop of Oil

-


Comments