Basic Plain Chiffon Cake
I was impressed by the chiffon cake recipe that my friend taught me many years ago. From that recipe, I aimed for using up all the egg and and this is the recipe I made after many changes. The ingredients and the procedure gradually get easier! It's a simple chiffon. I used the advice from other users and revised it so that anybody can make this without fail!
This is the standard procedure. It's good to measure the vegetable oil and water together. Add it little by little and mix ve~~ry well.
Adding 1/3 of sugar to the egg yolk and the remaining 2/3 of sugar to the egg whites makes it easier to make.
It's soft, but you'll still be able to decorate it. You can increase the oil and water content up to 80 g. Refer to Step 30. For 1 17 cm [6.7 in] chiffon cake mold, [1 10cm mold]. Recipe by Blue poppy
Steps
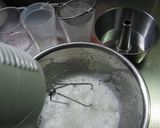
- 1
Separate the egg whites from the yolk. Sift the flour once. Preheat the oven. Gas:180°C, Electric: 200°C
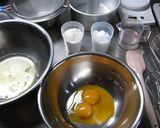
- 2
While beating the egg yolk, add in 20 g of sugar. Mix well with a whisk (it doesn't have to form peaks).
- 3
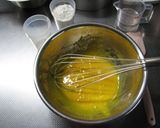
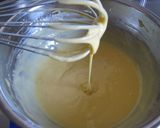
Add the water + oil and mix well (measure them together).
- 4
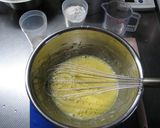
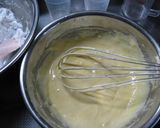
Add the flour all at once while sifting a second time. Using a whisk, stir in a circular motion from the center, mixing everything together (it should be the same consistency as pancake mix).
- 5
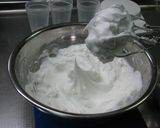
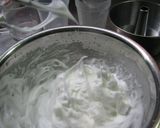
Add 40 g of sugar, separated into 3 batches, to the egg whites and form stiff peaks, making a meringue. Refer to Steps 19 and 29.
- 6
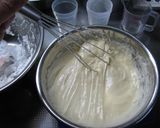
Add 1/3 of the meringue from Step 5 into the mixture from Step 4 and mix in neatly.
- 7
Next, add 1/3 of the meringue and from the top of the batter, gradually fold in towards the bottom to mix it in (it's okay if there is some batter that didn't get mixed in on the bottom).
- 8
Lastly, add the rest of the meringue and mix while breaking down the stiffness of the egg whites (lightly from the top of the batter).
- 9
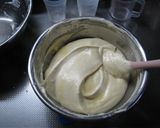
Switch to a spatula. Stir the bottom of the bowl (about 10-15 times).
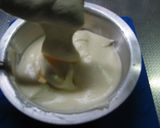
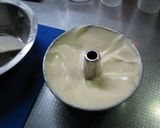
- 10
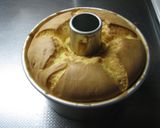
Pour into the ungreased cake mold, hold the cylinder, and tap on the counter to release the air bubbles. It's okay to rub off the batter on the sides of the bowl with the spatula. The picture shows the middle of this step.
- 11
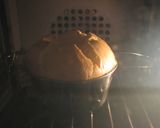
Bake for 10 minutes at 180°C, then lower the heat to 160°C and bake for another 20 minutes. After the first 10 minutes of baking, cut 5 notches in the surface so that it will expand nicely.
- 12
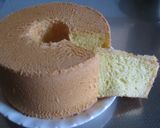
It's done baking! (Use 1 medium egg and 2 large eggs.) If you use 3 large eggs, it has the tendency to expand too much.
- 13
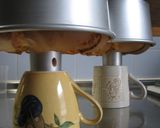
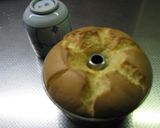
After it has baked, flip it upside down and place on an upside down mug to cool.
- 14
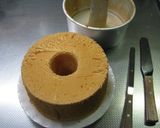
With a knife or skewer, slowly and gently remove from the mold.
- 15
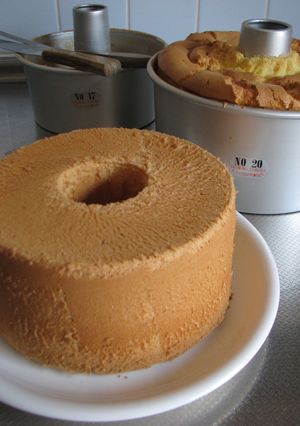
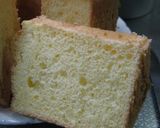
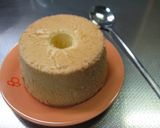
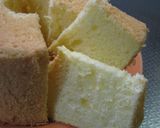
When cut, it will look like this. It's quite moist and fluffy!
- 16
This is the most important point! Make sure the meringue bowl is completely dry with no oil or water. There cannot be even a little bit of egg yolk mixed in! Please be careful about these two things!
- 17
For a 10 cm mold, just use 1 large egg. It's okay to use just one beater on the mixer. If you use both beaters, the mixture will jump out and splatter and the foam will be uneven.
- 18
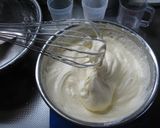
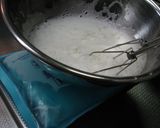
The state of the meringue. It should form stiff whipped peaks.
- 19
This is how it looks after the meringue has finished mixing. If the peaks decrease after adding the egg yolk to the meringue, then the meringue hasn't been whipped enough. If it becomes hard and crumbly, then it was whipped too much.
- 20
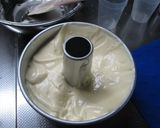
This is when it has been poured into the cake mold and the edges of the bowl have been rubbed with the spatula. This is a 100 yen ($1) cake mold.
- 21
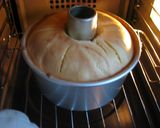
This is when the cake has been baking at 180°C for 12 minutes. It's expanding with all its might. After this, bake itat 160°C for 10 minutes. You don't have to cut notches into the cake.
- 22
It's baked! Place it upside down on a tea cup to cool.
- 23
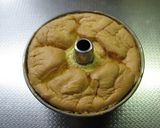
After cooling, it fits the mold just right. (Maybe it shrank too much?)
- 24
This time, I tried removing it from the mold with a spoon. Use the spoon handle to push firmly to remove. I used a knife for removing the top.
- 25
I made one with a little more oil, about 16 ml. So fluffy!
- 26
It's useful to use cotton gloves while dealing with the small mold! Always use 100% cotton gloves! Even 100 yen shop ones are good. Buy 2 pairs and layer them. Wear them in place of mittens.

- 27
Mixing in cocoa and matcha makes the cake's expansion worse. If you increase the egg whites by 50%, it will be the same height. Refer to the cocoa, matcha recipe.
- 28
For making meringue in the summer: It's a good idea to place an ice pack underneath the bowl while whipping. Use 10 g of sugar in the egg yolk and 50 g of meringue.
- 29
If you increase the oil to 50 ml, I don't think increasing the flour by 5 g would cause any problems.
- 30
When making it in an electric oven, there's two options. For the first, preheat to 200°C and bake for 30-40 minutes at 175°C. You don't need to cut notches. When it begins to darken, cover with aluminum foil.
- 31
The other option is to preheat to 200°C, bake for 10 minutes at 200°C, cut notches, cover with aluminum foil, and bake at 180°C for 20 minutes.
- 32
If using a paper cake mold, bake it for the longer amount of time because it's difficult for the heat to circulate. If it looks like it will burn, cover with aluminum foil. Check if it's done by sticking in a skewer.
Cooksnaps
Did you know that you can import recipes from anywhere into Cookpad with one click?
https://blog.cookpad.com/us/cookpad-recipe-import-feature-save-recipes-from-anywhere/
Download Cookpad app to plan your meals and store your cooking ideas in one safe place! https://cookpad.wasmer.app/us/download
Top Search in
Keywords
Similar Recipes
More Recipes
-


-


-


-

-

Zucchini and Tomato Stuffed Chicken Fillet

-


-

loaded baked potato an buffalo chicken casserole

-

Vickys Christmas Cranberry & Pistachio Cookies, GF DF EF SF

-


-


-
")

-
-

Airy and Rich Two-Layer Cheesecake

-

-

Rich Yet with a Refreshing Aftertaste! Cheesecake
-

Sautéed and Simmered Cauliflower
-

Slightly Bitter Chocolate & Coffee Cookies

")


")


Comments