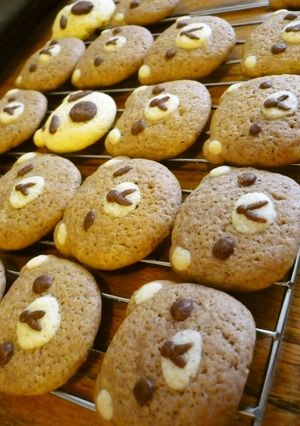
Cute Teddy Bear Cookies (Gluten-Free)
User Mikkorin523's "Cute Rilakkuma-Style Chocolate Sandwich Cookies"was so cute, so I changed some ingredients to make them gluten-free for my relative's birthday present who has a gluten allergy.
Mikkorin523, thank you for inspiring me with your recipe!
Using powdered sugar makes cookies crispy, and using caster sugar makes them slightly more coarse-textured.
If you use wheat flour instead of rice flour, try:
Plain flour 150 g + Almond flour 50 g + Powdered sugar 90 g
or
Plain flour 200 g + Powdered sugar 100 g. Recipe by Shirayukihimesan
Steps
- 1
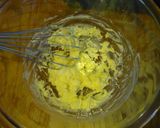
Bring the butter to room temperature. Sift the ☆ dry ingredients (or you can omit this). Beat the egg.
- 2
Put the butter in a bowl, and cream it with a whisk. (If the butter is too hard, microwave for about 15 seconds.)
- 3
Add the powdered sugar to Step 2, and mix until it turns white. (It's ok if it's roughly mixed together.)
- 4
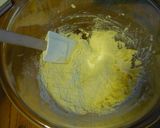
Once mixed together, add the egg, and mix further. The mixture may separate to start with, but it will blend together as you keep mixing.

- 5
Add the ☆ dry ingredients into Step 4, and fold in gently using a rubber spatula.
- 6
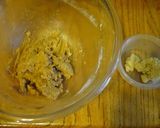
To make white dough and brown dough, divide the dough into 90% and 10%. Add the cocoa to the bigger batch.
- 7
Take out 10% of the cocoa dough and add more cocoa to make dark brown dough. (For eyes and nose.)
- 8
Wrap the dough with cling film and let it rest for more than 30 minutes in the fridge.
- 9
Start preheating the oven to 180°C before you start shaping the teddy bears.
- 10
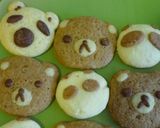
Take out the dough from the fridge, and shape it into teddy bear's face as you like. The photo shows the parts I made for my teddy bear cookies.

- 11
Bake at 180°C for 10-12 minutes. The cooking time differs depending on your oven, so adjust accordingly.

- 12
Once they are baked, place on a cooling rack, and cool them a little. Then they're done!
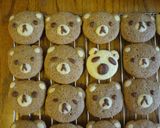
- 13
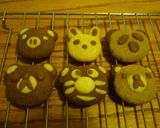
If you have leftover white dough, why not make koalas or pandas with it?
- 14
I made other kinds of animals as well. The bunny was the easiest.
Cooksnaps
Did you know that you can import recipes from anywhere into Cookpad with one click?
https://blog.cookpad.com/us/cookpad-recipe-import-feature-save-recipes-from-anywhere/
Download Cookpad app to plan your meals and store your cooking ideas in one safe place! https://cookpad.wasmer.app/us/download
Keywords
Similar Recipes
More Recipes
-

Pakhala or Fermented Rice Platter

-
")
Sattu Peda (Bihar Ka Superfood, Ab Peda Avatar Mein)

-


-


-


-


-

 Garima Mayur Mangwani
 -


-
 jaysongeisler
 -
")
Lychee Smoothie (Lychee Smoothie)

-


-


-
 pattij424
 -


-
 Katie Matsushima
 -


- Katie Matsushima
-


-

Handmade Spinach Fettuccine Pasta
-

Delicious Acqua Pazza Using Fish Fillets
-


-

Easy Handmade Chocolate Decoration Pens
-

Superb Tauchu-Style Sauce for Khao Man Kai
-


Comments