CookpadCookpad
Guest
Register or Log In
Save and create recipes, send cooksnaps and more
  • Search
  • Premium
    • Top Cooksnapped Recipes
    • Top Viewed Recipes
  • Premium
  • Challenges
  • FAQ
  • Send Feedback
  • Region
  • Your Collection
Your Collection
To start creating your recipe library, please register or login.
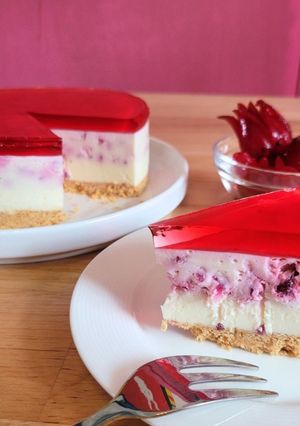
No-Bake! Multi-Layered Roselle Peanut Cheesecake with a Sweet and Tart Flavor
Save this recipe to come back to it later.
  • Add Cooksnap
  • Add to folders
  • Print
  • Share
    • Copied!
    • Email
    • Facebook
    • Pin it
    • Twitter
  • Report Recipe
  • See report
  • Edit recipe
  • Delete
CookpadCookpad
Taiwan Authentic home cooking from Taiwan, with US measurements.
Originally published on Cookpad Taiwan as 免烤箱!多層次口感,微酸帶甜的洛神花生乳酪蛋糕
A picture of No-Bake! Multi-Layered Roselle Peanut Cheesecake with a Sweet and Tart Flavor.

No-Bake! Multi-Layered Roselle Peanut Cheesecake with a Sweet and Tart Flavor

小圓姐姐愛料理
小圓姐姐愛料理 @missyuan_cooking
https://missyuan.cooking/

After making roselle preserves last time, my friends kept asking for a roselle-flavored cake. So, during a holiday break, I made a unique roselle peanut cheesecake that you can't find anywhere else. Initially, I planned to create a beautiful gradient color, but considering my friend's request for lots of roselle, I chopped the roselle preserves and added them to the cake. The crunchy roselle texture, combined with the roselle jelly and cheesecake, was so deliciously sweet and tart that it was gone in no time. Here's the recipe for anyone interested in trying it out.
❤️ For more recipes, visit: https://missyuan.cooking/roselle-peanut-cheesecake/

After making roselle preserves last time, my friends kept asking for a roselle-flavored cake. So, during a holiday break, I made a unique roselle peanut cheesecake that you can't find anywhere else. Initially, I planned to create a beautiful gradient color, but considering my friend's request for lots of roselle, I chopped the roselle preserves and added them to the cake. The crunchy roselle texture, combined with the roselle jelly and cheesecake, was so deliciously sweet and tart that it was gone in no time. Here's the recipe for anyone interested in trying it out.
❤️ For more recipes, visit: https://missyuan.cooking/roselle-peanut-cheesecake/

Read more

No-Bake! Multi-Layered Roselle Peanut Cheesecake with a Sweet and Tart Flavor

小圓姐姐愛料理
小圓姐姐愛料理 @missyuan_cooking
https://missyuan.cooking/

After making roselle preserves last time, my friends kept asking for a roselle-flavored cake. So, during a holiday break, I made a unique roselle peanut cheesecake that you can't find anywhere else. Initially, I planned to create a beautiful gradient color, but considering my friend's request for lots of roselle, I chopped the roselle preserves and added them to the cake. The crunchy roselle texture, combined with the roselle jelly and cheesecake, was so deliciously sweet and tart that it was gone in no time. Here's the recipe for anyone interested in trying it out.
❤️ For more recipes, visit: https://missyuan.cooking/roselle-peanut-cheesecake/

After making roselle preserves last time, my friends kept asking for a roselle-flavored cake. So, during a holiday break, I made a unique roselle peanut cheesecake that you can't find anywhere else. Initially, I planned to create a beautiful gradient color, but considering my friend's request for lots of roselle, I chopped the roselle preserves and added them to the cake. The crunchy roselle texture, combined with the roselle jelly and cheesecake, was so deliciously sweet and tart that it was gone in no time. Here's the recipe for anyone interested in trying it out.
❤️ For more recipes, visit: https://missyuan.cooking/roselle-peanut-cheesecake/

Read more
Saved
Save this recipe to come back to it later.
Edit recipe
See report
Add to folders
Add CooksnapAdd Cooksnap
ShareShare
  • Copied!
  • Email
  • Facebook
  • Pin it
  • Twitter
PrintPrint
  • PrintPrint
  • Add CooksnapAdd Cooksnap
  • Report Recipe
  • See report
  • Delete
Share
  • Copied!
  • Email
  • Facebook
  • Pin it
  • Twitter
Save this recipe to come back to it later.
  • Add Cooksnap
  • Add to folders
  • Print
  • Report Recipe
  • See report
  • Edit recipe
  • Delete

Ingredients

6-inch round mold
  • Crust
  • 80 ggraham crackers (or use digestive biscuits or Ritz crackers)
  • 30 gunsalted butter
  • Cheesecake Filling
  • 250 gcream cheese
  • 50 gchopped roselle preserves
  • 100 gunsweetened yogurt
  • 3 sheetsgelatin
  • 100 gheavy cream
  • 60 gsugar
  • Jelly Layer
  • 100 gwarm water
  • 40 groselle preserve syrup
  • 2 sheetsgelatin
Cookpad Open in Cookpad App
Saved
Save this recipe to come back to it later.

Steps

  1. 1

    Place the graham crackers in a ziplock bag and crush them with a rolling pin until very fine.
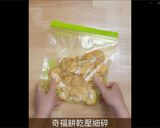
    A picture of step 1 of No-Bake! Multi-Layered Roselle Peanut Cheesecake with a Sweet and Tart Flavor.
  2. 2

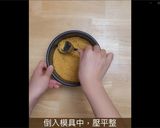
    Microwave the unsalted butter until melted, then mix it with the crushed crackers. Press the mixture firmly into the bottom of a mold. You can place a round piece of parchment paper at the bottom for easier removal.
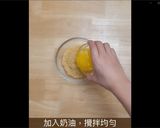
    A picture of step 2 of No-Bake! Multi-Layered Roselle Peanut Cheesecake with a Sweet and Tart Flavor.
  3. 3

    Refrigerate for 30 minutes.

    A picture of step 3 of No-Bake! Multi-Layered Roselle Peanut Cheesecake with a Sweet and Tart Flavor.
  4. 4

    Whip the heavy cream and sugar in a mixing bowl until soft peaks form (the cream should be slightly runny with visible lines). Chill in the fridge until needed. Whipping the cream makes the cheesecake fluffier and creamier. If not whipped, the texture will be denser and shorter.
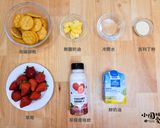
    A picture of step 4 of No-Bake! Multi-Layered Roselle Peanut Cheesecake with a Sweet and Tart Flavor.
  5. 5

    1. Cut the gelatin sheets into four pieces and soak them in cold water for about 5-8 minutes, then squeeze out excess water. 2. Do not use room temperature or hot water for soaking, as the gelatin will dissolve.

  6. 6

    Mix the cream cheese and sugar until smooth. Let the cream cheese reach room temperature before mixing for easier blending.
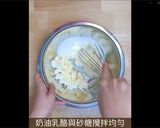
    A picture of step 6 of No-Bake! Multi-Layered Roselle Peanut Cheesecake with a Sweet and Tart Flavor.
  7. 7

    Take a small portion of the cheesecake filling and place it in another bowl. Add the drained gelatin sheets and mix over a hot water bath until smooth.
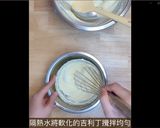
    A picture of step 7 of No-Bake! Multi-Layered Roselle Peanut Cheesecake with a Sweet and Tart Flavor.
  8. 8

    Combine the two portions of cheesecake filling until smooth.
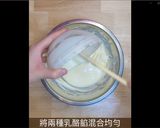
    A picture of step 8 of No-Bake! Multi-Layered Roselle Peanut Cheesecake with a Sweet and Tart Flavor.
  9. 9

    Mix in the whipped cream until well combined.
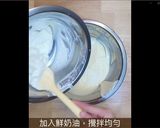
    A picture of step 9 of No-Bake! Multi-Layered Roselle Peanut Cheesecake with a Sweet and Tart Flavor.
  10. 10

    Divide the cheesecake filling into two parts. Pour half into the mold.
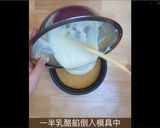
    A picture of step 10 of No-Bake! Multi-Layered Roselle Peanut Cheesecake with a Sweet and Tart Flavor.
  11. 11

    Gently shake to level, then refrigerate for 1-2 hours.
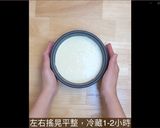
    A picture of step 11 of No-Bake! Multi-Layered Roselle Peanut Cheesecake with a Sweet and Tart Flavor.
  12. 12

    Mix the remaining cheesecake filling with the chopped roselle preserves until well combined.
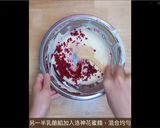
    A picture of step 12 of No-Bake! Multi-Layered Roselle Peanut Cheesecake with a Sweet and Tart Flavor.
  13. 13

    Pour the roselle cheesecake filling into the mold.
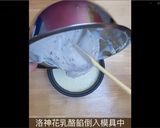
    A picture of step 13 of No-Bake! Multi-Layered Roselle Peanut Cheesecake with a Sweet and Tart Flavor.
  14. 14

    Gently shake to level, then refrigerate for 1-2 hours.
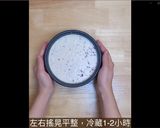
    A picture of step 14 of No-Bake! Multi-Layered Roselle Peanut Cheesecake with a Sweet and Tart Flavor.
  15. 15

    Soften the gelatin sheets and mix with warm water until smooth.
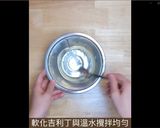
    A picture of step 15 of No-Bake! Multi-Layered Roselle Peanut Cheesecake with a Sweet and Tart Flavor.
  16. 16

    Add the roselle syrup and mix until well combined.
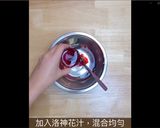
    A picture of step 16 of No-Bake! Multi-Layered Roselle Peanut Cheesecake with a Sweet and Tart Flavor.
  17. 17

    Pour the roselle jelly mixture over the cheesecake.
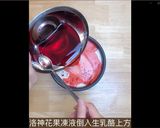
    A picture of step 17 of No-Bake! Multi-Layered Roselle Peanut Cheesecake with a Sweet and Tart Flavor.
  18. 18

    Refrigerate for 3-4 hours until set. When removing from a 6-inch springform pan, do so gently. If the jelly layer isn't firm enough, the edges might break, so be careful!
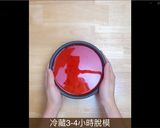
    A picture of step 18 of No-Bake! Multi-Layered Roselle Peanut Cheesecake with a Sweet and Tart Flavor.
  19. 19

    This roselle peanut cheesecake is sweet and tart, refreshing to taste, and pairs perfectly with a cup of coffee or tea. The aroma and texture are wonderfully layered. Remember to store it in the fridge and consume within 3 days.
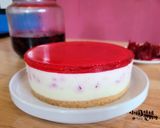
    A picture of step 19 of No-Bake! Multi-Layered Roselle Peanut Cheesecake with a Sweet and Tart Flavor.
Saved
Save this recipe to come back to it later.
Edit recipe
See report
Add to folders
Add CooksnapAdd Cooksnap
ShareShare
  • Copied!
  • Email
  • Facebook
  • Pin it
  • Twitter
PrintPrint
  • PrintPrint
  • Add CooksnapAdd Cooksnap
  • Report Recipe
  • See report
  • Delete

Cooksnaps

Saved
Save this recipe to come back to it later.
  • Add Cooksnap
  • Add to folders
  • Print
  • Share
    • Copied!
    • Email
    • Facebook
    • Pin it
    • Twitter
  • Report Recipe
  • See report
  • Edit recipe
  • Delete

Copied!

小圓姐姐愛料理
小圓姐姐愛料理 @missyuan_cooking
Published in the US on April 23, 2025 09:03
https://missyuan.cooking/
Hi! 我是小圓姐姐,是個喜歡吃,臉有點圓的女生。工作之餘,我喜歡自己做點料理,所以分享自己喜歡的食譜,希望大家一起吃得開心!網站:https://missyuan.cooking/FB:https://www.facebook.com/missyuan.cookingIG:https://www.instagram.com/missyuan.cooking/
Read more

Keywords

Sweet Cheesecake Cream Cheese Yogurt Butter

Similar Recipes

More Recipes

  1. A picture of Sautéed Sweet Corn on the Cob.

    Sautéed Sweet Corn on the Cob

    ShuriahK. ShuriahK.
  2. A picture of Leek and horseradish soup.

    Leek and horseradish soup

    Rianne Van Setten Rianne Van Setten
  3. A picture of Caramelized Pork Belly.

    Caramelized Pork Belly

    ShuriahK. ShuriahK.
  4. A picture of Custard Kunafa Cups - Indian Style Quick and Easy Dessert.

    Custard Kunafa Cups - Indian Style Quick and Easy Dessert

    Manisha Sampat Manisha Sampat
  5. A picture of Corn Capsicum Pizza.

    Corn Capsicum Pizza

    Jigisha Modi Jigisha Modi
  6. A picture of GARLIC & SESAME OIL CUCUMBER SALAD.

    GARLIC & SESAME OIL CUCUMBER SALAD

    Pinkblanket's Kitchen Pinkblanket's Kitchen
  7. A picture of Adai.

    Adai

    Swaminathan.V Swaminathan.V
  8. A picture of Palak Mutton.

    Palak Mutton

    Durreshahwar Khan Durreshahwar Khan
  9. A picture of Chicken with Basque Style Sweet Paprika Sauce, Haricots Verts and Potatoes.

    Chicken with Basque Style Sweet Paprika Sauce, Haricots Verts and Potatoes

    Rianne Van Setten Rianne Van Setten
  10. A picture of Mango roll.

    Mango roll

    Pragati Hakim Pragati Hakim
  11. A picture of Air-fried Fish fry 🐟.

    Air-fried Fish fry 🐟

    QueenMel👸🏿 QueenMel👸🏿
  12. A picture of Simple Peach Crumble.

    Simple Peach Crumble

    Scott Scott
  13. A picture of Nanny’s Go-Fer Biscuits.

    Nanny’s Go-Fer Biscuits

    Sonya Bankester Sonya Bankester
  14. A picture of Sprout Green Moong Dal Salad.

    Sprout Green Moong Dal Salad

    Krishna Biswas Krishna Biswas
  15. A picture of Chicken Popcorn 65.

    Chicken Popcorn 65

    Shital Siddhesh Raut Shital Siddhesh Raut
  16. A picture of Raw Papaya Tutti Frutti.

    Raw Papaya Tutti Frutti

    Daxa Parmar Daxa Parmar
  17. A picture of Chicken Shwarma.

    Chicken Shwarma

    itsnoel itsnoel
  18. A picture of Chicken and broccoli pie.

    Chicken and broccoli pie

    Mariska van Wyk Mariska van Wyk
  19. A picture of Cheesesteak Pasta.

    Cheesesteak Pasta

    Sarvat Hanif Sarvat Hanif
  20. A picture of Roasted Rolled oats Mixture.

    Roasted Rolled oats Mixture

    Kalpana Rai Kalpana Rai
  21. A picture of Vegetable chicken enchiladas.

    Vegetable chicken enchiladas

    Mariska van Wyk Mariska van Wyk
  22. A picture of Idly & Dosa.

    Idly & Dosa

    Bina Anjaria Bina Anjaria
  23. A picture of Pomegranate and coconut flakes Dark chocolate bark.

    Pomegranate and coconut flakes Dark chocolate bark

    Kalpana Rai Kalpana Rai
https://cookpad.wasmer.app/us/recipes/24043633
Cookpad Open in Cookpad App

About Us

Our mission at Cookpad is to make everyday cooking fun, because we believe that cooking is key to a happier and healthier life for people, communities and the planet. We empower home cooks all over the world to help each other by sharing their recipes and cooking experiences.

Subscribe to Premium for exclusive features & benefits!

Cookpad Communities

🇺🇸 United States 🇬🇧 United Kingdom 🇪🇸 España 🇦🇷 Argentina 🇺🇾 Uruguay 🇲🇽 México 🇨🇱 Chile 🇻🇳 Việt Nam 🇹🇭 ไทย 🇮🇩 Indonesia 🇫🇷 France 🇸🇦 السعودية 🇹🇼 臺灣 🇮🇹 Italia 🇮🇷 ایران 🇮🇳 India 🇭🇺 Magyarország 🇳🇬 Nigeria 🇬🇷 Ελλάδα 🇲🇾 Malaysia 🇵🇹 Portugal 🇺🇦 Україна 🇯🇵 日本 See All

Learn More

Cookpad Premium Careers Feedback Blog Terms of Service Community Guidelines Privacy Policy Frequently Asked Questions

Download our app

Open Cookpad App on Google Play Open Cookpad App on App Store
Copyright © Cookpad Inc. All Rights Reserved
close