 Authentic home cooking from Indonesia, with US measurements.
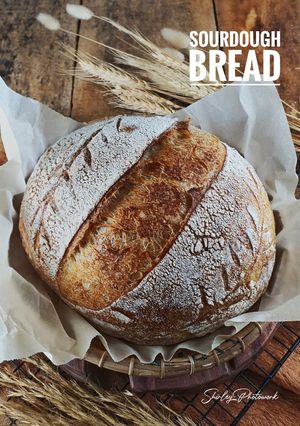
SOURDOUGH BREAD🥖
Sourdough bread is made using natural yeast. Before making sourdough bread, you need to create a sourdough starter/levain first. Once the yeast is strong and has doubled in size, feed it as usual for 4 to 6 hours before using it. A successful float test means it's ready. There are many tutorials and various methods available online; the important thing is to follow the steps carefully, including folding, scoring, etc., and practice often to understand the characteristics of your sourdough yeast. Learn from mistakes to improve next time, so you can successfully make sourdough bread at home with excellent results. This recipe is based on my two months of experimenting while working from home. Despite trials and failures, making sourdough bread is amazing for me. Start by making the levain first. Source: cookpad.com
Steps
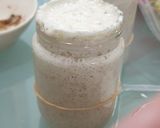
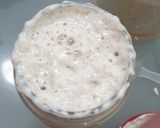
- 1
Feed the starter 40:40:40. Once it doubles in volume, it's ready to use after 4-6 hours.
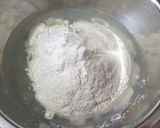
- 2
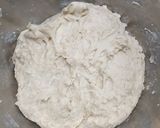
STEP 1 AUTOLYSE: Add all autolyse ingredients to a mixing bowl and hand mix until well combined. Scrape the sides of the bowl to the center. Let it rest for 30 minutes at room temperature (preferably 29°C for maximum yeast development), covered with plastic.

- 3
STEP 2: Add the levain/sourdough starter that has been fed for about 4-6 hours (doubled in size), then fold from the edges to the center and hand mix briefly until well combined. Add salt and hand mix again until well combined.

- 4
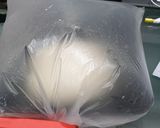
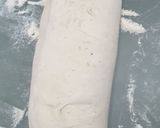
STEP 3: SLAB & FOLD: Spray the table with a little water. Transfer the dough to the table and start slab and fold for 5 minutes until the dough becomes softer (helps gluten formation). Use a scraper to round it, place it in a container, cover with plastic, and let it rest for 30 minutes at room temperature.


- 5
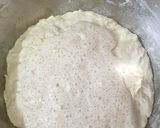
STEP 4: LAMINATION: Prepare a rectangular container and lightly coat it with olive oil. Also, spray the table with water and wet your hands. Transfer the dough to the table, spread it as thin as possible, then fold the right and left sides, then fold forward and place it in the container, cover with plastic, and let it rest for 1 hour at room temperature.


- 6
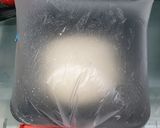
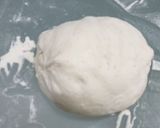
STEP 5: STRETCH AND FOLD/COIL FOLD: FIRST COIL FOLD: Fold the top, bottom, left, and right sides. With coil folding, we give the dough tension, strength, and structure. Let it rest for 1 hour, covered with plastic, at room temperature. SECOND COIL FOLD: Repeat the fold on all four sides once more.

- 7
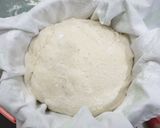
STEP 6: BULK FERMENTATION: Cover with plastic and let it rest for another 3.5 hours at room temperature.
- 8
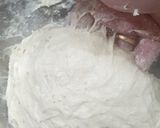
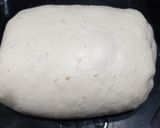
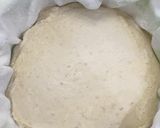
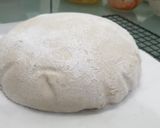
STEP 7: SHAPING WITH BANETTON: Dust the table and your hands with semolina flour. Turn the container over so the dough releases itself. With the help of a scraper, fold again and pinch the sides to close them to prevent spreading during baking. Dust the top again, then flip (the top facing down).
- 9
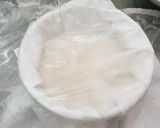
PREPARE THE BANETTON: Dust the banetton or container with rice flour and a cloth, then dust with general flour. Flip and roll the dough into the banetton. Pinch the open parts.

- 10
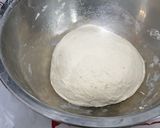
STEP 8: COLD PROOF: Wrap in plastic and proof for 12-16 hours in the fridge (overnight). If you want to bake immediately, leave it in the fridge for only 2 hours. Do the poke test: gently press with one finger and see if the indentation springs back, indicating the dough is sufficiently cold-proofed.

- 11
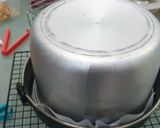
Preheat the oven to 250°C for 1 hour. Line with a stone and pan with a lid (Dutch oven, if you don't have one, use what you have at home).

- 12
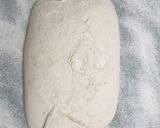
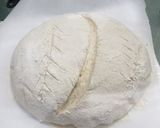
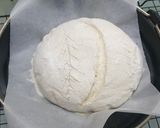
STEP 9: SCORING: Once the oven is ready, take the dough out of the fridge, place it on baking paper, and flip it. Dust the surface with semolina flour, then score with your desired pattern (check YouTube for techniques).
- 13
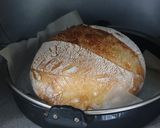
STEP 10: BAKE: Remove the pan, place the dough in the hot pan, and cover it. Quickly return it to the oven and bake for 20 minutes at 250°C.
- 14
Remove the lid, lower the temperature to 230°C, and bake for another 20 minutes to achieve a crusty brown.

- 15
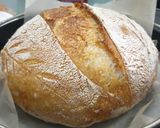
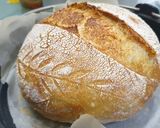
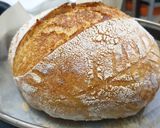
Fresh from the oven, let it cool for 15 minutes. Slice with a bread knife. The outside is crusty, and the inside is soft, with the distinctive sourdough flavor.

- 16
Take a picture first📷📷👩🍳🥰🥰🥰

- 17
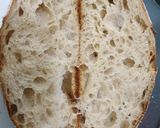
The inside appearance: Wild open crumb is so pretty🥰😘👩🍳


Cooksnaps
Keywords
Similar Recipes
More Recipes
-


-
")

-

 Akshita
 -


-


-

Japanese Green Peppers and Enokidake Mushrooms Fry

-

Golden Chicken and Autumn Vegetables

-

Pulao with Sprouted Basmati Rice, Coconut Milk and Vegetables

-


-


-

-

-


-
 Paratha")

-


-


-


-


-

Instant paneer tikka masala roll

-

")
-


-
")
Katki Keri (Instant raw mango pickle)

-


")
 Escabeche")
