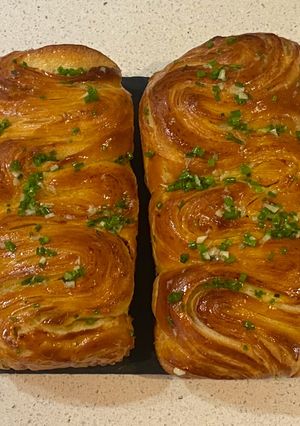
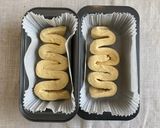
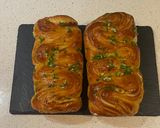
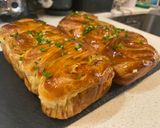
Fluffy puff pastry butter loaf (with butter glaze)
My bestie sent me a picture of this as they had recently made it. This got me to wanting to make this type of bread too.
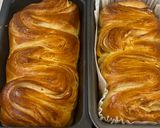
Not only does it look pretty but the bread is also very light, layered, soft and has a slight crispy edge.
You can add melted butter on top, while the bread is still. This makes it even more tasty. Or other glazes and toppings you can do is have a garlic butter glaze with chives or spring onions.
This can be eaten on its own or also be eaten with ham, blue cheese or anything of choice. The slightly sweetness of the bread compliments the cheese.
It is a favourite in our house. I hope you enjoy making and eating it as much as we do.
#Fluffypuffpastrybutterloaf
#Fluffypuffpastrybutterloafbread
#Butterbread
#bread
#loaf
#Butterglaze
#garlicbutterandchives
#garlicbutterandspringonions
#springdish
#kitchenwordsearch
Fluffy puff pastry butter loaf (with butter glaze)
My bestie sent me a picture of this as they had recently made it. This got me to wanting to make this type of bread too.
Not only does it look pretty but the bread is also very light, layered, soft and has a slight crispy edge.
You can add melted butter on top, while the bread is still. This makes it even more tasty. Or other glazes and toppings you can do is have a garlic butter glaze with chives or spring onions.
This can be eaten on its own or also be eaten with ham, blue cheese or anything of choice. The slightly sweetness of the bread compliments the cheese.
It is a favourite in our house. I hope you enjoy making and eating it as much as we do.
#Fluffypuffpastrybutterloaf
#Fluffypuffpastrybutterloafbread
#Butterbread
#bread
#loaf
#Butterglaze
#garlicbutterandchives
#garlicbutterandspringonions
#springdish
#kitchenwordsearch
Steps
- 1
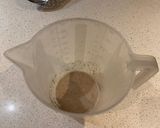
In a measuring jug, add half of the warm milk, dried active yeast and a teaspoon sugar. Let it sit for around 5-10 minutes to activate the yeast. Tip: the yeast will froth up.
- 2
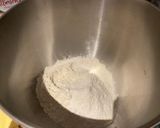
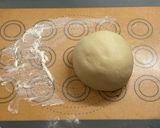
In a mixing bowl or electric stand mixer bowl add flour and salt. Mix together and then add the rest of the dough ingredients except for the soft butter. Knead dough until very smooth.
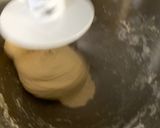
- 3
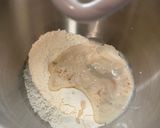
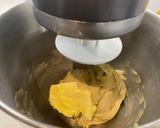
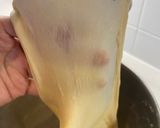
Stop kneading and do the 1st pane test. Tip: the dough should be kind of see through but not break when stretching it. The dough is ready for the next stage (dough has been kneaded enough and the gluten strands are long). Add the soft butter and continue to knead again until smooth.
- 4
Do the 2nd pane test. Again the dough should be see through and not break during this test.
- 5
Using a large baking tray 25cm by 30cm, lightly dust with (bread) flour.
- 6
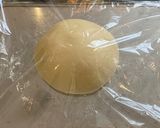
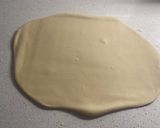
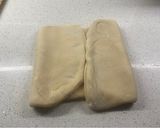
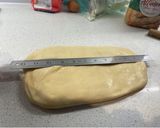
Transfer dough onto a lightly floured surface, add a touch of flour on top and knead until smooth. Tip: dough will be slightly sticky. Shape into a round ball and place on a lightly floured baking tray. Cover with cling film and place in fridge for 20 - 30 minutes (to cool down).
- 7
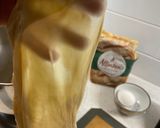
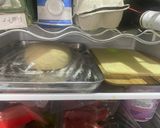
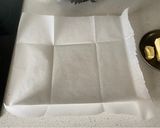
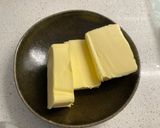
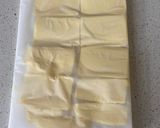
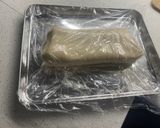
To prepare the cold butter, cut a large piece of parchment paper. Parchment paper should be 15cm by 20cm folded. Measure out the butter and cut into chunks.
- 8
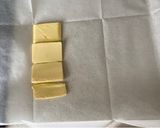
Then get the butter pieces and slice each one as thinly as possible (2mm) and place onto centre of parchment paper. Tip: this makes the butter easier to spread out later.
- 9
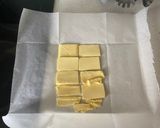
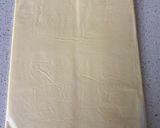
Fold and cover the butter with the remaining parchment paper. Using a rolling pin press and squish to the right size and shape. Tip: this should fill the folded parchment paper. Place in fridge for later.

- 10
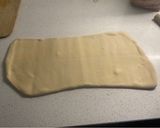
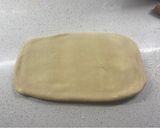
Once the dough has been in the fridge for 20 minutes or so. Transfer onto lightly floured surface. Lightly coat the top and the rolling pin. Shape the dough into a rectangle shape roughly 20cm by 30cm. Get the butter out of the fridge. Gently remove from parchment paper and transfer onto of the rolled out dough. Place in the centre. The dough should be bigger than the flatten butter.

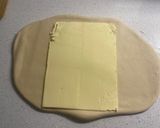
- 11
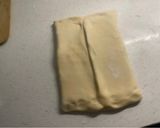
Then fold the dough edges into the centre, covering the butter. Turn the dough 90 degrees.
- 12
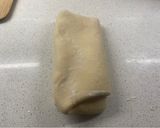
Using a rolling pin press from the centre outwards. Then roll over to smooth the dough and to stretch it out further.
- 13
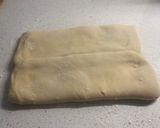
Then fold one half of the dough into the centre and then fold in the other half. Transfer back onto the baking tray (first fold) and place back in fridge for another 20 - 30 minutes.
- 14
After 20 minutes or so repeat steps 12 & 13 for the two folds. Once you have done the second fold, the dough then needs to be rolled out bigger. Roll into rough rectangle shape to size the of 15cm by 33cm.


- 15
Place in fridge again for another 20 - 30 minutes. Tip: placing dough in the fridge is to cool it down after each process and rest it.

- 16
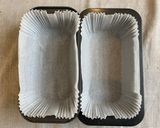
Light grease 2 loaf tins or line with bread loaf liners and set aside.
- 17
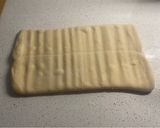
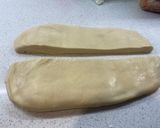
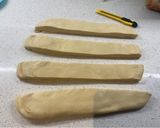
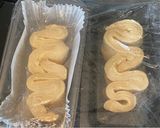
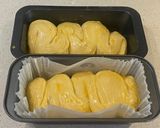
Once the bread has had the final 20-30 minutes in the fridge. Transfer onto a lightly floured surface. Using a sharp knife and a stainless steel ruler, cut the dough in half and then cut both dough pieces in half again to get 4 strands.
- 18
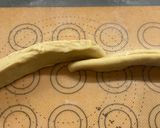
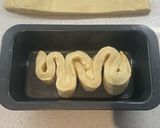
Get the first loaf tin. Lay 2 strands in its sides, layer side up. Place the ends together so the middle parts overlap one another slightly. Fold the dough strands in and out to create a squiggly shape and gently transfer into the loaf tin, layer side up.

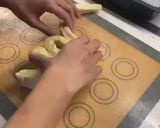
- 19
Repeat for the second loaf tin.
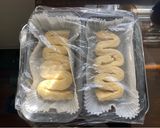
- 20
Cover with cling film. Keep in a warm place and leave to prove for 2 to 2.5 hours. Tip: the dough will expand but not double size. It should fill the loaf tin.
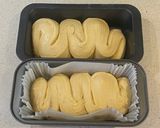
- 21
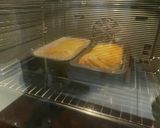
Preheat the oven to 170 degrees (fan). Once it's had the proving time egg wash the tops with a pastry brush.
- 22
Place in the oven on the lower shelf and bake between 25 to 27 minutes, until golden brown. Tip: carefully watch the dough towards the end of the baking time to avoid it burning or catching.
- 23
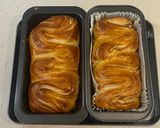
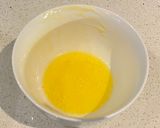
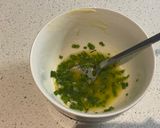
For the butter glaze place butter in a small saucepan or microwave (to keep bread soft) to melt. Then spread over the warm bread with a pastry brush. Or for the garlic butter glaze with spring onions or chives (optional), chop one clove of garlic, chives or spring onions very finely. Melt butter in a small saucepan or microwave. Add the garlic, chives or spring onions. Use a pastry brush to spread and glaze over the top of the breads.

- 24
Once bread has cooled down a little, remove from loaf tin and place on a wire rack to cool even further. Before serving transfer onto a serving board or plate. Let bread cool before eating. Then tear, share or serve with ham, blue cheese etc and enjoy!

Cooksnaps
Similar Recipes
More Recipes
-


-


-

Rosemary, Herbal, Refreshing Masala Tea, Fresh Rosemary, for Good Health

-


-

-
")

-


-

Smoked Bacon Wrapped Stuffed Pork Loin Roast

-

Risotto with Asparagus & Shrimp

-


-


-

Pork Lechon Belly in Ninja Foodi

-

")
-

 Alistair Rego
 -
 Alistair Rego
 -


-
")
Beef shami kabab (make & freeze)

-

Sinasir with Veg soup/ Rice Pancakes

-


-


-


-


")

Comments (4)