


Khatta Meeta Kaddu (pumpkin) with Samak poori

Khatta Meeta Kaddu (pumpkin) with Samak poori
 Open in Cookpad App
Steps
- 1
Take a pan. add desi ghee. add cumin seeds, carom seeds, curry leaves and asafoetida. saute for one minute then add paste of tomatoes, ginger and green chilli. cook till tomatoes turn softened and releases oil.
- 2
Then add pieces of kaddu saute it then add some water.cook properly for 10 mnts. then add sugar dry mango powder and cumin powder mix well and cook for another 2 minutes. garnish with coriander leaves.

- 3
Then take a vessel. add samak aata, salt, boiled Aloo, coriander leaves, black pepper and knead it in a dough by adding water if required.

- 4
Then made small balls and roll it with the help of roller pin and you can also flatten it on a plastic bag with help of hands

- 5
Then take a wok, add ghee/ oil make it hot properly then add poori in it and fry it till turns light brown and crispy.

Made this recipe? Share a Cooksnap!
Let Winkle Joshi know how it turned out.
Nothing says thank you like a photo!

Someone made your recipe and shared a Cooksnap!


Similar Recipes
More Recipes
-

 Phenny Sharon
-

-
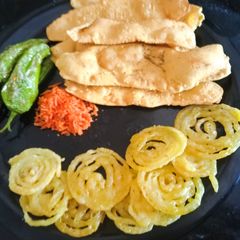
Tasty fafda crispy Jalebi for dashara festival

-


-


-

-


-


-


-
-


-

Chicken Tortilla Soup (Instant Pot)
angieandcurt -

Sausage and sweet corn chowder

-

Cinnamon and cream cheese roll ups

-

Rajgira singada poori with Aloo subji

-


-


-


-
Sausage and sweet corn chowder
-


-


Comments (4)