 Authentic home cooking from Spain, with US measurements.
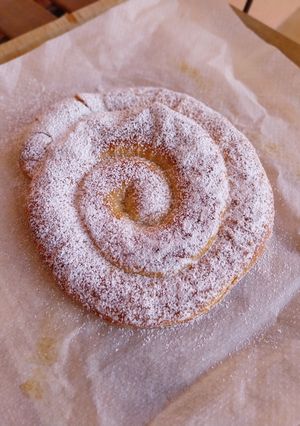
Ensaimada v3
I love making ensaimadas—I'm always searching for recipes and trying new things. This one takes a lot of time, but if you can plan ahead, it's definitely worth it.
Ensaimada v3
I love making ensaimadas—I'm always searching for recipes and trying new things. This one takes a lot of time, but if you can plan ahead, it's definitely worth it.
Steps
- 1
The night before, make the starter. The * is because it's hard to measure such a small amount of yeast. What I did was weigh out the total amount (3 grams) and use a little less than half.
- 2
Mix everything together until you have a smooth dough—start with a spoon, then use your hands. Cover with plastic wrap and let it ferment overnight.
- 3
Since it's winter, I left it at room temperature in the kitchen instead of the fridge.
- 4
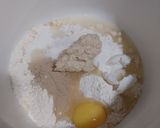
The next day, put all the dough ingredients into the bowl of a stand mixer fitted with the dough hook.
- 5
Knead until the dough reaches the windowpane stage. This means you can stretch a piece of dough between your fingers until it's almost transparent without tearing.
- 6
This process takes a while. I alternated kneading and letting the dough rest for about 1 1/2 hours, with 10-15 minute breaks. But really, let the dough tell you when it's ready.
- 7
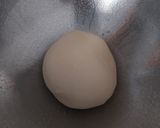
Once the dough is ready, shape it into a ball and place it in a greased bowl. Cover with plastic wrap and let it rise for about 6 hours. For example, I finished kneading at 11 a.m. and let it rise until 5 p.m.
- 8
At this point, divide the dough in half to make two ensaimadas.
- 9
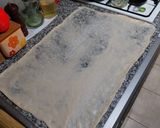
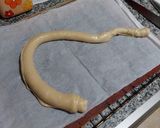
For each one, roll the dough into a long strip about 12 inches by 2 1/2 inches wide (30 cm by 6-7 cm) and spread with lard.
- 10
Now, gently stretch the dough by lifting it from underneath with both hands and pulling outward as much as possible, little by little, until it's very thin—almost transparent—without tearing.
- 11
Spread plenty of lard all over the surface. If you want to fill it with 'cabello de ángel' (angel hair pumpkin jam), add a strip along the bottom edge now.
- 12
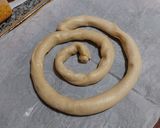
Roll the dough up into a cylinder without pressing, making as many turns as possible.
- 13
Let the rolled dough rest again so you can stretch it further—about 3 hours.
- 14
After resting, gently stretch the cylinder with both hands.
- 15
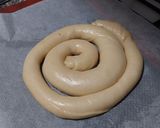
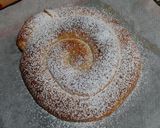
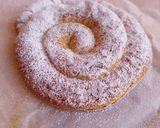
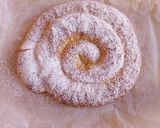
Shape it into the classic spiral on a sheet of parchment paper, leaving about 1/2 inch (1.5 cm) of space between the coils. Tuck the end slightly underneath.
- 16
Place the tray (you'll need two trays, one for each ensaimada) in the turned-off oven and let it rise slowly.
- 17
Ideally, let it rise until the spaces in the spiral have mostly closed up. Mine took 24 hours. Yes, 24!
- 18
After about 23 hours, take the trays out of the oven and preheat to 350°F (180°C).
- 19
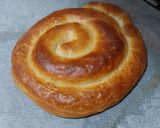
Bake one tray at a time until lightly golden but not too dark, so it doesn't dry out—about 20-25 minutes.
- 20
I like to dust them with powdered sugar while they're still warm so it sticks a bit, then dust again before serving.
- 21
As always, you can eat them as is or fill them with whatever you like. I love them with whipped cream.
Cooksnaps
Keywords
Similar Recipes
More Recipes
-


-


-
")

-


-

Healthy Tasty High Protein Sattu Paratha

-


-

🍓 Tender Strawberry Galette with Cottage Cheese Dough

-


-

Debbie's Chicken Caesar Pasta Salad

-


-


-

-

Hot Chocolate ala Café - Homemade

-


-

-


-

Black Sesame Seeds & Cashews Chikki Roundels

-


-

-

Pan-fried Prawn & Onion Rice Bowl
-

Spinach, Corn & Tuna Salad with Sesame & Mayonnaise
-


