Just Follow the Steps! My Grandma's Simmered Taro
My beloved grandma is great at making nimono or simmered dishes (She is 93 years old!) She lives far away but was finally able to come over for a visit, so I asked her to teach me how to make simmered taro properly. She told me that "Anyone can do it as long as they follow the steps in order!"
If I were to give you one tip, it would be to add the water in last!! This will prevent the taro from turning grey and watery, and will produce a richer flavor in less sauce. Add in the mirin right after turning off the heart. This will let the flavor soak in and will add to the glossiness. Recipe by Mo-chan47330
Cooking Instructions
- 1
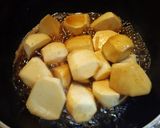
Place the peeled taro into a wide pan, coat the potatoes with Japanese style dashi stock, soy sauce, and sugar, and then turn on the heat. Don't use any water at this stage.
- 2
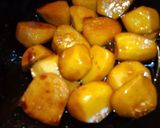
While ladling the flavoring on the taro, boil the sauce down over strong heat. It doesn't matter if they burn a bit since it adds to the flavor!
- 3
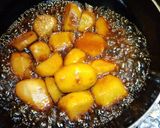
After boiling it down, add enough hot water (this speeds up the process) to lightly submerge the taro, and boil down on medium to strong heat. Cover with a lid that sits right on top of the taro (an otoshibuta or drop lid).
- 4
Once small bubbles start forming on the surface, stick a toothpick; if it goes through cleanly, then mix in the mirin, turn off the heat, cover with a lid, and steam-cook.
- 5
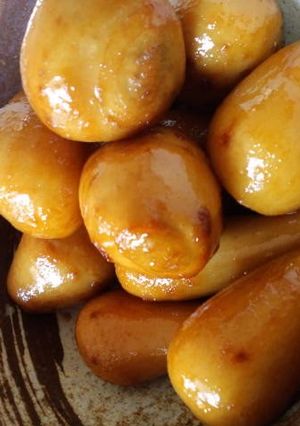
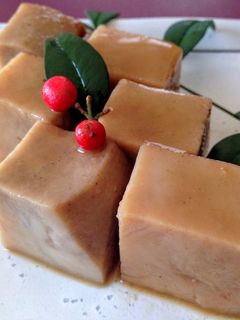
Now then, you should have glossy taro tumbles. If you let them sit overnight after cooking, then the flavor will soak in and it will become more delicious.
- 6
In step 3, there are times when the taro will not cook through over strong heat, so boil the sauce down over medium to strong heat while keeping an eye on the taro.
- 7
Burdock root will induce your appetite while this is boiling. It seems to be a good idea to add in the burdock root with lots of water and slowly boil it.
- 8
There are many recipes that state their husbands and children eat them happily, and I am happy to add my family's flavor to that list. Please adjust the flavor to your preference.
- 9
I saw my grandma for the first time in a long time the other day, so I made sure to tell her how great her recipe is!
Cooksnaps
Did you make this recipe? Share a picture of your creation!

Similar Recipes
-
Simmered Taro Simmered Taro
When I use dashi powder to make this, I can get proper hardness and texture of taro. The key point of this recipe is to pour water not from the beginning but after stir-frying. And add mirin right before turning off the heat.
-

My Basic Stewed Taro Root Tumbles My Basic Stewed Taro Root Tumbles
I have been preparing taro root like this for a long time.If not serving right away, remove from heat while still on the raw side, allowing them to cook with the residual heat, then simmer again right before serving.This will come out light tasting, so adjust the seasoning to suit your taste. I personally like the balance of 2 parts sugar to 1 and 1/2 parts soy sauce. Recipe by Soraten mama
-
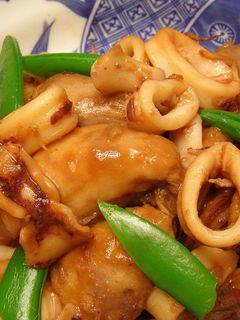
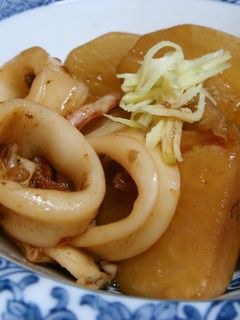
Easy Simmered Taro Roots and Squid Easy Simmered Taro Roots and Squid
I never ate much simmered food as a child, but as I grew up, I came to understand how delicious it can be.I make this all the time in the winter.The squid will go tough if you overcook it.Since the squid is simmered again with the satoimo at the end, be quick seasoning it in Step 2.You can get a great aroma by grating Yuzu peel and sprinkling it on top. Recipe by Nanamama -
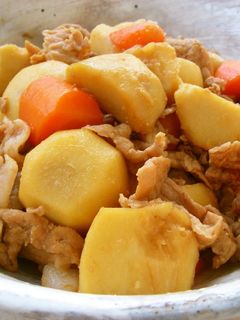
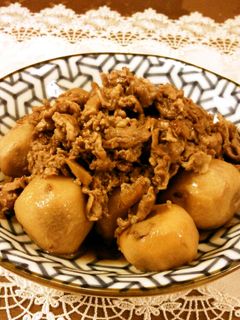
Delicious Simmered Taro Root & Thinly-Sliced Pork Delicious Simmered Taro Root & Thinly-Sliced Pork
This is a go-to recipe in the fall and winter when I receive plenty of taro roots. I made this when I was getting tired of dashi and sweet and sour flavors. You can make this and set it aside for later, making this work for a bento lunch box item as well.The key to the flavor is the Japanese sake and the mirin. For the Japanese sake, you can use the carton type, but please be sure to use authentic mirin. If you use mirin-style flavoring or cooking sake, they have salt, and with this amount the whole thing will become salty. If you don't have options, then reduce the soy sauce to 1 teaspoon. Recipe by Umakappe -

Oooh, So Tasty! Stewed Taro Root Tumbles Oooh, So Tasty! Stewed Taro Root Tumbles
This is a recipe I learned from my mom!Make sure each potato is touching the bottom of the pot, (i.e..do not stack them). That way, they'll cook through evenly, and won't be prone to breaking apart.If you have any Chinese citrus (yuzu) zest on hand, slice it into narrow, delicate strips and sprinkle on top of the potatoes for added delight. For 2 servings. Recipe by JoQo -

Stewed Taro Potato Soboro Tumble Stewed Taro Potato Soboro Tumble
The hungry boys in my family gobble up my basic tumble stew when I add meat.Crinkle aluminum foil and spread it out; this is a drop lid, so the crinkles will pick up the surface scum, without you manually skimming. Adjust the pre-boiling and boiling time according to the size of the taro potatoes. Recipe by kebeibiko. -
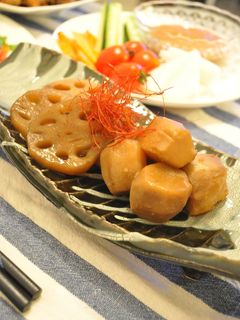
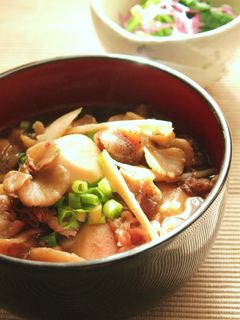
Simmered Taro in Rich Oyster Sauce Simmered Taro in Rich Oyster Sauce
I wanted to enjoy a tasty dish of simmered taro and lotus potatoes.Just put everything in the pan and simmer. Just add chicken stock powder and oyster sauce to a regular simmered dish for a different taste.If you have time, let cool so the flavours meld. Recipe by Jina shufu -

Granny's Recipe for Simmered Kabocha Granny's Recipe for Simmered Kabocha
My grandmother used to make this for me. It brings back memories. Recipe by Tecchan mama n -
Well-Flavoured Simmered Taro Roots, Daikon Radish, and Squid Well-Flavoured Simmered Taro Roots, Daikon Radish, and Squid
It's our family's staple dish using the combination of taro root, daikon radish, and squid.If you simmer the squid too long, it gets hard, so please take it out after getting the dashi from it. I kept a little bit of sticky texture from the taro root by omitting the parboiling process. Recipe by Midofadobeshi -

Simmered Taro with Kintoki Ginger Powder Simmered Taro with Kintoki Ginger Powder
Warm your body with the hot power of ginger♪The origin of this recipeI created this recipe by adding Kintoki ginger to the usual simmered taro to help get through the cold winter.
 Translated from Cookpad Japan
 -
Yamagata-Style Stewed Taro Root Yamagata-Style Stewed Taro Root
This taro root simmer is a regional dish of Yamagata. To be honest I've never eaten it...I heard that the flavor and the stock differs depending on the household and the region, so I made this taro root simmer to my liking.A light flavor that lets you enjoy drinking the soup as well. Adjust the flavor to your liking. Add the burdock root as is without soaking in water. For serving 4. Recipe by Happytonakai -
Simmered Taro and Pork Belly Simmered Taro and Pork Belly
Creamy taro absorbs the flavors from the pork belly, making it a delicious autumn side dish.The origin of this recipeThe idea came from thinking, 'Taro and pork obviously go well together. Using pork slices is more convenient than a whole piece.' Translated from Cookpad Japan

More Recipes

Comments