Just Follow the Steps! My Grandma's Simmered Taro
My beloved grandma is great at making nimono or simmered dishes (She is 93 years old!) She lives far away but was finally able to come over for a visit, so I asked her to teach me how to make simmered taro properly. She told me that "Anyone can do it as long as they follow the steps in order!"
If I were to give you one tip, it would be to add the water in last!! This will prevent the taro from turning grey and watery, and will produce a richer flavor in less sauce. Add in the mirin right after turning off the heart. This will let the flavor soak in and will add to the glossiness. Recipe by Mo-chan47330
Steps
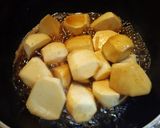
- 1
Place the peeled taro into a wide pan, coat the potatoes with Japanese style dashi stock, soy sauce, and sugar, and then turn on the heat. Don't use any water at this stage.
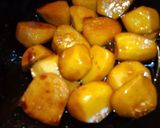
- 2
While ladling the flavoring on the taro, boil the sauce down over strong heat. It doesn't matter if they burn a bit since it adds to the flavor!
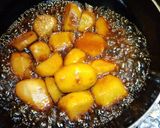
- 3
After boiling it down, add enough hot water (this speeds up the process) to lightly submerge the taro, and boil down on medium to strong heat. Cover with a lid that sits right on top of the taro (an otoshibuta or drop lid).
- 4
Once small bubbles start forming on the surface, stick a toothpick; if it goes through cleanly, then mix in the mirin, turn off the heat, cover with a lid, and steam-cook.
- 5
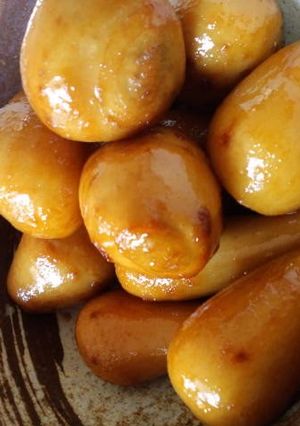
Now then, you should have glossy taro tumbles. If you let them sit overnight after cooking, then the flavor will soak in and it will become more delicious.
- 6
In step 3, there are times when the taro will not cook through over strong heat, so boil the sauce down over medium to strong heat while keeping an eye on the taro.
- 7
Burdock root will induce your appetite while this is boiling. It seems to be a good idea to add in the burdock root with lots of water and slowly boil it.
- 8
There are many recipes that state their husbands and children eat them happily, and I am happy to add my family's flavor to that list. Please adjust the flavor to your preference.
- 9
I saw my grandma for the first time in a long time the other day, so I made sure to tell her how great her recipe is!
Cooksnaps
Did you know that you can import recipes from anywhere into Cookpad with one click?
https://blog.cookpad.com/us/cookpad-recipe-import-feature-save-recipes-from-anywhere/
Download Cookpad app to plan your meals and store your cooking ideas in one safe place! https://cookpad.wasmer.app/us/download
Keywords
Similar Recipes
More Recipes
-

Healthy Beetroot Peas Little Millet Pulao

-


-
")
Juicy Homemade Beef Burger (Restaurant Style)
 ultra_recipes
 -

Power of Grains~Vegan Wok Fried Rice😋

-


-

Summer Special Juicy Jowar & Tofu Colorful Salad Bowl

-


-

")
-


-

Pierogi, cabbage and kielbasa bake

-


-


-


-

-
orange and lemon wafer cookies
veronika.lugo -

Corned Beef and Potato Chowder

-

-

Bok Choy and Tofu Egg Drop Soup

-
 ani8o8
 -

-


![A picture of [Farmhouse Recipe] Goya Tsukudani (Salty-sweet Simmered Bitter Melon).](https://img-global.cpcdn.com/recipes/4688015459876864/240x240cq80/farmhouse-recipe-goya-tsukudani-salty-sweet-simmered-bitter-melon-recipe-main-photo.jpg "[Farmhouse Recipe] Goya Tsukudani (Salty-sweet Simmered Bitter Melon)")

Comments