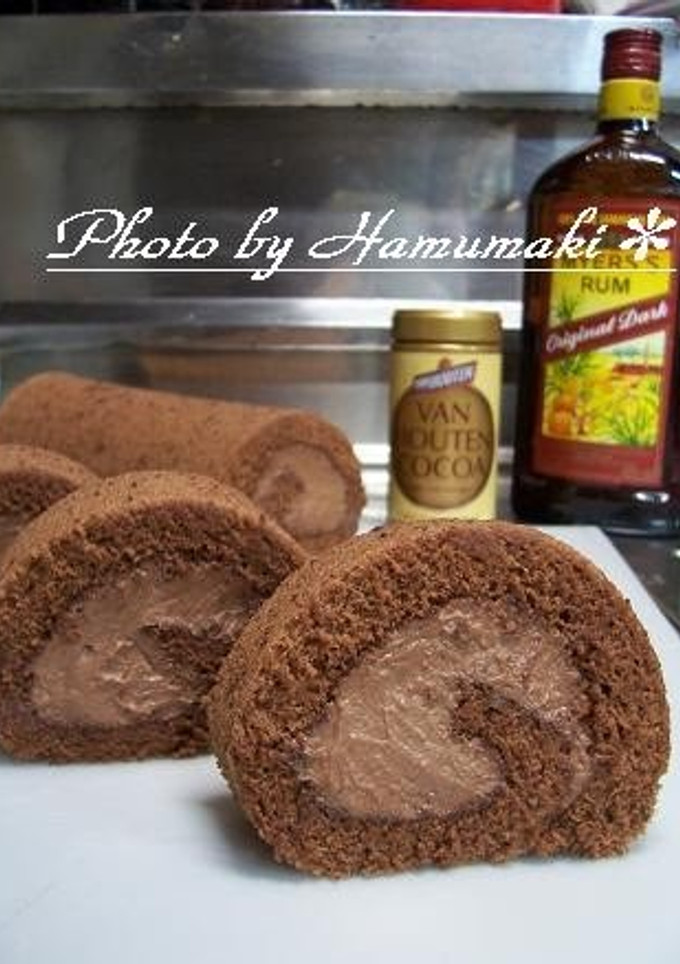
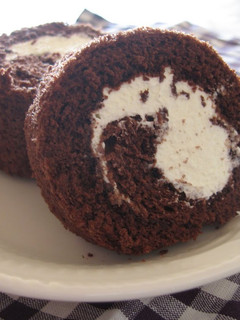
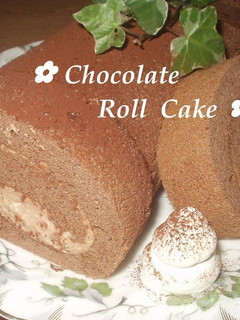
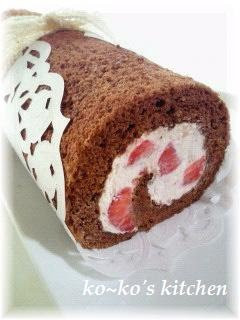
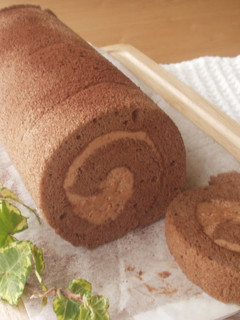
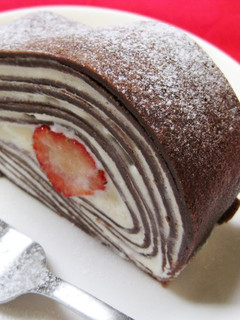
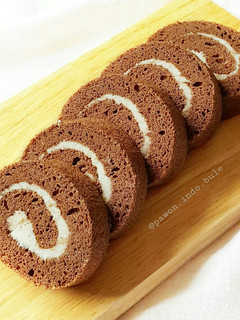
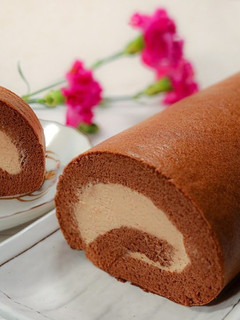
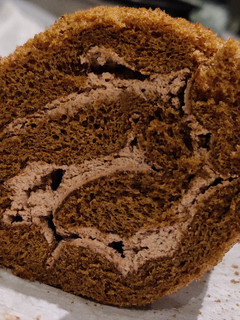
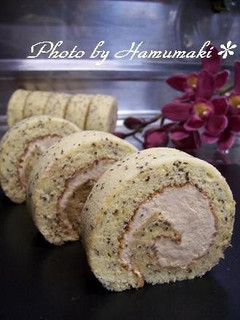
Simply Made with Cocoa: Chocolate Roll Cake
Using"4 Ingredients! Chocolate Sponge Cake with Cocoa " and"No Need for Chocolate! Chocolate Cream with Cocoa"
as a base, I made a chocolate roll cake!
Use plain cocoa that doesn't have sugar and milk added!
The eggs will boil through if you let them sit when warming them up, so be careful not to let that happen.
Whip the eggs well, and continue to gently mix until it produces a glaze.
If you don't mix it enough then it will be gritty, and it will become hard if you over mix it. For one 26 cm [10.2 in] x 35.5cm pan. Recipe by Hamumaki
Cooking Instructions
- 1
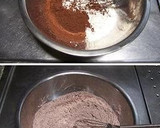
Place the cake flour and cocoa into a small bowl and mix together well. Spread out paper in a mold, and preheat the oven to 180°C.
- 2
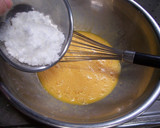
Crack eggs into the bowl, add in sugar, and mix immediately.
- 3
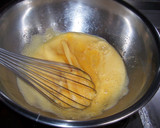
Place the bowl into a hot water bath, continuously mix with an egg beater, and heat until the egg mixture becomes warm (about 40°C). (I do this right on the flame, but feel free to use a hot water bath if you are worried about it.
- 4
Touch it and remove it from the hot water bath once it feels warm (about 40°C), and whip at a high speed with a hand mixer.
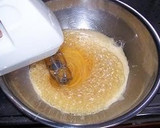
- 5
Whip at a high speed until it gradually becomes fluffy, the bubbles become fine, and the hand mixer leaves a trail, and finally whip at a low speed for 30 seconds!

- 6
Remove the hand mixer, and sift in the cake flour and cocoa so that it sits on the surface.
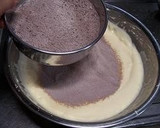
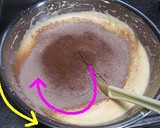
- 7
Use a rubber spatula to draw a curl, (pink line) and lightly mix it, while turning the bowl in the opposite direction at the same time (yellow line).
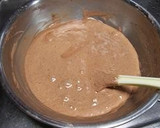
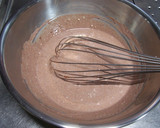
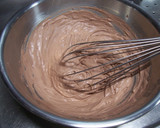
- 8
After mixing about 30 times the flouriness will have dissipated, and you won't be able to see the powder, but if you stop here then it will become a rough and gritty batter, so stir it a bit more...
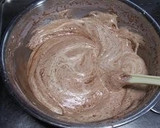
- 9
It's best to keep mixing until it produces a glaze! It will be gritty if you don't mix it enough, and it will turn into a springy batter if you over mix it, so get your own feel for it!
- 10
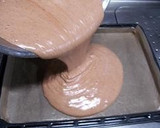
Pour Step 9 evenly into a pan lined with parchment paper or a baking sheet, and bake in an oven preheated to 180°C for 12 minutes while keeping an eye on the color.
- 11
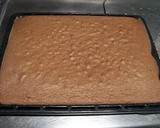
If you are worried about it then stick it with a toothpick to see if it comes out clean, and then it's OK! Place the cake on a rack to cool.
- 12
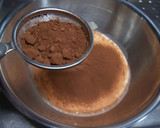
Place the heavy cream and sugar into a bowl, and add in the cocoa while sifting it through a tea strainer. (There will be balls of cocoa remaining if you don't do this).
- 13
Mix slowly using an egg beater, until the cocoa blends in. It will be difficult to mix at first, but it will gradually mix together.
- 14
It clumps up easily, so you can continue to use the egg beater to do it, but you can also use a hand mixer if it is too much of a bother! Be careful not to over whip it!
- 15
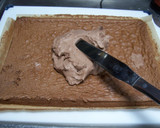
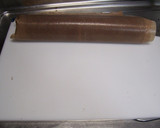
After it has cooled, peel the paper off of the cake from Step 11 and place it back on top, and spread out the whipped cream thickly at the front, and thinly at the back.
- 16
After lifting up the end of the paper closest to you, start to roll and then squeeze it in.
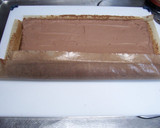
- 17
While holding the paper from the front, make sure the overlap faces towards the bottom.
- 18
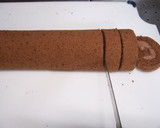
If you let the cake cool in the fridge it will settle down and become easier to cut, but the cream right after cooking is fluffy, and I like it.
- 19
When cutting this, dip the knife into hot water between each cut, plus it's also good to move it back and forth without adding force. Use a bread cutting knife to do it if you have one!
Reactions
Cooksnaps
Did you make this recipe? Share a picture of your creation!

Written by
Similar Recipes
Moist Cocoa Roll Cake

Fluffy Cocoa, Chocolate Roll Cake
Fluffy Chocolate Roll Cake
Fluffy Chocolate Roll Cake
Fluffy Chocolate Roll Cake - With Tips
Cocoa Crepe Roll Cake with Whole Strawberries
White Roll Cake with White Chocolate
Chocolate Roll Cake
Matcha Roll Cake White Chocolate Cream
Melt in Your Mouth Chocolate Chiffon Roll Cake
Easy Fluffy Fruit Roll Cake
Chocolate Swiss Roll Cake Recipe

Orange Roll Cake
Italian Roll Cake
Pretty Roll Cake
Chocolate Roll Cake with Pink Raspberry Cream

Premium Roll Cake
Cinnamon Roll Cake
Cinnamon Roll Cake

Cinnamon Roll Cake
Japanese Chocolate Swiss Roll Cake
Cinnamon Roll Cake

Cinnamon Roll Cake
Cinnamon Roll Cake

Log Christmas Cake with Roll Cake Batter
Rum Raisin Roll Cake
Vanilla roll cake
Cinnmon Roll Cake
Berry Berry Roll Cake

Comments