CookpadCookpad
Guest
Register or Log In
Save and create recipes, send cooksnaps and more
  • Search
  • Premium
    • Top Cooksnapped Recipes
    • Top Viewed Recipes
  • Premium
  • Challenges
  • FAQ
  • Send Feedback
  • Region
  • Your Collection
Your Collection
To start creating your recipe library, please register or login.
Sponge Cake
Save this recipe to come back to it later.
  • Add Cooksnap
  • Add to folders
  • Print
  • Share
    • Copied!
    • Email
    • Facebook
    • Pin it
    • Twitter
  • Report Recipe
  • See report
  • Edit recipe
  • Delete
CookpadCookpad
A picture of Sponge Cake.

Sponge Cake

cookpad.japan
cookpad.japan @cookpad_jp

I confess that I was really inspired by a book called "A Book That Answers your Why? Questions About Making Sweets" by Kazuyoshi Aihara. I highly recommend you read the book for further details.
I reduced the calories of the recipe listed in the book as much as possible.

There are 4 important key points; if you do these properly, then you can make a beautiful sponge cake. If you use the same ingredients in the exact same order, then this is the key to not failing in mixing it. If you remember this, then there is nothing to fear. *When beating the eggs, please add in vanilla essence if you like. Recipe by Osshosan

I confess that I was really inspired by a book called "A Book That Answers your Why? Questions About Making Sweets" by Kazuyoshi Aihara. I highly recommend you read the book for further details.
I reduced the calories of the recipe listed in the book as much as possible.

There are 4 important key points; if you do these properly, then you can make a beautiful sponge cake. If you use the same ingredients in the exact same order, then this is the key to not failing in mixing it. If you remember this, then there is nothing to fear. *When beating the eggs, please add in vanilla essence if you like. Recipe by Osshosan

Read more

Sponge Cake

cookpad.japan
cookpad.japan @cookpad_jp

I confess that I was really inspired by a book called "A Book That Answers your Why? Questions About Making Sweets" by Kazuyoshi Aihara. I highly recommend you read the book for further details.
I reduced the calories of the recipe listed in the book as much as possible.

There are 4 important key points; if you do these properly, then you can make a beautiful sponge cake. If you use the same ingredients in the exact same order, then this is the key to not failing in mixing it. If you remember this, then there is nothing to fear. *When beating the eggs, please add in vanilla essence if you like. Recipe by Osshosan

I confess that I was really inspired by a book called "A Book That Answers your Why? Questions About Making Sweets" by Kazuyoshi Aihara. I highly recommend you read the book for further details.
I reduced the calories of the recipe listed in the book as much as possible.

There are 4 important key points; if you do these properly, then you can make a beautiful sponge cake. If you use the same ingredients in the exact same order, then this is the key to not failing in mixing it. If you remember this, then there is nothing to fear. *When beating the eggs, please add in vanilla essence if you like. Recipe by Osshosan

Read more
Saved
Save this recipe to come back to it later.
Edit recipe
See report
Add to folders
Add CooksnapAdd Cooksnap
ShareShare
  • Copied!
  • Email
  • Facebook
  • Pin it
  • Twitter
PrintPrint
  • PrintPrint
  • Add CooksnapAdd Cooksnap
  • Report Recipe
  • See report
  • Delete
Share
  • Copied!
  • Email
  • Facebook
  • Pin it
  • Twitter
Save this recipe to come back to it later.
  • Add Cooksnap
  • Add to folders
  • Print
  • Report Recipe
  • See report
  • Edit recipe
  • Delete

Ingredients

6 servings
  • 90 gramsCake flour
  • 3 largeeggs if you can
  • 70 gramsGranulated Sugar (or Caster Sugar)
  • 10 gramsButter
  • 1 tbspMilk
  • 1 tbspWater
  • 1water, add it in ◼︎Spray
Cookpad Open in Cookpad App
Saved
Save this recipe to come back to it later.

Steps

  1. 1

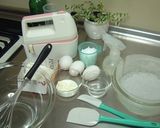
    First, measure out the ingredients and sift the flour. Butter the cake pan and dust it with flour (not listed in the ingredients); chill the pan in the fridge. Alternately, or line the pan with kitchen parchment paper cut to size, and stick it to the sides and bottom. Put the * ingredients in the same container, and melt them suspended over a pan of hot water. Preheat the oven to 180 °C.
    A picture of step 1 of Sponge Cake.
  2. 2

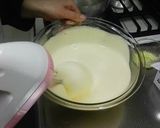
    (From this point on it's a race against time: you have to finish within 15 minutes.) Crack three eggs that have been returned to room temperature into a bowl. Whip the eggs using a handheld mixer, with the bowl held over a hot water bath, while adding the sugar in 3 batches for 7 to 8 minutes. Make sure that the batter does not become warmer than 40 °C by taking it off the hot water sometimes.
    A picture of step 2 of Sponge Cake.
  3. 3

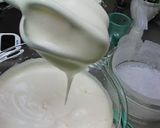
    The batter should reach the point where, when the mixer is listed up, the batter stays in the beater for a while with a thick, fine bubbly texture. This is the first key point. In addition, if the temperature is too high at this point, the gluten in the flour will develop when it's added to the batter later, which will not be good. Before you've finished beating the eggs, place the bowl into cold water to lower the temperature while continue to beat on a low speed setting for 1 minute.
    A picture of step 3 of Sponge Cake.
  4. 4

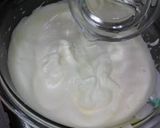
    Add in the listed amount of water to the beaten egg. Since the flour will not mix in well if the beaten egg is too foamy, please make sure to add the water beforehand to make it more liquid. This is the 2nd key point. Whip the mixture very briefly after adding the water. Just swirl your whisk twice.
    A picture of step 4 of Sponge Cake.
  5. 5

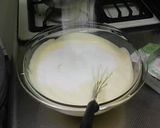
    Add the pre-sifted flour in two batches. Don't use a rubber spatula. Hold a whisk almost flat on the bowl, move it in between the foam and the flour. Do not stir whatever you do. Keep holding the whisk horizontally as shown, and turn the bowl while scooping the batter straight up and down.
    A picture of step 5 of Sponge Cake.
  6. 6

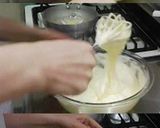
    If you follow this step exactly, then you will not fail. While slipping the flour through openings in the bubbles, mix the batter by scooping it up and dropping the batter back in, fold it onto itself in a cutting motion, and you will be able to do it easily. This is the third key point.
    A picture of step 6 of Sponge Cake.
  7. 7

    After mixing in the flour, add in the * butter and milk that have been warmed in a hot water bath by pouring it over the whisk and folding it in. Do this step quickly as well, and make absolutely sure not to stir it around.
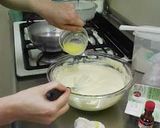
    A picture of step 7 of Sponge Cake.
  8. 8

    Pour the batter into the pan. Don't pour it in the center, but move the bowl back and forth, and even it out. Finally, if you spot any bits of butter than have not been mixed in, be absolutely sure not to place them into the center. Add them in around the edges of the pan or don't add them in even though it may seem like a waste.
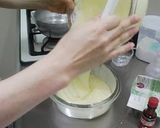
    A picture of step 8 of Sponge Cake.
  9. 9

    In order to even out the surface of the batter, and make the bubbles inside uniform, it's often recommend to tap the bottom of the pan to shock them, but do not ever do this. Mist the surface of the batter instead; this moisture will level out the surface. This is the fourth key point.
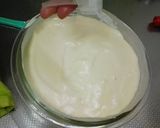
    A picture of step 9 of Sponge Cake.
  10. 10

    Bake for 20 minutes at 170 °C and 10 minutes at 160 °C. Please adjust the baking time according to your household oven, and it is done. Drop the cake while still in the pan from a height of about 30cm. It will shock the cake, remove the heat from the center of the cake all at once by exchanging the air, and keep it from shrinking
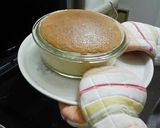
    A picture of step 10 of Sponge Cake.
  11. 11

    After removing it from the pan, please remove the paper. This is the paper on the bottom of the cake. It's convenient to have a cheap round grill (the type used for grilling mochi cakes) bought from a 100 yen shop to flip out the cake on to. After flipping the cake upside down, flip it over right side up, and leave to cool.
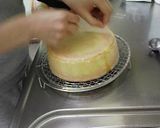
    A picture of step 11 of Sponge Cake.
  12. 12

    Peel off the paper on the sides of the cake cleanly at this point as well. Let it sit as-is until the residual heat subsides naturally, and then put into a plastic bag after it has cooled to keep it from drying out. The sponge will settle and improve if you leave it for a day before decorating it, so make it the day before you plan to serve it.
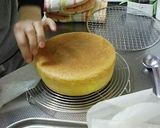
    A picture of step 12 of Sponge Cake.
  13. 13

    I cut it cleanly into three slices. I used a tool called a sponge cake slicer. If you don't have one stick toothpicks into the sponge in four different locations, and use those as a guide, and you can slice the cake nicely.
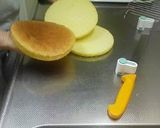
    A picture of step 13 of Sponge Cake.
  14. 14

    This one is made with with 10g less sugar and 19g less flour. The egg foam didn't have a lot of oomph, and didn't hold up well to cutting, so this just sank down while retaining its fluffy texture.
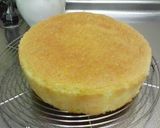
    A picture of step 14 of Sponge Cake.
  15. 15

    The sugar not only effects the sweetness, but also effects the whipped egg. This recipe has already reduced the sugar to the bare amount. Changing it even a little will be a cause for failure. If you are afraid the cake will have problems, bake it in a square flat sponge cake pan, and turn it into a rolled cake (using 60g flour, 49g sugar, and 3 eggs).

    A picture of step 15 of Sponge Cake.
  16. 16

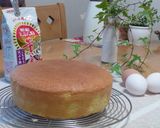
    I exchanged 1/3 of the flour for tempura flour (which contains dried egg), to make the cake more golden yellow. It turned into a very soft sponge cake. If you use 100% tempura batter the cake will be very tender, and is probably too delicate to support the weight of any decorations on top. It may be okay if you make the cake one size smaller.
    A picture of step 16 of Sponge Cake.
  17. 17

    ■Attention: ■ Regarding the beating times indicated for the egg, please note that they are just a guideline. Make sure that you do not beat it as stiff as you would an egg white meringue, or the sponge will be very dry. You can also try beating the egg at room temperature rather than held over a hot water bath. The baking time is also approximate, please adjust it depending on your oven, observing how well or fast the cake is baking.

Saved
Save this recipe to come back to it later.
Edit recipe
See report
Add to folders
Add CooksnapAdd Cooksnap
ShareShare
  • Copied!
  • Email
  • Facebook
  • Pin it
  • Twitter
PrintPrint
  • PrintPrint
  • Add CooksnapAdd Cooksnap
  • Report Recipe
  • See report
  • Delete

Cooksnaps

Saved
Save this recipe to come back to it later.
  • Add Cooksnap
  • Add to folders
  • Print
  • Share
    • Copied!
    • Email
    • Facebook
    • Pin it
    • Twitter
  • Report Recipe
  • See report
  • Edit recipe
  • Delete

Copied!

cookpad.japan
cookpad.japan @cookpad_jp
on January 20, 2014 02:41

Did you know that you can import recipes from anywhere into Cookpad with one click?
https://blog.cookpad.com/us/cookpad-recipe-import-feature-save-recipes-from-anywhere/

Download Cookpad app to plan your meals and store your cooking ideas in one safe place! https://cookpad.wasmer.app/us/download

Read more

Comments

Guest
Add a comment
0/0

Keywords

Cake Egg Butter

Similar Recipes

More Recipes

  1. A picture of Ca2026.

    Ca2026

    Nutan Shah Nutan Shah
  2. A picture of Gatte ki kadhi and dry Masala gatta.

    Gatte ki kadhi and dry Masala gatta

    Prachi Maheshwari Prachi Maheshwari
  3. A picture of Sous vide ultimate ribs :P - Yes I have a FEW rib recipes but I love them soooo many ways :P - ENJOY.

    Sous vide ultimate ribs :P - Yes I have a FEW rib recipes but I love them soooo many ways :P - ENJOY

    farang31 farang31
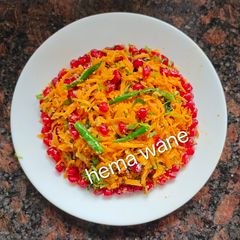
  4. A picture of Pomegranate Salad.

    Pomegranate Salad

    Suchitra S(Radhika S) Suchitra S(Radhika S)
  5. A picture of Avocado Thick Shake.

    Avocado Thick Shake

    Sangita Vyas Sangita Vyas
  6. A picture of The Best Homemade Prunes from Fresh Plums! My Tried-and-Tested Dehydrator Recipe.

    The Best Homemade Prunes from Fresh Plums! My Tried-and-Tested Dehydrator Recipe

    OnlyProven Recipes OnlyProven Recipes
  7. A picture of Pomegranate Raita.

    Pomegranate Raita

    Hema Wane Hema Wane
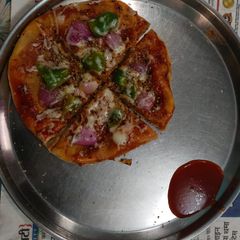
  8. A picture of Roti cheese Pizza (Home made).

    Roti cheese Pizza (Home made)

    Mridula Srivastava Mridula Srivastava
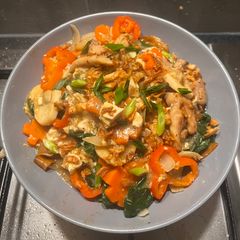
  9. A picture of Wat Tan Hor Fun.

    Wat Tan Hor Fun

    Francesco Francesco
  10. A picture of Mashed Sweet Potato and Mozzarella with Asian Style Prawns.

    Mashed Sweet Potato and Mozzarella with Asian Style Prawns

    Arezu Arezu
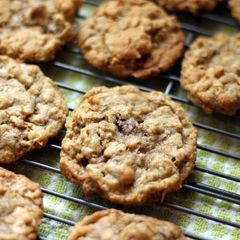
  11. A picture of "Oh My Goodness" Cookies.

    "Oh My Goodness" Cookies

    Amanda Amanda
  12. A picture of Chipotle steak pasta.

    Chipotle steak pasta

    cantalicia cantalicia
  13. A picture of Chicken Fajitas.

    Chicken Fajitas

    Kristy Kristy
  14. A picture of Fried Catfish.

    Fried Catfish

    Kristy Kristy
  15. A picture of Lasagna.

    Lasagna

    Kristy Kristy
  16. A picture of Pumpkin in coconut gravy.

    Pumpkin in coconut gravy

    harfaqalmi harfaqalmi
  17. A picture of I Finally Did It! Batter to Make Springy Crepes.

    I Finally Did It! Batter to Make Springy Crepes

    cookpad.japan cookpad.japan
  18. A picture of Shredded Chicken.

    Shredded Chicken

    chiefjoker chiefjoker
  19. A picture of Fluffy and Crispy Melon Bread.

    Fluffy and Crispy Melon Bread

    cookpad.japan cookpad.japan
  20. A picture of Nostalgic Milk Bread.

    Nostalgic Milk Bread

    cookpad.japan cookpad.japan
  21. A picture of A Little Luxurious - Silky Smooth Milk Shokupan - Square Pullman Bread Loaf.

    A Little Luxurious - Silky Smooth Milk Shokupan - Square Pullman Bread Loaf

    cookpad.japan cookpad.japan
  22. A picture of An Everyday Shokupan Square Loaf Bread.

    An Everyday Shokupan Square Loaf Bread

    cookpad.japan cookpad.japan
  23. A picture of "Oh My Goodness" Cookies.

    "Oh My Goodness" Cookies

    Amanda Amanda
  24. A picture of banana nut bread.

    banana nut bread

    annette.vidaurri annette.vidaurri
  25. A picture of Standard Shokupan - Plain Bread Loaf.

    Standard Shokupan - Plain Bread Loaf

    cookpad.japan cookpad.japan
https://cookpad.wasmer.app/us/recipes/147911
Cookpad Open in Cookpad App

About Us

Our mission at Cookpad is to make everyday cooking fun, because we believe that cooking is key to a happier and healthier life for people, communities and the planet. We empower home cooks all over the world to help each other by sharing their recipes and cooking experiences.

Subscribe to Premium for exclusive features & benefits!

Cookpad Communities

🇺🇸 United States 🇬🇧 United Kingdom 🇪🇸 España 🇦🇷 Argentina 🇺🇾 Uruguay 🇲🇽 México 🇨🇱 Chile 🇻🇳 Việt Nam 🇹🇭 ไทย 🇮🇩 Indonesia 🇫🇷 France 🇸🇦 السعودية 🇹🇼 臺灣 🇮🇹 Italia 🇮🇷 ایران 🇮🇳 India 🇭🇺 Magyarország 🇳🇬 Nigeria 🇬🇷 Ελλάδα 🇲🇾 Malaysia 🇵🇹 Portugal 🇺🇦 Україна 🇯🇵 日本 See All

Learn More

Cookpad Premium Careers Feedback Blog Terms of Service Community Guidelines Privacy Policy Frequently Asked Questions

Download our app

Open Cookpad App on Google Play Open Cookpad App on App Store
Copyright © Cookpad Inc. All Rights Reserved
close