

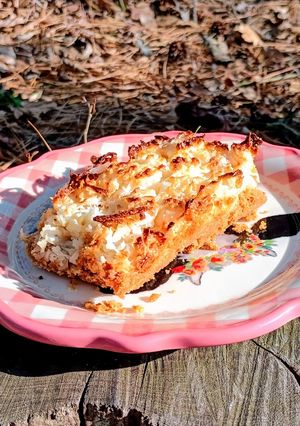
Coconut Bars and Graham Crackers

I have been addicted, lately, to coconut candy. My local gas station ran out of my favorite, and I thought, "why not make my own?"
I wound up going in a totally different direction, and made these macaroon-style bars with a graham cracker crust as a base. Typically, coconut bars don't have graham cracker crusts, but I absolutely love them and always find myself wishing for more. I decided to add a graham cracker crust and then set out on my journey to fenagle these ingredients into a single, delicious, chewy, sweet, and salty baked good.
Coconut Bars and Graham Crackers
I have been addicted, lately, to coconut candy. My local gas station ran out of my favorite, and I thought, "why not make my own?"
I wound up going in a totally different direction, and made these macaroon-style bars with a graham cracker crust as a base. Typically, coconut bars don't have graham cracker crusts, but I absolutely love them and always find myself wishing for more. I decided to add a graham cracker crust and then set out on my journey to fenagle these ingredients into a single, delicious, chewy, sweet, and salty baked good.
 Open in Cookpad App
Steps
- 1
For the coconut batter, mix all of the ingredients together in whatever order you like.
- 2
At this stage, taste the batter after you put in 1/4 tsp salt. You want to be able to taste the salt, the kosher or flaky salt preference is to maintain tiny pockets of salt to add contrast to the flavor. I tend to put 1/2 tsp.
- 3
In a separate, small bowl, melt 6-8 tablespoons of butter and set aside.
- 4
Add graham crackers to a blender and pulverize them, then add them to a separate bowl from the coconut batter. If you do not have a blender, use a freezer storage bag, put the graham crackers in and beat them with whatever object is nearest you.
- 5
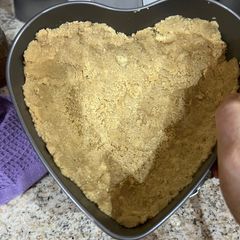
Add melted butter to the pulverized graham crackers, starting with 6 tablespoons and adding more if needed. Mix together until the texture is like that of wet sand. Add vanilla extract to this mixture, then add the sugar and salt.
- 6
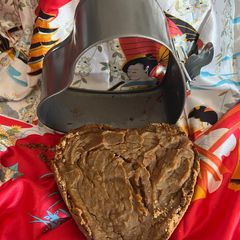
This is where you can either get creative or use what you have around. I used a pan for mini cornbread loaves to make a bar shape, but you can use a 9×9 inch pan, or even a bundt pan. I don't know why you would do that, though.
- 7
Take the graham cracker mixture and empty it into your pan of choice, then press down and flatten it into a layer as thick as you want. I like graham cracker crust, so I went about 1/2 an inch.
- 8
Take the coconut batter and add it to your pan on top of the graham cracker mixture. Be careful, as the coconut batter is very thick and sticky, it can be tricky to press down into the crust without sticking to it and lifting it out. You can use butter or oil on your fingertips to prevent this.
- 9
Put the pan into a preheated oven at 350°, for 5-15 minutes, keeping a close eye on it. Depending on how thick your bars are, the cooking time will vary. Look for the top of the coconut bars to begin browning around the edges, and pull them out once they achieve a medium, toasted brown. Even if the center is still white, or they look soft, that's okay. Pull them out. They will firm up when they cool off and we will toast them more.
- 10
Add a light, even sprinkle of granulated sugar on top of the bars. This will caramelize in the next step.
- 11
Turn the oven off and turn the broiler on at the lowest setting you have. Preheat. Put the pan back into the oven on the bottom rack, this time keeping an even closer eye on the bars. This should take no more than 90 seconds, and likely much less! This will continue to toast the coconut and caramelize the sugar.
- 12
Pull the bars out of the pan and put them on a cooling rack, let them cool completely before consuming. They will be hot, yes, but they also just taste much better at room temperature and have a better texture.
- 13
If you baked in a sheet pan, this is the time to cut your bars into whatever size or shape you want. If you used a mini loaf pan or similar, this is the end.
- 14
Optionally, lightly sprinkl kosher or flaky salt on each of the bars, and enjoy!
Tips
I highly, highly recommend you let them cool down completely before eating them. They really do taste much better and the texture is chewier and has more bite to it.
When you broil and toast the top, make sure to, as best you can, evenly broil the entire top surface. The more toasted, the better, the more evenly toasted, the better. If there are any burnt parts, pluck them off.
Cooksnaps

Keywords
Similar Recipes
More Recipes
-

-
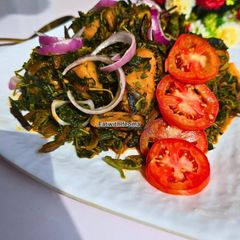
Creamy Yam Porridge with Spinach

-

-
Avocado Wheat Bread Grilled Sandwich

-

-

-

-
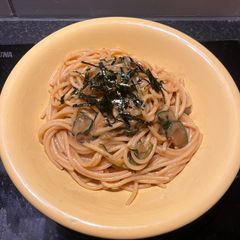
My Spaghetti Zucchini and Miso

-

-
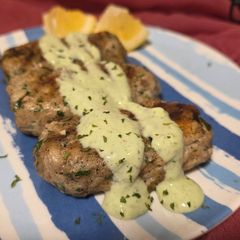
Chicken kafta with garlic yogurt sauce

-

-
 deonna69
 -
Sheet pan sausage, potatoes, and bacon

-
-
-
-

-
Dry Kasuri Meethi Laccha Parathas

-

-

- deonna69
-

-
-


Comments