
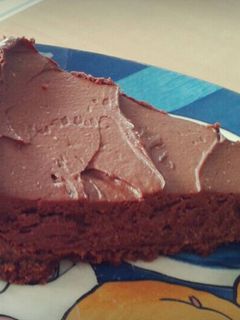
Vegan chocolate cheesecake
It was an improvisation when I craved a dessert and it ended up very resembling the real cheesecake
Vegan chocolate cheesecake
It was an improvisation when I craved a dessert and it ended up very resembling the real cheesecake
Cooking Instructions
- 1
To the high speed blender add cashews and coconut milk. Blend until very smooth
- 2
While cashews are blending, melt coconut butter and chocolate chunks together and let it cool down a bit
- 3
While molten chocolate is cooling down in a food processor crush cookies and nuts until fine (but not powder). Melt some coconut butter and add to the cookie and nuts mixture.
- 4
Put this mixture into the deep round baking form and press to the bottom using a glass to form a crust. Bake it for 5 minutes on 150 degrees Celsius
- 5
Back to the cashews. Run the blender with the cashew cream and slowly pour in the melted chocolate followed by sugar syrup and lemon juice
- 6
Add some tapioca starch and run the blender until smooth
- 7
Add agar agar powder and pulse until well combined (make sure not to run the blender constantly to avoid excessive heating of the razors, we don’t wont to activate agar agar and tapioca starch to early)
- 8
Put a saucepan on a medium heat, pour your chocolate cheesecake mixture into the pan and constantly stirring (it could take 5 to 10 minutes) wait until the agar and tapioca starch will help the mass significantly thicken
- 9
Transfer this mass onto your crust, help yourself with an offset spatula to form a nice cheesecake layer
- 10
Finally, let it cool down completely in the fridge
Cooksnaps
Did you make this recipe? Share a picture of your creation!


Similar Recipes
-

Vegan Tofu Cheesecake Vegan Tofu Cheesecake
This is my own variation of a recipe that I saw in a cook book! I changed it slightly so that it's easier for me to make!Make sure to drain the tofu well. Without decent draining, the cheesecake wouldn't turn out so well. Please adjust the sweetness and the sour flavor of lemon to your liking. If it's too much trouble making the tart crust, you could substitute that by spreading out sliced almonds. Recipe by apricot7
-

Raw Vegan Berry Cheesecake Raw Vegan Berry Cheesecake
I was introduced to the idea of this dessert a couple of years ago at a potluck dinner. A friend made a version of this cake from a video she found on social media that listed the ingredients and steps, but not the measurements. The results were colorful and delicious, but very soupy. I did some research and found several different recipes online, but none were quite right. So, after some trial and error, I finally came up with a recipe that is pretty and ridiculously delicious. The optional herbal ingredients add a boost of color, flavor, and nutritional value, but don’t worry if you don’t have access to them.
-

No-bake Chocolate Cheesecake No-bake Chocolate Cheesecake
I've been trying out a lot of cheesecake recipes lately, and I thought I'd try making a chocolate one. The batter may be a bit stiff and hard to smooth out.When adding the chocolate to the cream cheese batter, just mix it lightly to make a marble pattern. I added the chocolate before pouring the batter into the mold in order for the marbleizing to be throughout the batter, but if you prefer, add the cream cheese batter to the mold first, and then add the chocolate. Recipe by nin -

Chocolate raspberry dairy free cheesecake Chocolate raspberry dairy free cheesecake
Rich in flavour but not overwhelming at all. Takes some time but is very easy. A big hit, can't even tell its dairy free! Could easily be made vegan by subsituting a nut and dried fruit crust and cocoa instead of chocolate. clara.vanhornfoy
 -

No bake mini chocolate cheesecake No bake mini chocolate cheesecake
This recipe is also from my favorite Chef’s cooking show. I had to try it out for myself to see if it as fluffy as it looked on TV. The truth is, it is a much lighter version than the usual Cheesecake, and the reason is because there is only one cup of Cream Cheese in this dessert. I love Cheesecake but not Chocolate, 🙂 as I have mentioned in the past as a cook I have to try everything out even though I may not like it. 🙂 Soo, I gave it a try and WOW!!! it really was good, but that’s as far as I got with eating any more of this dessert. I am definitely going to try this recipe out with White Chocolate, much more to my taste. 🙂
-

Lilhpster's VEGAN Cherry Cheesecake Lilhpster's VEGAN Cherry Cheesecake
My mom always made this at our family holiday gatherings. My sister and I will protest if we don't have it lol! Since I'm vegan, I didn't think I'd ever be able to enjoy it again :( but wait! I've substituted all the dairy ingredients for vegan ingredients! I hope you love it as much as my sister and I do lol.
-

No-Bake Chocolate Cheesecake No-Bake Chocolate Cheesecake
This recipe is so easy to follow and make! I saw this recipe somewhere long ago and I decided to submit this recipe according to how I make it. The cheesecake is very rich and smooth, and definitely for chocolate lovers. rinelle -

Chocolate Cheesecake Chocolate Cheesecake
This cheesecake is a easy to put together cheesecake. I skipped the water bath but protected the cheesecake some with the foil and baking sheet. To further prevent or close small cracks I cover the cheesecake on the cooling baking pan for an hour. It turns out deliciously rich and creamy!
-

Yogurt Rich Chocolate Cheesecake Yogurt Rich Chocolate Cheesecake
The usual strained yogurt cheesecake is delicious, so I created a chocolate version.Adjust the amount of chocolate to your taste. I used 1 bar this time. 2 bars make the cake rich and thick. Recipe by nyonta -

Dairy Free Guava Cheesecake Dairy Free Guava Cheesecake
This Guava Cheesecake is pure heart in every bite. Creamy, dairy & gluten free , and bursting with tropical sweetness, it’s my way of turning simple ingredients into something special. Made with love, resilience, and a touch of magic !
-
Chocolate & Carob Cheesecake Chocolate & Carob Cheesecake
A great indulgent cheesecake. If you're looking for a no bake dessert, you can still make this recipe, baking the crust is optional, it just results in a better presentation. If you can't find any carob, it can easily be replaced with more sugar (equal amounts)
-

Basic cheesecake Basic cheesecake
Made this after researching and trying other recipes... This ended up being the best choice of proportions to my tastes... but play with the ingredients... The possibilities are endless!!!
More Recipes

Comments