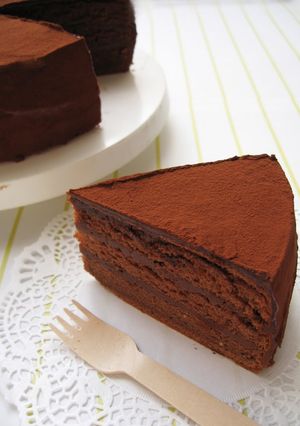
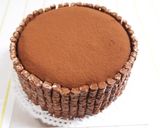
My Secret Chocolate Cake
I adapted the recipe my mother taught me to simplify the procedure.
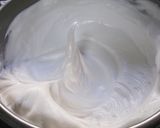
In Step 4, the key is to whip the meringue until it forms stiff peaks!
In Steps 6 and 10, after adding the flour and cocoa powder and butter, mix as little as possible! Cut and fold it together.
In Step 24, do not let the cream boil! You just need to warm it up! Recipe by Mareko
My Secret Chocolate Cake
I adapted the recipe my mother taught me to simplify the procedure.
In Step 4, the key is to whip the meringue until it forms stiff peaks!
In Steps 6 and 10, after adding the flour and cocoa powder and butter, mix as little as possible! Cut and fold it together.
In Step 24, do not let the cream boil! You just need to warm it up! Recipe by Mareko
Steps
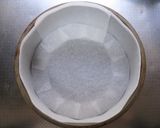
- 1
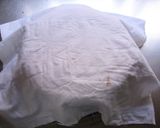
Preparation: Line a cake tin with parchment paper (or you can use wrapping paper!) If the paper won't stay on the bottom of the tin, spread oil on the tin first and then the paper will stick to it. Keep the eggs in the refrigerator until you need them. Apparently, they whip up better that way!
- 2
Put the egg whites in a bowl and break it up with a handheld mixer. Please be sure to use a clean bowl. If there's any oil or moisture on it, the egg whites won't whip up!
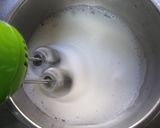
- 3
When the air bubbles in the egg whites are even, add half the sugar and keep beating. When it's fluffy add the rest of the sugar, and keep beating until you have a finely textured, shiny meringue.
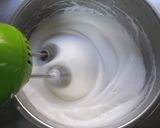
- 4
If peaks form on the meringue when you take out the handheld mixer, it's good!
- 5
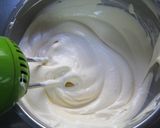
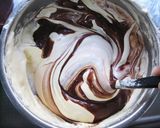
Add egg yolks to the meringue. Incorporate them well.
- 6
Sift the cake flour into the batter, and fold it in with a rubber spatula, scooping up from the bottom. Use a cut-and-fold motion while turning the bowl. Don't knead the batter whatever you do!

- 7
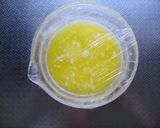
Put butter and milk in a heatproof bowl. Cover with plastic wrap, and microwave for a minute and a half. You can heat it in a small pot too.
- 8
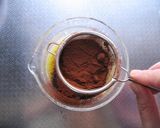
When it's warmed through, sift in cocoa powder using a tea strainer and dissolve. It's an extra step, but be sure to use the strainer!
- 9
Mix well until the cocoa powder has completely dissolved! Make sure there are no lumps.
- 10
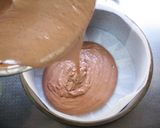
Add the Step 9 mixture to the bowl in Step 6 little by little (if you add it all at once the cocoa powder and butter will sink to the bottom.) Mix in quickly, scooping up the batter from the bottom while turning the bowl. Don't knead the batter during this step either.
- 11
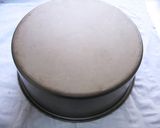
Pour the batter into the lined cake tin. The batter stuck to the bowl doesn't rise well, so pour it around the perimeter of the tin where it will bake faster. Drop the tin from a height onto the work surface 4 to 5 times to eliminate any air pockets, then smooth out the surface.
- 12
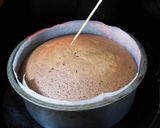
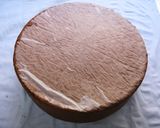
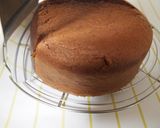
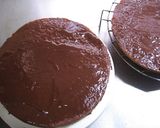
Bake for 30 to 40 minutes in a preheated 170°C oven. When a bamboo skewer poked in the middle comes out clean, it's done! As soon as it comes out of the oven, drop the cake tin onto a work surface from a 30 cm height, to prevent the spongecake from shrinking.
- 13
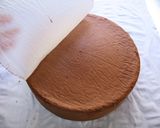
Put a tightly wrung out moist kitchen towel on your work surface, and take the spongecake out of the tin. Place the cake bottom side up and peel off the paper.
- 14
Invert the cake tin over the cake again, and leave for 2 to 3 minutes. This is to flatten out the surface, and also to distribute the moisture in the cake evenly.
- 15
Remove the tin and paper off.
- 16
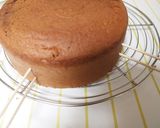
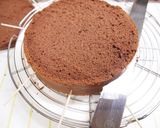
Invert the cake and place on a cooling rack.
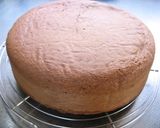
- 17
Cover with a tightly wrung out kitchen towel and leave to cool.
- 18
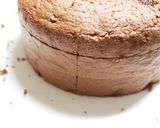
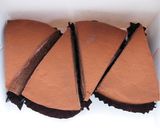
When the spongecake has cooled, slice into 3 even pieces horizontally. It's easier to slice after letting it rest for a day. Store in a plastic bag to prevent it from drying out.
- 19
How to slice the spongecake cleanly: Mark the sides vertically with a knife so that you can re-stack the layers later.
- 20
If you don't have a cake slicer: Insert toothpicks where you want to slice through the cake, starting with the upper layer, spacing the toothpicks evenly (in 4 to 8 places).
- 21
Slice through the cake on top of the toothpicks horizontally. Slice the lower layer in the same way.
- 22
Re-stack the layers, following the vertical marks you made in Step 19.
- 23
Tip: If you flip the bottom layer over, put the middle layer on top, and the top layer in the middle, the cake will be easier to decorate.
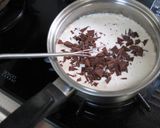
- 24
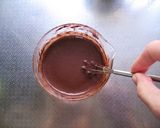
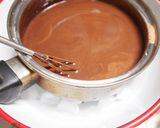
Make the chocolate cream: Put the cream in a small pot, and heat over a low flame. When it has warmed take it off the heat (it should just be bubbling around the edges!) Add the finely chopped chocolate and stir to melt.
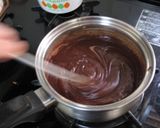
- 25
Stir the cream and chocolate to melt. When it has cooled down a bit, optionally add a little liqueur. See Step 42. You can make hot chocolate with the chocolate left in the pan. See.
https://cookpad.wasmer.app/us/recipes/142783-hot-chocolate-with-leftover-icing
- 26
Put the bottom of the pan in a bowl of ice water, and let it cool down while stirring with a whisk until the chocolate cream is thick enough to use as icing. You could beat the cream if you like too.
- 27
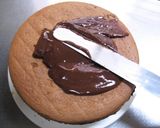
Spread plenty of the chocolate cream on the cut sides of the sponge cake from Step 23! Be very generous! The cake will become very moist.
- 28
Lots of cream.
- 29
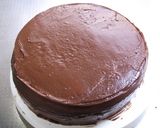
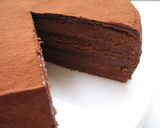
Spread the chocolate cream on the top and sides too, and we're 90% done.
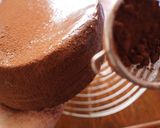
- 30
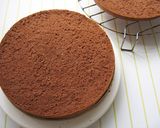
When the chocolate cream has firmed. If it doesn't firm up fast enough, put the cake in the refrigerator, dust the cake with cocoa powder through a tea strainer. To dust the sides, lift the cake up and hold it diagonally as you dust.
- 31
When the chocolate cream has firmed up again, slice the cake and serve. Dip your knife in hot water and wipe off the moisture to cut the cake cleanly.
- 32
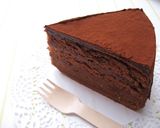
The cake keeps for 2 to 3 days. It's great the day it's made, but is even more delicious the next day! The chocolate cream melds with the spongecake, and it's moist and sublime!
- 33
To store the cake: Cover loosely with plastic wrap and keep at room temperature. Use a cake box or even a paper bag! In the summer, store in the vegetable compartment of the refrigerator.
- 34
To make a 12 cm diameter cake: Use 1/2 the ingredients of the 18 cm cake. Here I decorated the sides with a box of chocolate twigs. (4 twigs x 12 bags = 48)
- 35
To make a 15 cm diameter cake: Halve the amount of ingredients used for the 20 cm cake. I decorated with this cake with hearts, which I was inspired by.

- 36
To make a 21 cm diameter cake: Recalculate the amounts based on 5 eggs Or multiply the amounts for the 18 cm cake by 1.5. Bake for 30 to 40 minutes. The cake here is decorated on the sides with biscottes (light crispy cookies).

- 37
To make a 12 cm diameter cake plus a 15 cm diameter cake: Use the amount of ingredients specified for the 18 cm or 20 cm cakes (I prefer the latter). Baking time is about 30 to 35 minutes. This cake is decorated on the sides with almond praline and macarons.

- 38
To make mini-cakes: Cut the spongecake with a 5.5 cm circular cutter to make mini-cakes. These cakes are rolled on the sides in crushed almond praline.

- 39
For a tin with 500 ml capacity, calculate the ingredient amounts needed for 1 egg.

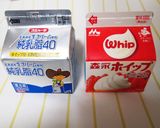
- 40
On fresh cream: Animal or vegetable based heavy cream is OK, as is whipping cream. Coffee cream or coffee creamer is not OK.
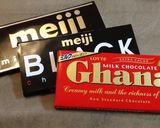
- 41
On chocolate: You can use sweet baking chocolate, regular chocolate bars (milk or dark, whichever you prefer) or bite sized chocolates (bulk packs) etc.
- 42
On liqueurs: Try adding 1 teaspoon of rum and 1 and 1/2 teaspoons of brandy to the basic chocolate cream.

- 43
More on liqueurs: In Step 27, before spreading the chocolate cream, try sprinkling a little liqueur on the cut sides of the sponge cake. It will make the cake very fragrant and grown-up.
Linked Recipes
Cooksnaps
Did you know that you can import recipes from anywhere into Cookpad with one click?
https://blog.cookpad.com/us/cookpad-recipe-import-feature-save-recipes-from-anywhere/
Download Cookpad app to plan your meals and store your cooking ideas in one safe place! https://cookpad.wasmer.app/us/download
Keywords
Similar Recipes
More Recipes
-

Francesco’s Crying Tiger Pork Chop

-


-


-


-


-

Spicy Mutton Masala or Aloo Gosht

-


-


-


-


-


-

 momof3boys86
 - momof3boys86
-

Satoimo and Mushroom Milk Stew

-

Seconds Please! White Stew with Napa Cabbage and Turnip
-

Addictive Tomato Cream Stew with Shrimp
-

Authentic, Rich and Healthy Vichyssoise
-

Cream Cheese from Paneer and Set Curd

-

-
 rainstarmcgee


")


Comments (2)