 Authentic home cooking from Taiwan, with US measurements.
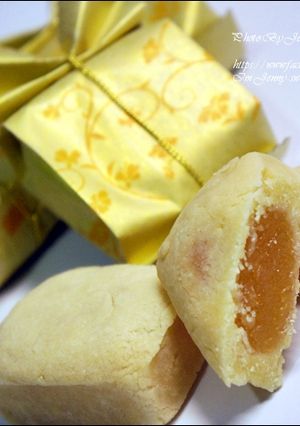
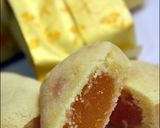
Parent-Child Baking - Pineapple Cakes
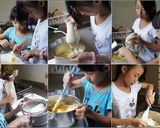
In the past, the kids would watch while mommy made snacks. This time, the kids participated in the entire process, with mommy guiding them. Watching the kids happily and attentively learn brought us closer together. It's a very fulfilling experience for them. The kids have loved pineapple cakes since they were little, but they're not cheap these days. So, this time, I let them experience making pineapple cakes themselves. After this experience, I believe they've fallen in love with baking and are already scheduling the next baking session with mommy. We shared the finished products with other family members and teachers, and the feedback was quite good!
Parent-Child Baking - Pineapple Cakes
In the past, the kids would watch while mommy made snacks. This time, the kids participated in the entire process, with mommy guiding them. Watching the kids happily and attentively learn brought us closer together. It's a very fulfilling experience for them. The kids have loved pineapple cakes since they were little, but they're not cheap these days. So, this time, I let them experience making pineapple cakes themselves. After this experience, I believe they've fallen in love with baking and are already scheduling the next baking session with mommy. We shared the finished products with other family members and teachers, and the feedback was quite good!
Steps
- 1
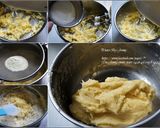
Crust: Cut the butter into small pieces and let it soften at room temperature. Use an electric mixer to beat the softened butter until smooth, then add sugar and salt and mix on low speed until combined.
- 2
Add the eggs one at a time, mixing on low speed (or stir by hand) until combined.
- 3
Sift in the milk powder and cake flour in batches, and mix with a spatula until just combined. Do not overmix.
- 4
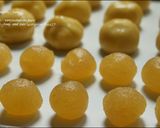
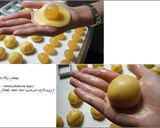
Assembly: Divide the crust into 25 portions, each about 1 ounce (25g). Roll each portion into a ball, then flatten it in your palm (do not flatten too much to avoid breaking).
- 5
Take 1/2 ounce (15g) of pineapple jam filling, place it in the center of the crust, and use your thumb and forefinger to wrap the crust around the filling. If the filling is difficult to wrap, press the filling with your left thumb and wrap the crust with your right hand. If the dough becomes too soft, refrigerate for 5-10 minutes before continuing.
- 6
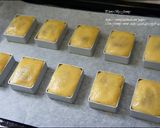
Gently roll the wrapped dough into a ball again, place it in a mold, and press it flat (make sure to fill the corners for a nice shape). Grease the inside of the mold.
- 7
Place in a preheated oven at 355°F (180°C) top heat and 265°F (130°C) bottom heat, and bake for about 15 minutes. Then flip the pineapple cakes and bake for another 15 minutes.
- 8
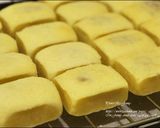
After baking, remove the pineapple cakes from the mold and let them cool on a wire rack.
- 9
Once cooled, seal the pineapple cakes in a packaging bag.
Cooksnaps
Keywords
Similar Recipes
More Recipes
-

Instant Raw Turmeric and Green Chili Pickle

-


-
")
🥗 Fit Cuban Cold Salad (Low-Carb & High Protein)

-


-


-
")
Bolognese Sauce (Fast Version & Traditional Version)

-


-


-

Jalapeño Popper Chicken Breast

-

Simmer simmer delicious easy dinner

-


-

Spicy Low Calorie Mushroom sauce With Rigatoni

-
-


-


-
Chicken Tortilla Crockpot Soup

-


-
Jalapeño Popper Chicken Breast
-


")


