CookpadCookpad
Guest
Register or Log In
Save and create recipes, send cooksnaps and more
  • Search
  • Premium
    • Top Cooksnapped Recipes
    • Top Viewed Recipes
  • Premium
  • Challenges
  • FAQ
  • Send Feedback
  • Region
  • Your Collection
Your Collection
To start creating your recipe library, please register or login.
Chicken Dum Biryani with Raita
Save this recipe to come back to it later.
  • Add Cooksnap
  • Add to folders
  • Print
  • Share
    • Copied!
    • Email
    • Facebook
    • Pin it
    • Twitter
  • Report Recipe
  • See report
  • Edit recipe
  • Delete
CookpadCookpad
A picture of Chicken Dum Biryani with Raita.

Chicken Dum Biryani with Raita

Vivek Raman
Vivek Raman @vivekraman
Pune

You need to start 3 - 4 hrs in advance for this dish but not all the time will be spent cooking. Make sure you add salt at each stage because you can't fix this later.

You need to start 3 - 4 hrs in advance for this dish but not all the time will be spent cooking. Make sure you add salt at each stage because you can't fix this later.

Read more

Chicken Dum Biryani with Raita

Vivek Raman
Vivek Raman @vivekraman
Pune

You need to start 3 - 4 hrs in advance for this dish but not all the time will be spent cooking. Make sure you add salt at each stage because you can't fix this later.

You need to start 3 - 4 hrs in advance for this dish but not all the time will be spent cooking. Make sure you add salt at each stage because you can't fix this later.

Read more
Saved
Save this recipe to come back to it later.
Edit recipe
See report
Add to folders
Add CooksnapAdd Cooksnap
ShareShare
  • Copied!
  • Email
  • Facebook
  • Pin it
  • Twitter
PrintPrint
  • PrintPrint
  • Add CooksnapAdd Cooksnap
  • Report Recipe
  • See report
  • Delete
Share
  • Copied!
  • Email
  • Facebook
  • Pin it
  • Twitter
Save this recipe to come back to it later.
  • Add Cooksnap
  • Add to folders
  • Print
  • Report Recipe
  • See report
  • Edit recipe
  • Delete

Ingredients

180 mins
6-serving
  • 1 kgWhole Chicken cut into pieces (with bone)
  • 3 cupsRice Long grain aged
  • 1 tbspChilli powder
  • 1/2 tsphaldi
  • 1 tbspcorriander powder
  • 1 tbsplime juice
  • 1/2 cupyogurt sour
  • Salt
  • 3Onions (medium size)
  • 6 tbspsOil
  • salt
  • 3 inchesGinger
  • 12 clovesGarlic
  • 6red chilli Dry
  • 2red chilli Dry Kashmiri
  • 4green chilli
  • 6Cashew nuts
  • 3 inchsCinnamon
  • 10Cardamom Green
  • 2Cardamom Black
  • 1Star anise
  • 10Black Pepper corns
  • 6Cloves (lavang)
  • 1 tspNutmeg grated
  • 2Bay leaf
  • 1 cupatta
  • water
  • 1 cupYogurt
  • 2Green chillies finely chopped
  • 1Onion finely chopped
  • 1Tomato finely chopped
  • 1/2Cucumber chopped
  • 1 tbspCorriander finely chopped
  • 1 tspJeera powder
  • 1/2 cupwater
  • salt
Cookpad Open in Cookpad App
Saved
Save this recipe to come back to it later.

Steps

180 mins
  1. 1

    Heat 6 tbsp veg oil in a thick bottom Kadhai. Finely slice the onions and add them to the oil. Keep the heat on low and let the onions cook. Stir occasionally

  2. 2

    Clean the chicken and squeeze out as much water as possible

  3. 3

    To the chicken add 1 tbsp lime juice + 1 tbsp red chilli powder + 1/2 tsp haldi + 1 tbsp corriander powder + salt and mix well. Make sure the spices do not get stuck in some crevasse of the chicken pieces i.e. it should coat the whole chicken uniformly.

  4. 4

    Add the whole spices and mix

  5. 5

    Add the Ground marinade ingredients to the chicken and mix

  6. 6

    Add 1/2 cup yogurt and mix

  7. 7

    Leave the chicken to marinade for 1 hr
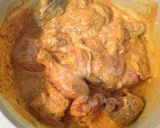
    A picture of step 7 of Chicken Dum Biryani with Raita.
  8. 8

    The onions will take approx 1 hr to become golden brown. You need to become careful after 45 min. If you are not careful towards the end, the onions may burn. After 45 min, add salt and increase the heat and stir continuously until the onions become crisp. Remove immediately and leave to cool. You may remove the onions little earlier if you prefer a less intense caramelised onion taste. I like my onions to be quite browned.

  9. 9

    None

    A picture of step 9 of Chicken Dum Biryani with Raita.
  10. 10

    Empty the oil left behind from frying the onions into the marinating chicken and mix.

  11. 11

    As soon as the onions cool, crush them and add to the marinating chicken and mix. Don't leave the onions out for too long otherwise they will become soggy

  12. 12

    Wash the rice and soak for at least 30 min. You should be gentle while washing long grain rice otherwise the grains will break.

  13. 13

    Add salt to the rice and half cook it i.e. use half water e.g. 3 cups of water for 3 cups of rice. After the water dries out, switch off the heat and keep the rice covered for 10 min.

  14. 14

    Grease the bottom of the large vessel you are going to use for Dum with oil and transfer the marinated chicken into it.

  15. 15

    Overturn the half cooked rice over the chicken in such a way that the rice at the bottom of the vessel comes on top and the rice at the top goes to the bottom. This is necessary because when you half cook the rice, the rice at the bottom will be almost cooked and the rice at the top will be only 1/4th cooked. If you reverse this in the dum, the rice will end up being uniformly cooked.

  16. 16

    If required, use a fork to gently spread the rice to cover the chicken without breaking the rice grains and without mixing the top / bottom too much. Even if the rice is completely covering the chicken, make some cracks in the rice using a fork so that the steam can come through.

  17. 17

    Knead the atta into a stiff dough and line the edge of the vessel with it. Place a cover on the vessel and press it down so that it is sealed all around.

  18. 18

    If the vessel does not have a thick bottom, you will need to place it on a tawa while cooking.

  19. 19

    Place the tawa on one burner to heat. On another burner, place the sealed vessel on high heat. Keep moving the vessel around so that the entire bottom heats uniformly. You need to cook on high heat for 5 min for the steam to develop

  20. 20

    After 5 min, switch off one of the burners. Reduce the heat of the other burner to minimum and place the dum on top of the tawa and let it cook for 35 min.

  21. 21

    In the meantime prepare the raita by finely chopping all ingredients and mix them with some water and salt. Keep in the fridge to cool.

  22. 22

    You will know the biryani is done when you get a heavenly smell out of the dum. Switch off the heat and take the dum off the tawa. If you want to eat later, make a small opening in the aata seal so that the vessel does not collapse under atmospheric pressure on cooling.

  23. 23

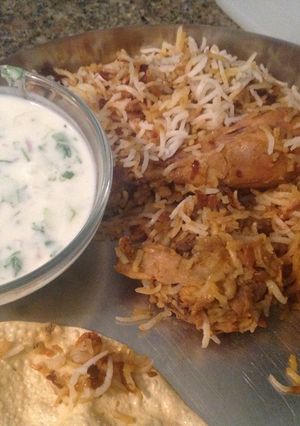
    When you are ready to eat, crack open the dum and gorge on fresh steaming biryani with cool raita and crisp papad.
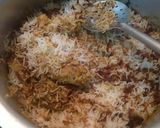
    A picture of step 23 of Chicken Dum Biryani with Raita.
Saved
Save this recipe to come back to it later.
Edit recipe
See report
Add to folders
Add CooksnapAdd Cooksnap
ShareShare
  • Copied!
  • Email
  • Facebook
  • Pin it
  • Twitter
PrintPrint
  • PrintPrint
  • Add CooksnapAdd Cooksnap
  • Report Recipe
  • See report
  • Delete

Cooksnaps

Saved
Save this recipe to come back to it later.
  • Add Cooksnap
  • Add to folders
  • Print
  • Share
    • Copied!
    • Email
    • Facebook
    • Pin it
    • Twitter
  • Report Recipe
  • See report
  • Edit recipe
  • Delete

Copied!

Vivek Raman
Vivek Raman @vivekraman
on December 27, 2014 07:55
Pune
I've always been passionate about food. With sensitive taste buds and a critical mind, I never had a choice really! I just can't eat 'anything'. The first time I tried cooking, I was completely hooked. The fact that you can create something amazing from basic ingredients in just a few minutes and then do it again and again in different ways is thrilling.
Read more

Comments

Guest
Add a comment
0/0

Similar Recipes

More Recipes

  1. A picture of Tomato Egg Drop Soup.

    Tomato Egg Drop Soup

    Francesco Francesco
  2. A picture of Fried Rice Egg Roll.

    Fried Rice Egg Roll

    Aunty Eiko's international cuisine experience Aunty Eiko's international cuisine experience
  3. A picture of Kutchhi Kadak Plate – A Crowd-Pleaser Street Food Dish - From Kutch - Gujarat - Local Specialty.

    Kutchhi Kadak Plate – A Crowd-Pleaser Street Food Dish - From Kutch - Gujarat - Local Specialty

    Manisha Sampat Manisha Sampat
  4. A picture of Mutton Biryani.

    Mutton Biryani

    Hema Wane Hema Wane
  5. A picture of Chilli Sauce Chicken.

    Chilli Sauce Chicken

    Surhaan Tahir Wafai Surhaan Tahir Wafai
  6. A picture of Rajma Chawal – Punjabi Special Comfort Food – One-Pot Meal.

    Rajma Chawal – Punjabi Special Comfort Food – One-Pot Meal

    Manisha Sampat Manisha Sampat
  7. A picture of Sprouts Upma.

    Sprouts Upma

    Pragati Hakim Pragati Hakim
  8. A picture of Khandvi.

    Khandvi

    Bhavnaben Adhiya Bhavnaben Adhiya
  9. A picture of Mix Flour Masala Daal Baati with Tricolor Churma 3 Flavors in 1 Recipe (Rajasthani Special).

    Mix Flour Masala Daal Baati with Tricolor Churma 3 Flavors in 1 Recipe (Rajasthani Special)

    Alka Bhandari Alka Bhandari
  10. A picture of Baked Beans with a Twist.

    Baked Beans with a Twist

    ifuchi ifuchi
  11. A picture of Corn Soufflé.

    Corn Soufflé

    m.rose1986 m.rose1986
  12. A picture of Cream Cheese Lemon Pound Cake.

    Cream Cheese Lemon Pound Cake

    thebaker002 thebaker002
  13. A picture of Summer Refreshing Cocktail.

    Summer Refreshing Cocktail

    TheRealCherz TheRealCherz
  14. A picture of Summer Watermelon Salad.

    Summer Watermelon Salad

    TheRealCherz TheRealCherz
  15. A picture of Augratin Brussel Sprouts.

    Augratin Brussel Sprouts

    Lisa Leach Hintz Lisa Leach Hintz
  16. A picture of How to Decorate Cookies with Icing.

    How to Decorate Cookies with Icing

    Brenda Brenda
  17. A picture of Sweet&Spicey Bbq pork roast *slow cooker*.

    Sweet&Spicey Bbq pork roast *slow cooker*

    chefcyndc chefcyndc
  18. A picture of The Pretty Princess' Milkshake.

    The Pretty Princess' Milkshake

    HardDog1110 HardDog1110
  19. A picture of Peanut butter cookies.

    Peanut butter cookies

    Drf001 Drf001
  20. A picture of Mini Cream Cheese And Ferrero Rocher.

    Mini Cream Cheese And Ferrero Rocher

    Lyii G Lyii G
  21. A picture of Chewy Fudge Brownies.

    Chewy Fudge Brownies

    thebaker002 thebaker002
  22. A picture of Pork Rib Sinigang.

    Pork Rib Sinigang

    jeancgv jeancgv
  23. A picture of Moist Graham Cracker Cake.

    Moist Graham Cracker Cake

    thebaker002 thebaker002
  24. A picture of Cream Cheese Lemon Pound Cake.

    Cream Cheese Lemon Pound Cake

    thebaker002 thebaker002
  25. A picture of Roasted Lamb Shanks And Onion Fried Rice.

    Roasted Lamb Shanks And Onion Fried Rice

    Lyii G Lyii G
https://cookpad.wasmer.app/us/recipes/2610276
Cookpad Open in Cookpad App

About Us

Our mission at Cookpad is to make everyday cooking fun, because we believe that cooking is key to a happier and healthier life for people, communities and the planet. We empower home cooks all over the world to help each other by sharing their recipes and cooking experiences.

Subscribe to Premium for exclusive features & benefits!

Cookpad Communities

🇺🇸 United States 🇬🇧 United Kingdom 🇪🇸 España 🇦🇷 Argentina 🇺🇾 Uruguay 🇲🇽 México 🇨🇱 Chile 🇻🇳 Việt Nam 🇹🇭 ไทย 🇮🇩 Indonesia 🇫🇷 France 🇸🇦 السعودية 🇹🇼 臺灣 🇮🇹 Italia 🇮🇷 ایران 🇮🇳 India 🇭🇺 Magyarország 🇳🇬 Nigeria 🇬🇷 Ελλάδα 🇲🇾 Malaysia 🇵🇹 Portugal 🇺🇦 Україна 🇯🇵 日本 See All

Learn More

Cookpad Premium Careers Feedback Blog Terms of Service Community Guidelines Privacy Policy Frequently Asked Questions

Download our app

Open Cookpad App on Google Play Open Cookpad App on App Store
Copyright © Cookpad Inc. All Rights Reserved
close