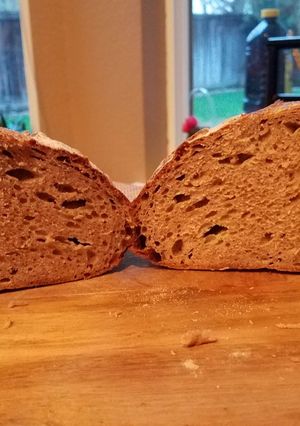
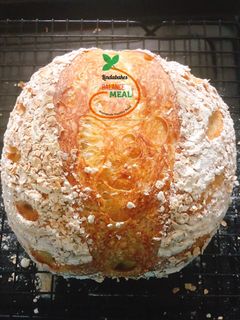
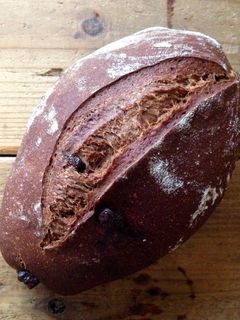
California 100% Whole Grain Sourdough Bread
I work with wheat a lot and bake and cook often. However, there was something that scared me about making 100% whole grain sourdough bread. Whole grain flours are different, because they love water and recipes need more water. At the end, you do end up working with dough that is more wet than your normal flours. I have tried this recipe and I lost that fear. I encourage you to try it. Don't aim for perfection, but rather, aim to learn and to enjoy the process, and have fun.
Cooking Instructions
- 1
Day 1
Find a plastic or glass container to build, feed, and keep your starter.
Mix:
• 3 tbsp of starter (Sourdough starter, or build your own with 4 tbsp of flour and 2 tbsp of water – mix and store in closed container for 12-24 hours at room temperature or until you see bubbles - then use it for this recipe)
• 3 tbsp of water
• 3 tbsp of flour
Rest: for 12 hours
The starter will become active and form bubbles, and it will smell like sourdough due to the fermentation process.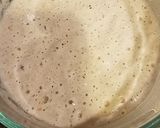
- 2
Day 2
From the previous step of day 1, you are going to take only 3 tbsp of the mixture, which is your starter.
Step 1 - Mix:
• 3 tbsp of starter (from day 1 starter you build)
• 3 tbsp of water
• 3 tbsp of flour
Rest: for 5 hours
Step 2 - Mix:
• 3 tbsp of step 1 starter.
• 1 ¼ cup of flour
• 1 cup of water
Just mix all the ingredients and put in a closed container and let it rest at room temperature.
Rest: 12 hours (overnight will be best)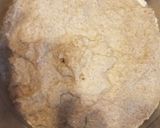
- 3
Day 3
This is the day that you will be making your bread (yay!). I promise that at the end, the work and patience will be all worth it. After the larger starter you build before and sit for 12 hours, you are going to do the following: - 4
Step 1 – Mix (just to incorporate and distribute all the ingredients – do not overmix):
• 2 2/8 cups of starter (almost all the starter you prepared the day before)
• 8 cups of whole grain flour
• 6 1/4 cups of water (ADD ONE cup at a time and if you use white flour, you will need to adjust the water).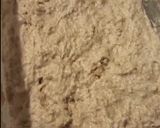
- 5
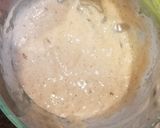
2 ½ tbsp of salt
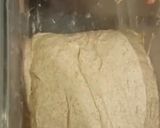
Rest: 45 minutes (Do not make a dough, this is just to mix the ingredients together. Rest in a closed container at room temperature) It is going to look chunky like the photo: - 6
Step 2 – Stretch and Fold
Watch the video on YouTube titled “The Stretch and Fold technique from Peter Reinhart”.
Stretch and Fold only four times the dough (for each time you do it).
Put the dough back to your closed container.
Rest: 30 minutes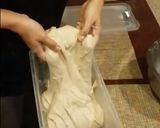

- 7
Step 3 – Stretch and Fold
Follow the same produce from before
Rest: 30 minutes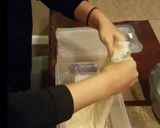

- 8
Step 4 – Stretch and Fold
Follow the same produce from before
Rest: 30 minutes - 9
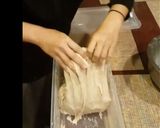
Step 5 – Divide and shape the dough, then rest right before baking
• Divide the dough into 2 dough pieces. This recipe will give you two loaves of bread. You can use a rectangular bake pan for this.
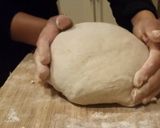
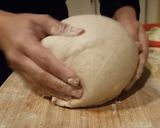
• Shape dough. Watch video on YouTube “Bread 101 – basic white bread shaping and baking loaf”. This will give you an idea on how to shape and pan the dough.
• Let the dough rest inside the pan for 1 or 2 hours, or until it has reached the top of the bake pan.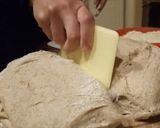
- 10
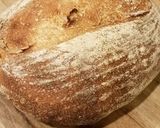
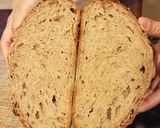
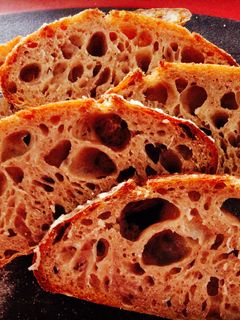
Step 6 – Bake
Bake the bread at 475 F for 45 minutes, or until dark brown on top. Let the bread cool down before cutting it. Enjoy.
You could add steam to your oven by adding 1 cup of hot water to your lower rack pan and removing it after 10 minutes.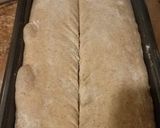
- 11
Enjoy.

Cooksnaps
Did you make this recipe? Share a picture of your creation!

Top Search in
Similar Recipes
-

California Farm San Francisco Sourdough Bread California Farm San Francisco Sourdough Bread
We don’t buy yeast, we throw flour in the air over a large bowl and catch airborne natural yeast in the kitchen, honestly. I learned this from Tartine’s Bakery in San Francisco. I also replaced my front lawn with 60’x20’ rows of red winter wheat and rows of fava beans. With winter rains, we expect 60 to 90 lbs. of wheat come summer.Once you have this sour dough starter, you use a cup and add a cup every time you bake. I keep the same sour dough starter for white bread. For wheatbread, I add wheat flour and keep a second starter. I add dark rye flour to the wheat starter for dark rye bread.Overnight dough, fresh warm crusty San Francisco bread in an hour in the morning.
-

All Natural San Francisco Sourdough Bread All Natural San Francisco Sourdough Bread
Nothing but flour, water, salt, and locally sourced microorganisms.Don't worry too much about the measurements and times and such. If you sweat the details, you might get frustrated or intimidated. And then, all is lost.It is the simplest of foods. Just keep an eye and it will arise as if by accident. But it will take patience and persistence to master. Don't get discouraged if your starter dies, or if your first loaf is a bit of a brick, just keep at it.
-

Sourdough Bread Sourdough Bread
This is a recipe from King Arthur Flour. It comes with the sourdough starter that can be ordered from them as well as finding it online in their website. It is a very good base recipe for making sourdough breads.Maintaining a proper sourdough starter is definitely a commitment. If you keep starter out at room temperature you will have to feed it every day. If you keep it refrigerated like I do, you will only have to feed it once a week to maintain it however you have to remove from fridge and feed it at least 8 to 12 hours before you want to make bread with it. And with both ways; always feed after use.Making a starter from scratch takes a lot of time before you can use for first time. I suggest getting a few ounces of a established starter from someone who has one already or order it from King Arthur Flour.Sourdoughs have different flavors depending on where you live. The sourdough bread I make in New York will taste different than a sourdough made in San Francisco.
-

Sourdough Bread Sourdough Bread
Recipe makes one large loaf of bread. Sourdough starters can be made at home or bakeries sometimes will give some of their starter away. I have a recipe for Sourdough starter if you're interested in making your own from scratch.Adapted from Bon Appétit test kitchen: It's alive with Brad, S2 • E8 GB cooks
 -

-

California Farm Soft Crust and Hard Crust Sourdough Bread California Farm Soft Crust and Hard Crust Sourdough Bread
Water, flour, sourdough starter and a pinch of salt, the classic way to bake bread. We bake four french rolls of sourdough bread a week, either white sourdough bread or wheat sourdough bread.I make the dough and replace the sour dough starter Sundays. Depending on the time of year, it takes the dough a few hours or overnight to rise, I bake the bread when dough is ready on Monday morning for breakfast. Eat half a roll, freeze the rest. -
Basic Sourdough Bread Basic Sourdough Bread
After making natural yeast, I try to make this one! Love the crust and crumb! So tasty: fluffy and airy! Recipe adapted from Foodbod Sourdough.#mycookbook
-
Sourdough bread Sourdough bread
Sourdough bread is a newer bread that i learned to make by trial and errors but I'm getting better by the day
-
-
-
Chocolate Chunk Sourdough Bread Chocolate Chunk Sourdough Bread
I was never a fan of chocolatey bread until I made this. Using a sourdough and long fermentation time gives it great flavor. I love using dark molasses to make it extra dark and to give it more complexity. Eat with good butter for a divine experience ;)The total time is about 18 hours, but it's mostly waiting time:Pre-dough - 12 hoursFirst rising - 2 hoursSecond rise - 3 hoursBake time - 35 minutes
-
Very Strawberry Sourdough Bread Very Strawberry Sourdough Bread
I made a starter using the organic strawberry yeast water which I successfully cultivated. With this very fragrant sourdough starter, some fresh strawberries and the leftover strawberry yeast water, I came up with a recipe and baked a sourdough loaf smelling and tasting of strawberry! Felicia Tang
More Recipes

Comments