Easy For Beginners: Raisin Bread Starter Rolls
Ever since I discovered homemade natural bread starter or leaven, my bread baking experience has gotten so much richer. I've been making natural-starter bread referring to various books and online articles.
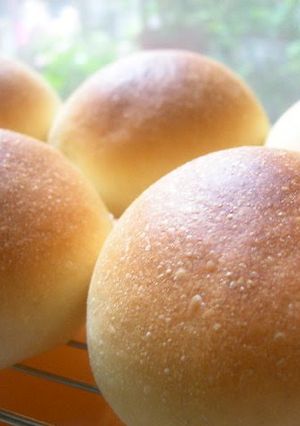
In this recipe the starter liquid is used straight, without making an intermediary sponge. This is called the "straight method". With this method you can really enjoy the fragrance of the starter and the straightforward taste of the flour, and it's really delicious. I prefer using straight starter rather than the sponge method, since the dough is more tender and moist. Please watch the bread's color in the oven to judge its baking time. When it's golden brown and smells wonderful, it's done. If the bread won't brown well, that means the dough was over-proofed. Recipe by Raichi
Easy For Beginners: Raisin Bread Starter Rolls
Ever since I discovered homemade natural bread starter or leaven, my bread baking experience has gotten so much richer. I've been making natural-starter bread referring to various books and online articles.
In this recipe the starter liquid is used straight, without making an intermediary sponge. This is called the "straight method". With this method you can really enjoy the fragrance of the starter and the straightforward taste of the flour, and it's really delicious. I prefer using straight starter rather than the sponge method, since the dough is more tender and moist. Please watch the bread's color in the oven to judge its baking time. When it's golden brown and smells wonderful, it's done. If the bread won't brown well, that means the dough was over-proofed. Recipe by Raichi
Steps
- 1
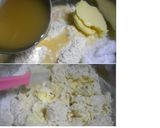
Put all the ingredients in a bowl, mix with a spatula, then knead with your hands until the dough comes together.
- 2
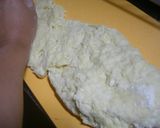
Take it out onto a work surface, and knead it well as if you were smearing the dough, stretching and folding it repeatedly. The dough will be sticky to start with, but after kneading it for 5 to 10 minutes it will no longer be sticky. Keep kneading for a total of about 15 minutes.
- 3
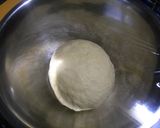
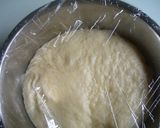
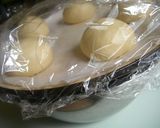
Put the ball of dough in a lightly buttered bowl, cover with plastic wrap, and put the bowl in a warm place such as the top of the refrigerator until it's 3 to 4 times its original volume (1st rising). (In the winter this takes 8 to 12 hours, in the spring and fall 5 to 8 hours, and in the summer 3 to 5 hours).
- 4
How to tell if the dough has risen enough. When it's about 2-3 times its original volume, stick a floured finger into the middle. If the hole made with the finger doesn't fill back in, the dough has finished rising.
- 5
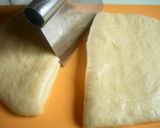
Take the dough out onto a work surface, and press to deflate and flatten it. Divide into 6 to 7 pieces.
- 6
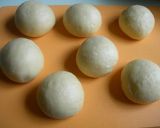
Round off each piece of dough, forming a smooth surface and gathering in the cut sides into the center. Cover the dough with a tightly wrung out moistened kitchen towel, a piece of plastic or plastic wrap, and rest for 20 minutes.
- 7
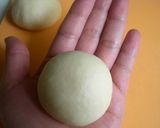
After the dough has rested, round off each piece again to form a fall with a smooth, taut surface like this.
- 8
Put the formed rolls on a kitchen parchment paper line baking tray. Cover with a large piece of plastic or put the tray into a big bag, and place a bowl filled with 40°C or so water under the tray. Leave until the rolls have risen to 2 to 3 times their original size. ※You can also let them rise slowly without using hot water. Put the tray near your rice cooker or on top of the refrigerator etc.
- 9
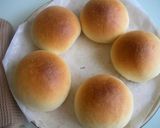
When the dough had doubled or tripled in size, bake in a preheated 180 °C oven for 12 to 15 minutes. Check to see if the rolls are done.
- 10
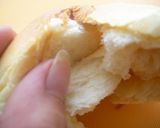
Split a freshly baked roll carefully so you don't crush it, put on lots of butter and enjoy. It's moist, smooth, chewy and tender.
Cooksnaps
Did you know that you can import recipes from anywhere into Cookpad with one click?
https://blog.cookpad.com/us/cookpad-recipe-import-feature-save-recipes-from-anywhere/
Download Cookpad app to plan your meals and store your cooking ideas in one safe place! https://cookpad.wasmer.app/us/download
Keywords
Similar Recipes
More Recipes
-


-


-


-


-


-


-


-


-

Quick Tomatillo Salsa Verde Sauce

-


-


-

Easy Pizza Crust, No Need To Knead

-

-

Freshly Baked in the Morning Focaccia
-

 BeryUmbreon
 -

Perfect Fermentation - Homemade Tea Yeast
- daniel.wentworth48
-


-


-

Smokey Ancho Chile Potato Salad


")


Comments