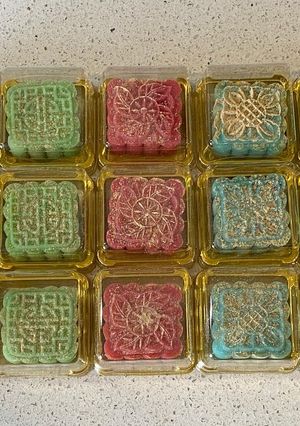
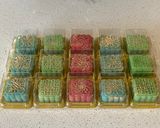
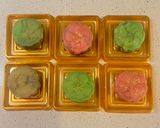
Snow Skin Mooncake
Mid-Autumn Festival is coming up in a few days (21st Sept 2021) and I had seen these snow skin mooncakes on social media.
I usually make the traditional style (still perfecting the recipe), which requires you to bake, but for these you don't have to bake it. I have seen various methods where you can either steam the ingredients together to form the sticky dough or use a microwave.
I recently saw on Instagram and Youtube people making snow skin mooncakes and sharing their recipes. I decided to read up on a few and also make a batch myself as an experiment in preparation for next week.
My snow skin mooncake recipe is inspired by Adam Liaw (Master chef Australia, previous contestant), his video can be found here https://youtu.be/v1dejrXbULs.
This is my version of Snow skin mooncakes, I modified the ingredients to my family's taste and preference. I also dusted mine with peanut powder at the end rather than leaving them as it is or in some recipes I have seen they used extra icing sugar to coat it.
#mooncakes
#midautumnfestival
#Chinese
#Snowskinmooncakes
#ChristmasGifts
Steps
- 1
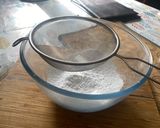
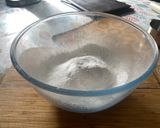
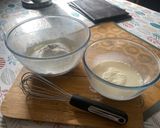
In a large glass mixing bowl (one you can put in the microwave), add all of the dry ingredients (rice flour, icing sugar, glutinous rice flour and corn flour), sieving each of the flours one by one into the bowl. Mix together using a whisk.
- 2
In a another mixing bowl or a measuring jug, add all of the wet ingredients (oil, milk and condensed milk). Mix together using a whisk.
- 3
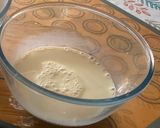
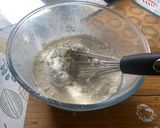
Pour the wet ingredients into the bowl with the dry ingredients (the flours) and give it a good mix to incorporate all of the ingredients.
- 4
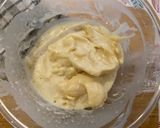
Then place the glass bowl into the microwave (mine is 700W). Turn the power on high and set the timer to 1 minute. Once the minute is up, using a tea towel to take out the bowl from the microwave and using a spatula stir the mixture. Tip: it will still be quite runny at this point.
- 5
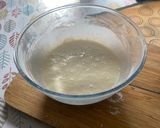
Return the bowl back to the microwave, and turn the timer back to 1 minute again. Then remove the bowl again. My microwave was has low wattage so it didn't all fully bind together to a solid state at this point. The mixture was be less runny and some bits formed together at this point. Using a spatula stir again. Tip: if your microwave has a higher wattage you may find at the mixture is no longer liquid and has fully combined. If so go to step 7.
- 6
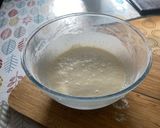
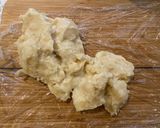
Return the bowl back to the microwave, and turn the timer back to 1 minute again. Then remove the bowl again. Once the mixture has fully set using a tea towel to hold the bowl, remove the dough (solid mixture) from the bowl into a chopping board.
- 7
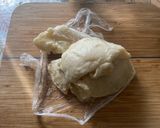
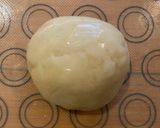
Let the dough (this will be the mooncake skin) cool a little before kneading it. Then knead the dough until smooth, wrap in either cling film or parchment paper and set aside until ready to use.
- 8
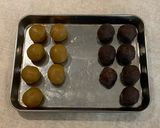
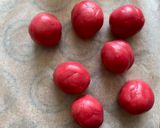
Now, get the paste fillings from the fridge, and weigh each filling to 30g. Place on a plate or baking tray and set aside until ready to use.
- 9
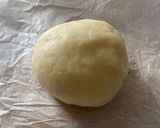
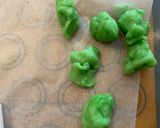
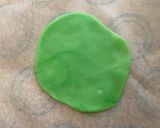
Go back to the dough and cut into 4 quarters. You can colour the dough with food colouring or leave them uncoloured. Tip: if using food colouring, get toothpicks as it will be easier to poke into the holes. You can use any colour you want. Poke a toothpick into the hole of the colour of choice, then brush it onto 1 quarter of the dough. Knead the colour into the dough until visible, add more colour depending on how vibrant you want it to be. Repeat this for the remaining dough if colouring.

- 10
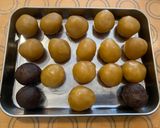
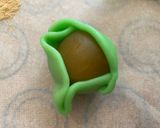
Once all of the dough has been coloured, weigh each dough ball to 20g and roll into a ball. Transfer onto a baking tray or plate. Grab one dough ball, using a rolling pin, make the dough large enough to cover one of the filling balls. Place the ball filling in the middle of the rolled out dough, and wrap it around. Then take the moon cake mould, place the ball inside, place it flat on the chopping board on a strip of parchment paper and press the mould on top.

- 11
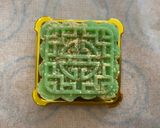
Once pressed down, raise the mooncake mould a little and gently press out the pressed mooncake and it will be released from the mould. Either using a pastry brush or your fingers sprinkle a small amount of peanut powder on top of the mooncake (optional). Place and transfer onto a plate, baking tray or in Mooncake cases.

- 12
And repeat step 10 until all of the dough skin and filling has been used up. Tip: every now and again change up the mould template to create other patterns. They can be eaten straight away or place in the fridge until ready to serve and eat.

Cooksnaps
Similar Recipes
More Recipes
-


-


-
 Tripe Stew/Curry")
Honeycomb (Cow Stomach & Intestine) Tripe Stew/Curry

-

-


-


-

Buckwheat with Mushrooms and Avocado
-


-

-


-

Fudgey Triple Chocolate Brownies-2 net carbs per brownie

-


-


-
-

Aloo ka Zafar shorba for breakfast meal

-

California Farm Hot Green Pepper Sauce: Sambal Ijo

-

-

Beef Mince & Garlic Chives Rice Bowl

-


-

Green chile Salsa aka pico de gallo
-


-

Sweet and sour soft bone pork ribs


Comments (2)