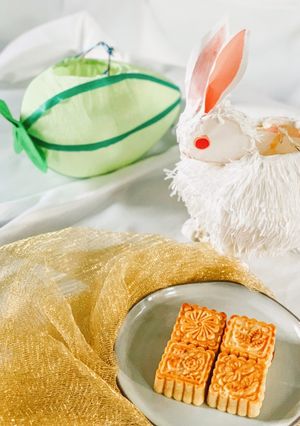
Salted Egg Yolk Custard Mooncakes (蛋黃奶皇月餅)
These custard-filled mooncakes are perfect for celebrating the Mid-Autumn Festival with friends and family. The mooncake crust is more similar to a cookie crust than the traditional mooncake crust with lye water and golden syrup. This recipe makes 20 medium mooncakes using a 75g mold.
Steps
- 1
Make the salted egg yolk custard filling.
- 2
Take 5-6 salted egg yolks and roll them in a bit of oil. Steam them for 15 mins.
- 3
After steaming the salted egg yolks when they are still warm, crush them with a fork. Set aside.
- 4
Mix the dry ingredients together: cake flour, custard powder, milk powder, and sugar.
- 5
From the two eggs, set aside some for the egg wash when baking the mooncakes.
- 6
Add evaporated milk, coconut milk, the remainder of the 2 eggs, and softened butter to the dry ingredients. Mix everything well. Keep the salted egg yolks aside.
- 7
Steam the custard filling for 15-20 mins.
- 8
When steaming is done, there will be a layer of oil. While the filling is hot, mix the butter/oil together with the crushed salted egg yolk back into the filling.
- 9
Place cooled filling on a piece of plastic wrap and form a long log shape. Wrap well to prevent leaking and drying out.
- 10
Place the custard filling in the fridge to chill for 2 hours at least.
- 11
While the custard is being chilled, let's make the mooncake crust pastry.
- 12
Mix together the dry ingredients first: cake flour, custard powder, and powdered sugar.
- 13
Add the unsalted butter, evaporated milk and 1 egg. Mix everything together.
- 14
Also place the pastry in the fridge until the custard filling is ready.
- 15
After chilling the custard filling for at least 2 hours, divide the filling and crust into equal portions by weighing them.
- 16
To make 20 mooncakes (75g each), divide the filling into 30g a piece and the crust into 45g a piece. Roll each piece into a small ball.
- 17
Prepare a large baking sheet and place a piece of parchment paper on top. This is for placing the mooncakes after stamping with the mold.
- 18
Place a piece of the crust pastry onto a small piece of plastic wrap. Roll flat or press flat with your hand into a circle of about 3-3.5 inch.
- 19
Place a piece of the custard filling onto the flatted crust pastry. Gather up the corners of the plastic wrap and twist at the top so the crust fully wraps around the custard filling and forms a tight ball.
- 20
Unwrap the mooncake dough from the plastic. Squeeze it a little to form a slightly oblong shape rather than a sphere. The longer shape helps putting into the mooncake mold easier.
- 21
Sprinkle the dough with a bit of flour. Place the dough into the mooncake mold.
- 22
Press the mold onto the mooncake on a flat, hard surface 4-5 times. Release the mooncake from the mold onto the baking sheet. Line the mooncakes neatly.
- 23
Once all the mooncakes are stamped with the mold, place the baking sheet into the fridge to chill for 30 mins.
- 24
Pre-heat the oven to 450°F.
- 25
After chilling the mooncakes for 30 mins, lightly brush all surfaces (top and sides) with the egg wash. Save some egg wash for a second brushing (can be less for mooncake tops only).
- 26
Place the moooncakes onto the oven's middle rack. Bake at 450°F for 6 mins.
- 27
Take the mooncakes out and let them cool down for 5 mins. Keep the oven at 450°F.
- 28
Add a tiny bit of dark soy sauce into the remainder of the egg wash. Use a small, clean paint brush to brush the egg wash onto the pattern of the mooncake surface. No need to brush the sides. This is to highlight the pattern for it to stand out more.
- 29
Bake the mooncakes at 450°F for another 6 mins.
- 30
Mix 1 tsp of honey with some hot water in a small bowl. Brush the warm mooncakes with the honey glaze.
- 31
Let the mooncakes cool down a bit. Enjoy!
- 32
Storage: I suggest placing the mooncakes into the fridge if you can't finish them all within 3 days. For a slightly crunchy crust on following days, reheat and toast the mooncakes for a few minutes before serving.
Cooksnaps
Keywords
Similar Recipes
More Recipes
-
")

-

 Akshita
 -


-


-

Japanese Green Peppers and Enokidake Mushrooms Fry

-

Golden Chicken and Autumn Vegetables

-

Pulao with Sprouted Basmati Rice, Coconut Milk and Vegetables

-

Slow Cooker Spaghetti Bolognese
Cook1999 -


-


-


-


-


-


-


-


-


-


-

Scallops with Garlic Wine Sauce

-

🧑🏽🍳🧑🏼🍳 Thai Spicy Pork Cakes • With Homemade Red Curry Paste Recipe

-


-
")

-


")
 Escabeche")

Comments