
Mulberry Jam
I came up with this recipe after 9 years of experimentation. I wonder if the mulberry tree in the courtyard of my alma mater is still bearing fruit.
Since snipping off the stems does not remove the part that is inside the berry, I've discovered this method. Since the berries are separated from the stem, there's no need for a blender or food processor. Recipe by Iguanano egao
Steps
- 1
Change into clothing that you don't mind getting stained. Mulberry juice spatters everywhere during this process, and is very hard to remove.
- 2
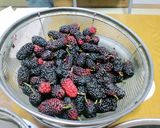
Rinse the mulberries. There will be ants and other unrecognizable critters, so rinse well and drain in a colander.
- 3
Weigh the pot in which you will be boiling the berries.
- 4
Prepare a pair of disposable rubber gloves (I recommend surgical gloves, or other tight fitting ones), and a trash can lined with a plastic bag.
- 5
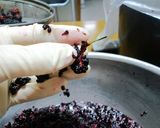
To remove the stems from each mulberry, hold the stem with one hand...

- 6
...and gently massage the berries with the other hand while separating them from the stem.

- 7
Strip them off the stem.
- 8
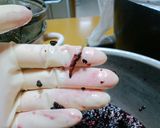
This is the remaining stem. They give the jam a poor texture if not removed.
- 9
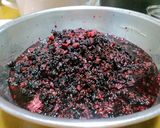
Here are the de-stemmed berries. This amount took me 1 hour to de-stem.
- 10
Place the stem-free mulberries in a pot, then weigh the pot to record the weight of the berries (mine yielded 1,540 g).
- 11
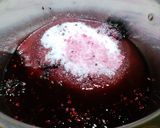
Calculate 60% of that weight and that is the amount of sugar to add (I used 924 g of sugar).
- 12
Let it sit for a while until the sugar blends into the mulberries (since the berries are de-stemmed, this does not take long).
- 13
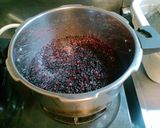
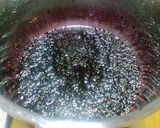
Bring the pot to a boil, then reduce to medium heat. Simmer while skimming off the scum.
- 14
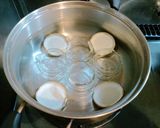
While simmering, boil the jars and lids in water in a separate pot to sterilize.(Be sure to have the jars in the pot before starting to heat the water, because otherwise they will crack.
- 15
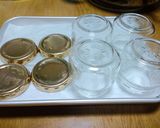
Dry the jars and lids on top of a paper towel.
- 16
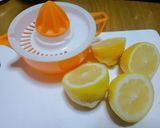
Squeeze out 2 lemons' worth of juice (I yielded 75 ml).
- 17
Once the jam starts to thicken, add the lemon juice, bring to a boil, then remove from heat.
- 18
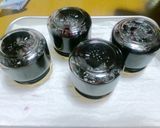
Put your gloves back on, transfer the jam to the jars while hot, then tightly seal the lids.
Cooksnaps
Did you know that you can import recipes from anywhere into Cookpad with one click?
https://blog.cookpad.com/us/cookpad-recipe-import-feature-save-recipes-from-anywhere/
Download Cookpad app to plan your meals and store your cooking ideas in one safe place! https://cookpad.wasmer.app/us/download
Top Search in
Keywords
Similar Recipes
More Recipes
-
 Ricotta Panna Cotta")

-

Aaliv Ladoo - Garden Cress Seeds Ladoo

-


-


-

-


-


-


-

Non-Fried Egg Yolk & Veggies Pakora

-


-


-

Buffalo Chicken Cheddar Cheese Balls

-


-

Super Yummy Vanilla French Toast

-

Easy whipped strawberry frosting

-

sunshine 's easy light vanilla ice cream

-

Fava Beans, Avocado and Tomatoes in Basil Sauce

-

Nanohana & Shimeji Mushroom Namul
-

Homemade Vegetable and Fruit Chutney
-

-
")
Pan-fried Xiaolongbao for Father's Day by Dad (Me)
-


-
")


Comments