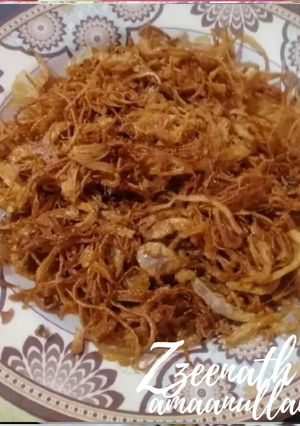
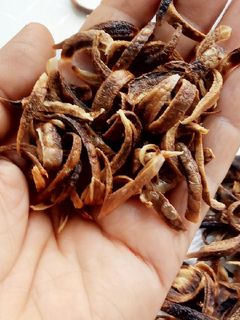
Birista/Deep Fried Sliced Onions
#tech2
A very basic recipe that comes handy at many a times when we require some quick alternatives. This is exactly one such basic recipe that i wanted to share with you all. These fried onions or Birista can be put to umpteen uses. Biryanis, Pulaos, Dum Ka Chicken, Chicken Korma, Mutton Korma, Chicken or Mutton Daleem, Murgh Musallam etc. It can be deep fried in advance and stored in the refrigerator to use later. And last but not the least, these are used in Hyderabad's famous Urad daal dish called Maash ki daal which is served mainly for breakfast with sliced fried onions alongside. Happy Frying !
Cooking Instructions
- 1
Heat Oil on a medium high heat until the onions are sliced. Do not do it on a high heat at all. Otherwise they get burnt and the colour will be dark.
- 2
Slice the onions as thinly as possible. I have used a slicer for this. Fry them in hot oil on a medium high heat only keeping an eye on them all the while. Keep turning every now and then so that they are fried evenly.

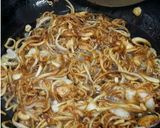
- 3
As soon as you reach this point when they are almost done by 95% as seen in the pic below,switch off the heat. Keep turning them and immediately drain them on an absorbent paper and spread them. Using your hands, separate them all because some tends to stick. Let them cool down a bit so that they get crispy. This is all really for use now.
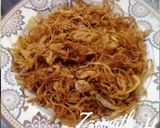
- 4
An excellent and important tip in this regard is that after they are done, spread them on a plate in order to separate all of them properly and then pop in the Freezer for about 5 minutes. Remove them and use as required. They will get super crispy.
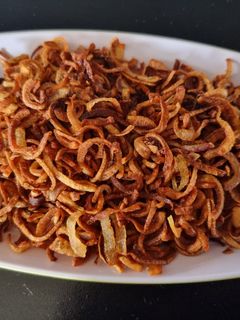
- 5
These can be done in large quantities and stored in ziplock bags in the Freezer for almost an year. You will definitely save on a lot of time and efforts. And also remember not to throw away the Oil in which they are fried. It's very flavourful and hence can be used in Curries and Gravies.
Cooksnaps
Did you make this recipe? Share a picture of your creation!

Similar Recipes
-
Barista (fried onions) and veg Biriyani Barista (fried onions) and veg Biriyani
#mybestrecipe #biriyaniBarista is sliced onion dip fried till they turn crisp and golden. It's a key ingredient in Biriyani. But it can also be used to enhance the taste of a dish such as to make brown punjabi gravy or just sprinkle it on bataka Paua, noodles etc. Barista is used to enjoy the sweetness of the onions.Recipe source: Your Food Lab. Veg dum biriyani
-
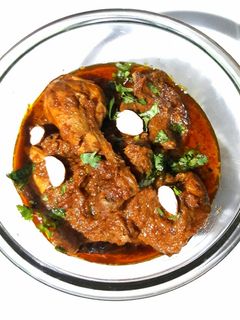
Chicken Korma Chicken Korma
Chicken Korma is a Mughlai-style curry dish typically made with yogurt, plenty of nuts, and spices. In this recipe, chicken is cooked with spices, fried onions, and yogurt. With the flavors of saffron and kewra, this chicken korma is a perfect dish for a family dinner party.
 Translated from Cookpad India
 -

Microwave Sweet Onion and Thinly Sliced Pork Rolls Microwave Sweet Onion and Thinly Sliced Pork Rolls
I created a main dish item using seasonal sweet onions that are easy to eat for toddlers. ♪You can adjust the cooking time to your liking. Serve with a little ichimi togarashi red chili powder sprinkled on top if you like. ☆ Recipe by Ringytrin
-
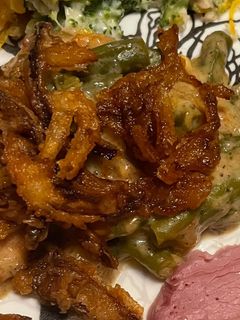
Green bean casserole with homemade fried onions Green bean casserole with homemade fried onions
Using fresh green beans with homemade fried onions definitely tastes better than the canned in the casserole.
-
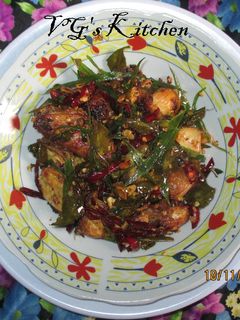
Chicken Catch (AYAM TANGKAP) Chicken Catch (AYAM TANGKAP)
Chicken is the most favorite dish in Indonesia and even the world, and each region has its own characteristic way to cook chicken. Chicken is a food that can be cooked in different variations --- baked, fried, or steamed --- but all are equally delicious, like this recipe from Aceh named “AYAM TANGKAP” (Chicken Catch).This typical dish from the region of Aceh is fried chicken served with leafy herbs. People say that the habit of eating Chicken Capture has become the culture of the Acehnese. So if you are on vacation in the Veranda of Mecca (Aceh), there are lots of famous restaurants that cook this dish. But arguably, this cuisine is still less popular and somewhat more difficult to find a vendor compared with, for example popcorn fried chicken or seasoned fried chicken.Making Ayam Tangkap is quite easy - just a few basic ingredients, along with natural ingredients that make this dish even more special. First, the chicken is flavored before frying (you can just soak it in the spices, or boil briefly with the spices).According to the story, the inventor of this recipe should catch the chicken first before cooking --- because that process was unique, and so it was called Ayam Tangkap. This dish much better if using chicken that's cut into small sizes, so the marinade can seep up into the meat.Ayam Tangkap doesn't seem attractive at first glance, because it's served with the dried herbs that are eaten with chicken. But the delicious fried chicken is wrapped in the scent of various leafy spices that give it a distinctive and tasty flavor. Looks might not be great, but this Ayam Tangkap with it's marinade make it perfect if used as a side dish when eating rice.I think it would also be nice if used for menu when celebrate #THANKSGIVING…
-

Potato Salad with Fried Onions Potato Salad with Fried Onions
I added the fried onions, which I often keep saved in the fridge, in a potato salad.I mix the ingredients in a plastic bag since I can feel the doneness by touch. One less dish to wash. Corn is great for this salad but any ingredients you see in potato salads, like cucumbers or ham, would be nice too! Recipe by yoco152 -
Fried Onions (Barista) in Microwave Fried Onions (Barista) in Microwave
#oven#ebook#Post17#teamtrees#onerecipeonetreeFried Onions also known as "Barista", are full of flavours and enhances the taste of Biryani. Biryani is incomplete without fried onions.Fried Onions or Barista made in microwave just takes 10 mins and requires very less oil.Results are same as we get by deep frying onions.Crispy and golden brown in colour but oil free. Shah")
-

Deep-Fried Sandwiched Sweet Onion and Sweet Miso Deep-Fried Sandwiched Sweet Onion and Sweet Miso
Since sweet onions in season cook through quickly, I tried out this recipe to feature their fresh sweetness by deep frying thick slices of them.When sweet onions are in season, they cook through quickly. You can truly enjoy the sweetness of the onions when they're fried this way. Since these are skewered with toothpicks, the rings will stay together, making dredging a lot easier. Recipe by kebeibiko -
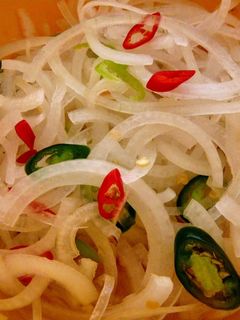
Vietnamese Style Onions in Vinegar (Hanh Dam) Vietnamese Style Onions in Vinegar (Hanh Dam)
You won't always get these thinly sliced onions in vinegar (pronounced hang DZUHM) when you order your pho, but if you ask for them, your waitperson will probably be pleasantly surprised that you did.And you will probably be pleasantly surprised by the delicious savorycrunchytangy contrast they bring to your pho experience. :)I like to add thinly sliced fresh chilies to mine. On the day I made these, it was Thai birds and Serranos.Any leftovers are delicious in sandwiches and salads.
-

Non-Deep-Fried! Pork, Shiso Leaves, and Cheese Rolled Cutlets Non-Deep-Fried! Pork, Shiso Leaves, and Cheese Rolled Cutlets
I wanted to add to my non deep-fried series of recipes.You can cook these in a toaster oven for 15-20 minutes too! Make sure to constantly stir the breadcrumbs when pan frying. For 16 cutlets. Recipe by EnjoyKitchen -

Pork Belly with Sweet and Sour Onion Sesame Sauce Pork Belly with Sweet and Sour Onion Sesame Sauce
I really love fried chicken topped with onion and sweet and sour sauce. So, I tried a pork version.I think this sauce could be used in many dishes. It goes well with fried chicken and would give a deliciously mild taste to shredded vegetables. You can also use thinly sliced pork. Recipe by Raby -

Habanero Turkey Melt Habanero Turkey Melt
Love good sandwiches with sweet and spice saw these ingredients and said why not give it a shot and to my surprise it turned out amazing lol.. I will publish my pickled onions recipe later on today for this recipe or just use your own that you like just needs to be sweet

More Recipes

Comments (6)