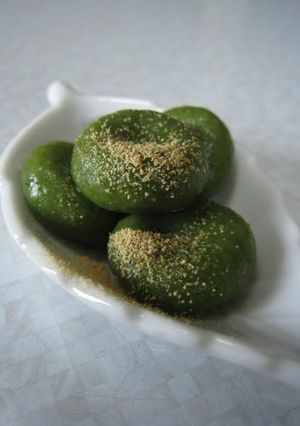
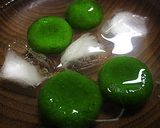
Yomogi Shiratama Yomogi Dango For Beginners
Enjoying the yomogi which I picked when I went for a walk with a standard taste.
You can enjoy it from just a little amount.
The amount would change with the amount of yomogi and the amount of water squeezed out. But this time, 1 tablespoon of ground yomogi + 3 tablespoons of flour + 20m water, I was able to make 8 mini shiratama.
I didn't want to wash dishes so I kneaded it in the mortar. But you can also mix in another bowl too. But sticking the yomogi to the dough would be the same. Recipe by one_k
Steps
- 1
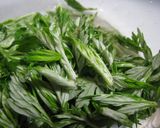
For the yomogi, pick the young sprouts which the back of the leaf is white and soft. It is a bit of work to chop, so I take off the soft stem too.
- 2
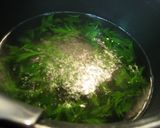
Boil the yomogi. The young sprouts which you can get until May is less bitter, so add a pinch of salt and boil for 1 minute. For the ones which is not a young sprout, add baking soda but add just a little bit.
- 3
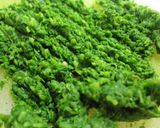
Soak in water to fix the color. Then squeeze and mince. You wouldn't be able to cut the small fibers so it will feel like you have a paper spread underneath.
- 4
Grind using a mortar. If you do Step 3 carefully, this process will be done in no time. There would be some fibers left but never mind about the small ones.

- 5
Cut corners here. Add flour in the mortar. Add water little at a time and adjust.
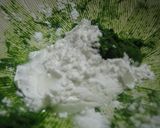
- 6
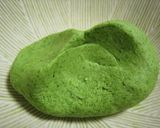
Knead all the yomogi even from the ditch and let it become as soft as earlobes at the end. Then you will have a green paper clay ready.
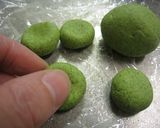
- 7
Round it and make a little dent.
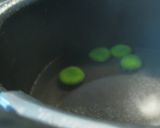
- 8
Drop into boiling water. When it comes floating up to the surface, boil for 1 minute and then take them out. It will be even better if you adjust the fire level to be like boiling (medium heat) and floating (low heat)!
- 9
Put in cold water. It is difficult to see in this picture, but the color will be more green than at Step 6 and 7.
- 10
Enjoy with the flavor you like, such as roasted soy beans flour (Kinako) It would be more fancy it you top it with ice cream. It is also possible to freeze. Defrost by boiling.
Cooksnaps
Did you know that you can import recipes from anywhere into Cookpad with one click?
https://blog.cookpad.com/us/cookpad-recipe-import-feature-save-recipes-from-anywhere/
Download Cookpad app to plan your meals and store your cooking ideas in one safe place! https://cookpad.wasmer.app/us/download
Similar Recipes
More Recipes
-


-


-


-


-


-


-

")
-

sunshines caramel apple cheesecake

-

Simple,Easy pasta and shrimp by Pam...

-

Potato and Ground Beef Burritos

-

Vickys Flourless Black Bean Brownies, GF DF EF SF NF

-


-


-

Personalized Pasta-Style Instant Ramen

-

Noodles in Tomato Sauce Made with Instant Ramen
-

Easy Sherbet with Egg White & Apple Juice
-

Authentic Kyoto Style Komatsuna and Fried Tofu Stir Fry
-

Fluffy and Rich Kinako Soy Flour Mousse
-

Spinach and Tofu Onion-Miso Gratin
-


-


")


Comments