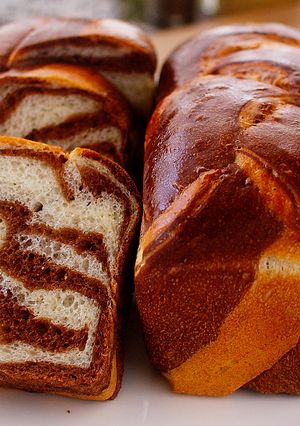
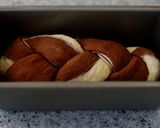
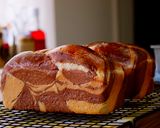
Mini and Cute Cocoa Marble Bread | used two loaf pans
How to make Mini and Cute Cocoa Marble Bread, used two 18 cm / 7-inch loaf pans. Basic white bread dough, so it goes well with all dishes.
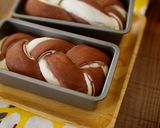
Mini and Cute Cocoa Marble Bread | used two loaf pans
How to make Mini and Cute Cocoa Marble Bread, used two 18 cm / 7-inch loaf pans. Basic white bread dough, so it goes well with all dishes.
Steps
- 1
My You tube Recipe Channel→ Fumie's Recipe
https://youtu.be/ICSq612UuXU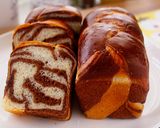
- 2
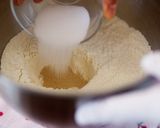
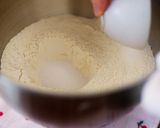
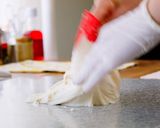
Warm the water until it reaches 40℃ / 104 F. Crush the lumps of dry milk and make it powder-like. Put bread flour and dry milk in a large bowl, and stir well. Make a dent and put sugar and dry yeast into it. Add salt to the edge away from the dry yeast.
- 3
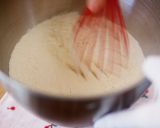
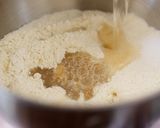
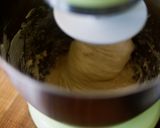
First, pour lukewarm water over the sugar and dry yeast, and then pour over the flour while drawing circles. Roughly mix with a spatula until the dough almost comes together. Knead it for 2-3 minutes at speed 2. (I used KitchenAid Artisan 3.3L.)
- 4
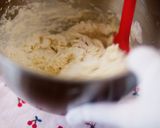
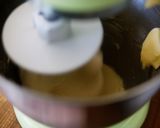
Then knead for 10 minutes at speed 4. In the middle of kneading, remove the dough from the hook, and turn it over. (Knead for 5 minutes, turn over and knead again for 5 minutes.)

- 5
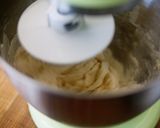
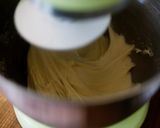
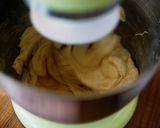
Add the softened butter, and turn up the speed for a short time until the dough holds together. Then knead for 10 minutes at speed 4. In the middle of kneading, remove the dough from the hook, and turn it over. (Knead for 5 minutes, turn over and knead again for 5 minutes.)
- 6
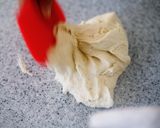
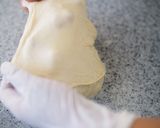
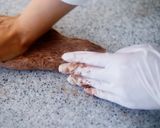
Put the dough onto a work surface. Use your hand and scraper to bang down the dough against the work surface hundred times. Stretch gently one part of the dough thinly. It's ready if it doesn't tear.
- 7
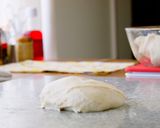
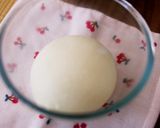
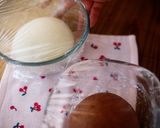
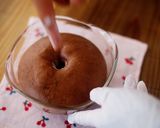
Use a scraper to split the dough into two parts, and shape 300g / 10.6 oz of the plain dough into a ball while stretching the surface. Put it in a lightly oiled medium bowl. Add the cocoa over the other dough and knead until smooth. Shape it into a ball while stretching the surface and put it in another lightly oiled bowl. The surface should be smooth and elastic.
- 8
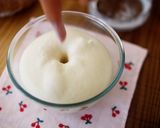
Cover it with cling wrap and let it rise at 35℃ / 95 F (or a warm place) for 40-60 minutes until doubled in size. Finger Dent Test! Press your floured finger into the dough. It's ready if the dent springs back a little and it stays without filling in.
- 9
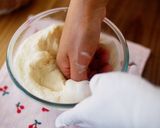
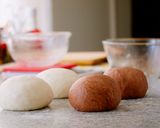
Punch down the dough, and divide each in half. Shape each into a ball while stretching the surface. 2 plain balls, and 2 cocoa balls. Cover them with a tightly wrung wet cloth and leave for 15 minutes.

- 10
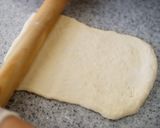
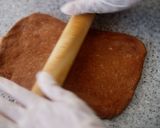
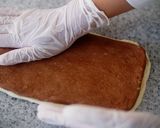
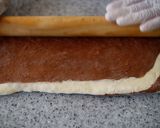
Flour the dough and your rolling pin. Press down a plain ball and roll it out into a rectangle, about 13 × 18cm, 5'' × 7''. Press down a cocoa ball and roll it out into a little bit smaller rectangle. Lay the cocoa dough on top of the plain dough. Press it to stick.
- 11
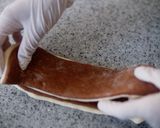
Divide in half lengthwise, lightly brush with water on the top of one surface, and lay the other over. It should stack plain and cocoa alternately. Make two sets. Cover them with a tightly wrung wet cloth and leave for 10 minutes.


- 12
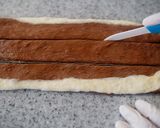
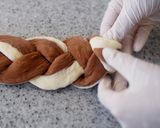
10 mins later, flour the one dough, and roll it out into a rectangle, about 13 × 30 cm / 5 × 12 inches. At this time, the plain and cocoa dough should stretch unevenly. Divide it into 3 equals lengthwise, remaining a little space on the top. Braid them, not too tight, not too loose.
- 13
Pinch the edges to stick together. Fold it in half and place it in a lightly oiled loaf pan. Braid the other dough in the same way and place it in another loaf pan.
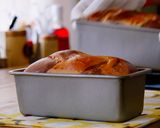
Let it rise at 40℃ / 104 F (or a warm place) for 30-40 minutes until the top of the dough is a little higher than the height of the pan.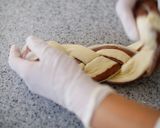
- 14
Preheat the oven to 210℃ / 410 F. Brush on the top with egg wash. Turn down the oven to 190℃ / 374 °F and bake it for 25 minutes until golden brown.
Drop the pan to prevent shrinkage. Remove the bread from the pan and cool it down on a rack.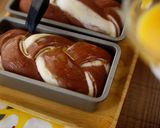
Keywords
Similar Recipes
More Recipes
-


-

-

-


-


-


-


-

Chocolate Peanut Butter Cookies

-

Ragi Pakoda / Bhajia - New Style Snacks Recipe

-


-


-

-


-

-
-
-


-

-


Comments (2)