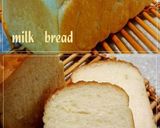
Hand-kneaded Milk Pullman Loaf
I had some leftover milk that was close to its best-by date. I wanted to use it up, so I used it instead of water!!
If you do Step 1 properly, it goes much more smoothly from that point on.
You don't really knead the dough much after adding the butter.
Don't handle the dough too much after it's risen, and be careful not to let it dry out.
I've tried to make this recipe as easy as possible to follow. For 1.5 square loaves (1 long pullman loaf). Recipe by inyako
Steps
- 1
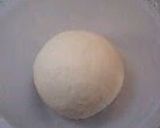
Add all the ingredients except for the butter, salt and half of the flour in a bowl, and mix it well with a wooden spatula very well until it has the consistency of taro root. Do this for about 5 minutes before proceeding.
- 2
After kneading the dough for about 5 minutes with a spatula, add the rest of the flour, the salt, and the butter and mix them in. When the dough is no longer floury, take it out onto a work surface and knead until it comes together into a smooth ball. Leave to rise (1st rising) for about 30 minutes, covered.
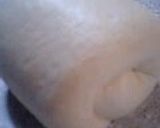
- 3
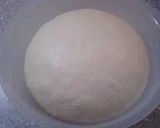
Here it is after the 1st rising. Looks great!
- 4
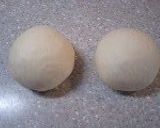
Deflate the dough and divide into two. Leave to rest for several minutes, covered so that it doesn't dry out.
- 5
Here's how I normally fold it.
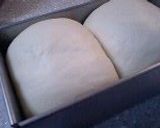
- 6
Lightly butter a square bread pan, and put in the dough. Leave for the 2nd rising (about 30 minutes plus).

- 7
This is how it looks after the 2nd rising.
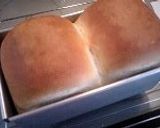
- 8
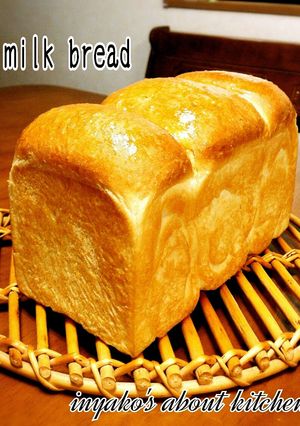
Preheat the oven to 180°C, and bake for 30 minutes. Finish by baking for 10 minutes at 200°C (cover the top with aluminium foil to prevent it from burning).

- 9
It's done! Rap the sides and bottom of the bread pan with oven mitt covered hands to release excess steam, and take the loaf out of the pan.
- 10
Let the bread cool down, then store in a plastic bag.
- 11
- 12
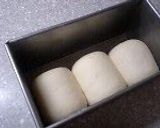
Another way to form the loaf. Divide the dough into thirds...

- 13
Place them into the pan and let rest for the second rising.
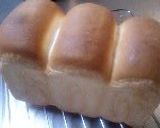
- 14
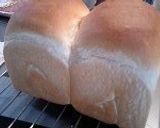
Baked!
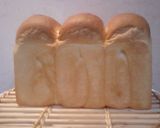
- 15
Here's what it looks like from the side.
Cooksnaps
Did you know that you can import recipes from anywhere into Cookpad with one click?
https://blog.cookpad.com/us/cookpad-recipe-import-feature-save-recipes-from-anywhere/
Download Cookpad app to plan your meals and store your cooking ideas in one safe place! https://cookpad.wasmer.app/us/download
Keywords
Similar Recipes
More Recipes
-


-


-

Jowar Flour Idiyappam and Veg Kurma 😋

-


-

Honey-Glazed Pork Ribs with Roasted Brussels Sprouts

-


-


-


-


-


-


-

-

Super AMAZING n' EASY Garlic Cheese Bread

-


-

Pain au Chocolat des Parisiennes

-

-

Homemade Pizza Made With Easy Pizza Crust~
-


-

-

Walnut Bread Kneaded in a Bread Machine
-


-

Chocolate Pain de Campagne with Coconut and Nuts
-


")

Comments