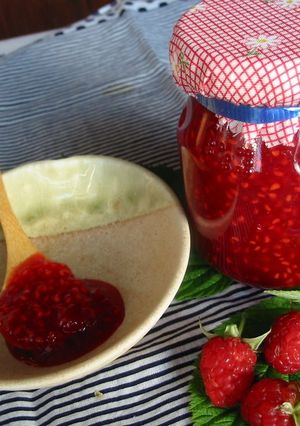
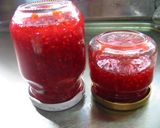
Raspberry Jam
I started growing raspberries and blackberries last year. This is the first jam I've ever made and I am addicted to its deliciousness.
The fragrance and flavor is great if you use granulated sugar. I usually use lemon juice. I used citric acid once because I read in a book that it really brings out the savory flavor of the fruit, but I couldn't really tell any difference. (Apparently you can substitute lemon juice for kiwi or fig) You should use a pot that can withstand acidity, such as an enameled or stainless steel pot (thought enameled is best). This is quite sweet and sour, so if you want a sweeter jam, taste it in Step 4 and adjust the amount of sugar. Recipe by Genpokin
Steps
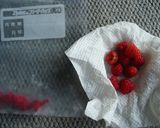
- 1
If you're able to gather the berries bit by bit, then wash them well. Pat dry with a towel, place into a freezer baggie, and freeze for later. Once you have enough berries, you can make the jam. (If you only want to make a small amount, blast in a microwave.)
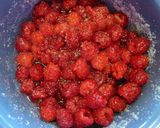
- 2
Place the raspberries, granulated sugar, and citric acid (lemon juice) into a pot. Mix them in without shaking the pot. Cover and leave for 30 minutes. If using frozen berries, use them as is.

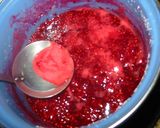
- 3
The berries will release some juice. Turn the heat to low and start cooking. After 5 minutes, more juice will be released, so stir it up with a wooden spoon. Simmer for 10 minutes while occasionally stirring. (Watch the pot so it doesn't boil over.)
- 4
After Step 4, increase the heat to medium or high heat to let the scum rise to the surface. Remove the scum just once. Use a wooden spoon to stir until it reaches your preferred thickness. While still hot, pour into a sterilized jar and flip it upside down to cool.
- 5
As it cools, it will thicken even more, so you should stop cooking it while it is still runny. If it seems too watery after it has cooled, boil it again.
- 6
You should wash the jar well and rinse it with hot, just-boiled water beforehand. The best method might be to boil it. We usually finish ours in a couple of weeks, so I can't say exactly how long it'll keep!
Cooksnaps
Did you know that you can import recipes from anywhere into Cookpad with one click?
https://blog.cookpad.com/us/cookpad-recipe-import-feature-save-recipes-from-anywhere/
Download Cookpad app to plan your meals and store your cooking ideas in one safe place! https://cookpad.wasmer.app/us/download
Keywords
Similar Recipes
More Recipes
-


-


-


-


-


-

Spinach Stuffed Pork Loin Chops

-


-


-
")
Amazing Brigadeiros (You'll be hooked)

-

-


-

My Husband's Favorite Mushroom Cream Soup

-

Brie, Pear, Cranberry, and Walnut Salad
-


-
")
Raspberry Sauce (Raspberry Purée)
-

Quick & Tasty Colacasia/Chemmagadda/Chemmadumppa Fry

-

-

-

-

-

Early Summer Appetizer Chicory and Vegetable Bouquet

 Biryani Recipe | Royal Mild Dum Biryani (Home + Professional Style)")


Comments