

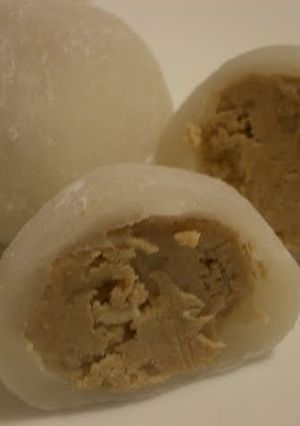
White Chocolate Daifuku with Walnuts and Kinako

I thought of this recipe for a sweets contest using walnuts. I knew that mochi with walnuts is delicious, but I wanted to make this combination even more delicious.
Boiling the heavy cream will cause it to separate, so do not let it boil.
Be quick after Step 10, as it dries out quickly!! If you can't shape the daifuku well, use plastic wrap. It's better to avoid reheating these in the microwave even they have hardened...it may be better to use mizuame instead of sugar water. Recipe by Tanpopo coffee
White Chocolate Daifuku with Walnuts and Kinako
I thought of this recipe for a sweets contest using walnuts. I knew that mochi with walnuts is delicious, but I wanted to make this combination even more delicious.
Boiling the heavy cream will cause it to separate, so do not let it boil.
Be quick after Step 10, as it dries out quickly!! If you can't shape the daifuku well, use plastic wrap. It's better to avoid reheating these in the microwave even they have hardened...it may be better to use mizuame instead of sugar water. Recipe by Tanpopo coffee
 Open in Cookpad App
Steps
- 1
{Day 1: Make the filling} Heat the heavy cream in a saucepan, and turn the heat off just before it boils. Let it cool.
- 2
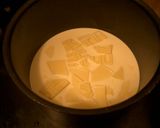
When the heavy cream cools down to slightly hotter than bathwater temperature, break the white chocolate into it. Mix well to melt.
- 3
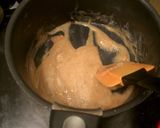
Add the milk and kinako, and mix well. It's better to make a smooth consistency without lumps, but if it's still got some lumps, it's ok.
- 4
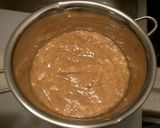
Add the chopped walnuts and mix some more.

- 5
After it has cooled off a bit, put it in the fridge to set. Once the filling has set a little, mix well to remove any kinako lumps.
- 6
{Day 2: Make the daifuku} Take the filling out of the fridge, and divide it into 6 portions. Form into balls.
- 7
Microwave the mochi one at a time for 30 seconds to soften. Then put all 3 softened mochi on a plate, and pour the sugar water over them.

- 8
Microwave for 30 seconds and knead. Then microwave for 30 seconds more and knead again. If the mochi start swelling, stop the microwave and knead. And back to the microwave again for another 30 seconds.
- 9
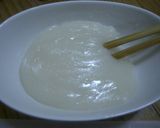
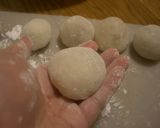
Repeat the process in Step 8 until the mochi form one big mochi without joints, like in this picture.
- 10
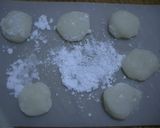
Dust the mochi and your hands, and divide the mochi into 6 balls. Then press into flat, round shapes. It's hot, so be careful!
- 11
If you can't work quickly with the hot mochi, cover with plastic wrap to prevent it from drying out.
- 12
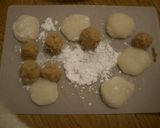
Get out the balls of filling.
- 13
Place the filling on the mochi and wrap. Bring the edges of the mochi towards the middle and pinch them together.

- 14
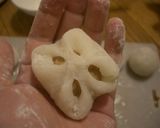
Bring the diagonal edges to the middle to wrap the filling, as shown in this picture. As you continue this step, the joints will disappear little by little.
- 15
Turn the joint side down, and dust the daifuku all over with flour. Then lightly wipe to remove any excess flour. Neaten the shape nicely, and they're all done!
- 16
The daifuku turn hard once they start to dry, so please wrap them with the plastic wrap right away. Wrap from the top of the daifuku and cinch the edges at the bottom.
Cooksnaps

Did you know that you can import recipes from anywhere into Cookpad with one click?
https://blog.cookpad.com/us/cookpad-recipe-import-feature-save-recipes-from-anywhere/
Download Cookpad app to plan your meals and store your cooking ideas in one safe place! https://cookpad.wasmer.app/us/download
Keywords
Similar Recipes
More Recipes
-


-

लौकी और कच्चे केले से बना फलाहारी सेहतमंद कटलेट।

-

Anda Ghotala (Surat Street Food)

-

-

-

Soft Pancakes for a Slow Morning 🥞

-

-
Salty Carmel Peanut & Pretzel Bars

-
Vickys No-Bake 'Nutella Cheesecake', GF DF EF SF Nut-Free Option

-


-

-
Namafu Manju (Wheat Gluten and Mochi Cakes)

-
 Lora Ellis
 -

Vickys Coconut 'Cream Cheese', GF DF EF SF NF
-

-

- kajal.dalal01
-
 mamabovee
 -











Comments