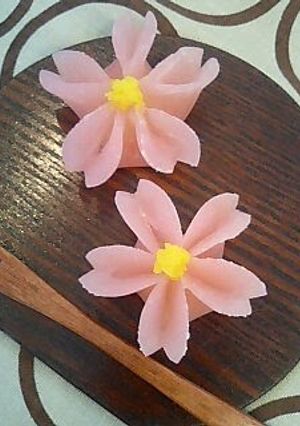
Elegant Japanese Sweets (Jo-Namagashi) for Spring
I wanted to make adorable Japanese sweets that were perfect for spring, so I did some experimenting with uiro dough, trying to make it not too stiff but not too soft. Finally, I thought it looked about right, so I uploaded the recipe.
If you need to re-shape the dough, roll it into a ball, cover it with plastic wrap and microwave it for 30 seconds, then stretch it out. If you have too much of the shiro-an, it'll stick out of the sides, so be sure to match the amount of bean paste to the size of the circle of dough. My microwave is 600w, but yours may differ, so please adjust the microwave time in step 3 accordingly. The grains of flour shouldn't be visible, and it should be springy. When the dough dries out it gets hard, so you may want to cover it with plastic wrap while you're working. Recipe by Shiropiyo
Steps
- 1
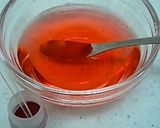
Place the ingredients marked with a ☆ into a microwave-safe bowl. Dilute the red food coloring with the water in a separate bowl.
- 2
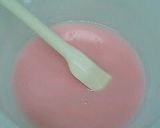
Add the colored water into the bowl with the dry ingredients a little bit at a time, mixing well so that no lumps form.
- 3
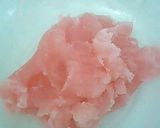
Cover with plastic wrap and microwave for two minutes. Remove and stir well, then cover and microwave for one more minute. This will produce a springy dough.
- 4
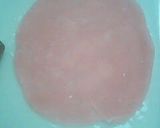
Roll the dough out on a surface dusted with the katakuriko while it is still warm. It should be about 2-3mm thick.
- 5
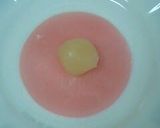
Using a round cookie cutter or a cup, cut out a circle of dough. I used one that was 8cm in diameter. Place about 5g of shiro-an, rolled into a 2cm ball, in the middle of the circle.
- 6
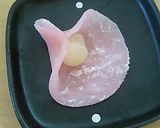
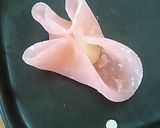
Create the petals by bringing the sides together. Here's how to form the first petal.
- 7
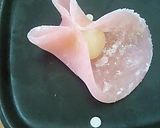
Forming the second petal.
- 8
Forming the third petal... Now it's starting to look like a flower!
- 9
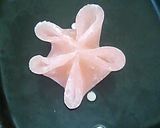
When you've brought the fourth and fifth petals together, pinch the middle part together firmly enough that it all stays together.
- 10
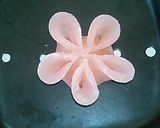
Use your finger to open up each petal, making them nice and round.
- 11
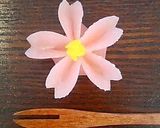
If you use kitchen scissors to cut a notch into the end of each petal, it will look even more like a cherry blossom. Place a bit of shiro-an mixed with yellow food coloring in the middle of each flower to make the stamens. Now they're ready to serve.
Cooksnaps
Did you know that you can import recipes from anywhere into Cookpad with one click?
https://blog.cookpad.com/us/cookpad-recipe-import-feature-save-recipes-from-anywhere/
Download Cookpad app to plan your meals and store your cooking ideas in one safe place! https://cookpad.wasmer.app/us/download
Keywords
Similar Recipes
More Recipes
-

Francesco’s Crying Tiger Pork Chop

-


-


-


-


-

Spicy Mutton Masala or Aloo Gosht

-


-


-

Buffalo Chicken Cheddar Cheese Balls

-


-

Super Yummy Vanilla French Toast

-

Honey-Marinated Cherry Tomatoes

-

Mexican Fiesta Chicken - Edited

-

-

Authentic Turkish Flavor - Fried Zucchini
-


-

Addictive Bibimbap Made in a Frying Pan
-
 jrtoy
jrtoy


 Straight From a Professional Chef")


Comments (2)