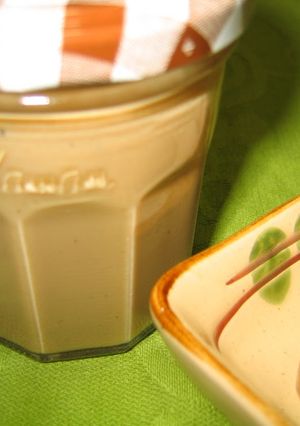
Macrobiotic Soy Milk Tea Jam
I used the idea from "Milsuke"'s Milk Jam and "Hironozomiyuuma"'s Condensed Milk recipe. I wanted the jam to be macrobiotic, so I tried making it delicious while using non-flavored soy milk and beet root. It is also a jam that will be good for a gift. Secretly, I am proud of it.
I recommend using earl grey tea which has a strong flavor.
Simmering the hull of the vanilla beans will reduce the soy milk-like flavor. Do not omit this process.
It is hard to tell when the jam is ready. If you can see the bottom of the pan for just one second when you scrape the bottom of the pan, it has the consistency of a condensed milk. If you can see the bottom of the pan for about 2 seconds, it has the right consistency for a jam. Adjust the consistency to your liking.
Do not take your eyes off the pan once you start making it and continue stirring while cooking. Recipe by Meifan
Steps
- 1
About the size of the pan, I used Le Creuset cookware. A 20 cm round cocotte will be the perfect size for 500 ml soy milk. A 20 cm pan will be too small if making the double amount with 1 liter of soy milk. 24 cm was the perfect size for 1 liter.
- 2
Portion out the tea into strainers if not already in bags. Wet an empty jam jar with water, and heat it up for 1 minute in a 600 W microwave. Let the jar dry naturally. (This will be the sterilizing.)
- 3
Put all ingredients except the tea leaves in a pan. Add the vanilla beans still inside their hull. Heat over medium heat. Continue mixing to melt the sugar.
- 4
Reduce the fire to a slightly low heat when the mixture comes to a boil. Put the tea leaves in the pan, simmer for 5 minutes and then take the tea leaves out. Simmer for another 5 minutes and then take the vanilla beans out. Continue stirring and simmer for a while.
- 5
Take out the vanilla beans from the hull and put the beans back into the pan.
- 6
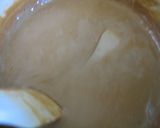
Turn up heat to medium and continue stirring with a wooden spatula. After 15 to 20 minutes, when the mixture is thick enough that you can see the bottom of the pan for about 1 to 2 seconds after scraping it with the spatula, it's ready.
- 7
If you keep the jam in a sterilized jar, it can be stored for 1 month.
- 8
If you don't add any tea leaves, you'll have a soy milk jam, which is delicious as well. Give it a try! In that case, take out the hull of vanilla beans 10 minutes after the mixture comes to a boil. Of course, the flavor will definitely improve if you put the vanilla beans back into the pan.
Cooksnaps
Did you know that you can import recipes from anywhere into Cookpad with one click?
https://blog.cookpad.com/us/cookpad-recipe-import-feature-save-recipes-from-anywhere/
Download Cookpad app to plan your meals and store your cooking ideas in one safe place! https://cookpad.wasmer.app/us/download
Keywords
Similar Recipes
More Recipes
-


-
")
Lauki Thalipeeth (Bottle Gourd Flatbread)

-


-

 Karthikeyan Nanjanavaram
 -
")
Easy Homemade Naan (Pan Method)
Phenny Sharon -
 Cook1999
 -


-


-

Vickys Homemade Pop Tarts / Toaster Pastries, GF DF EF SF NF

-

low calorie Ranch cheddar turkey burgers

-

low calorie vegan almond milk ice cream
-

For Cherry Blossom Viewing Bento Sakura Wine Jello

-

*Carrot Kinpira Stir-fry * For Bento Boxes *
-

-


-

Garlic Toast Breakfast Sandwich
-

Bacon, Tomato & Artichoke Pasta
-

-

-


")


Comments