 Authentic home cooking from Taiwan, with US measurements.
Napa Cabbage Potstickers
Fourth week challenge ingredient: Napa cabbage
It’s funny—I’ve been pretty chill about this challenge, but I just happened to have all the ingredients for week four. I was also seriously craving potstickers, so this recipe came together, and it turned out delicious!
Note: Napa cabbage in the US is huge, but it tastes pretty much the same as the kind in Taiwan.
Steps
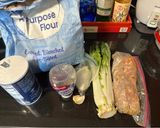
- 1
Gather all the ingredients and take a group photo if you like. Then put everything back except the flour and salt—we’ll start with the potsticker wrappers.
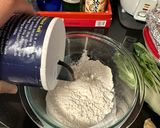
- 2
Add the flour and salt to a bowl, then pour in the warm water and mix until a dough forms. (Don’t worry, the water isn’t too hot.) The dough doesn’t need to be perfectly smooth.

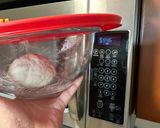
- 3
Cover the bowl and let the dough rest at room temperature for 1 hour. (Optional: take a photo with your timer!)
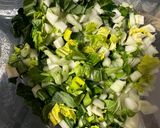
- 4
Next, prepare the Napa cabbage for the vegetable filling. Chop it into small pieces, add the salt for dehydrating, and let it sit until it releases water.
- 5
Put all the pork filling ingredients into a food processor and blend until ground. If you don’t have a food processor, it’s worth getting one!
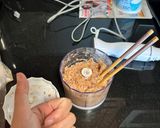
- 6
Finely chop the onion and garlic, or you can add them to the food processor to mince together.
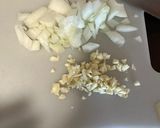
- 7
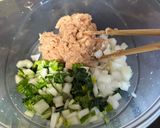
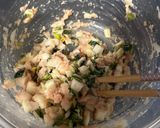
Drain the water from the Napa cabbage, rinse off the salt, and pat dry. Mix the pork filling and vegetable filling together until well combined.
- 8
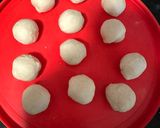
Once the dough has rested, divide it into 12 small pieces (about 19 grams each). Roll each piece into a smooth ball.
- 9
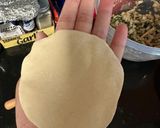
Dust your work surface, dough balls, and rolling pin with enough flour to prevent sticking. Roll each ball into a wrapper about palm-sized, with thinner edges and a slightly thicker center.
- 10
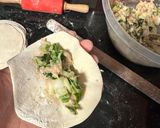
Place a log-shaped portion of filling onto each wrapper. Don’t overfill or it’ll be hard to seal; don’t underfill or they’ll taste empty.
- 11
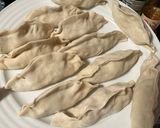
Dip your finger in water and moisten the edge of the wrapper to help seal the potstickers. After making all 12, take a photo if you like.
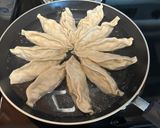
- 12
Heat a little oil in a skillet. Arrange the potstickers in a circle. Use the largest skillet you have—mine was a bit crowded this time! If you want crispy “lace” bottoms, mix some flour with water and pour it in, or just add water like I did. Add enough water to come about 1/4 of the way up the potstickers.
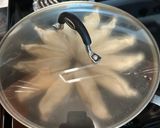
- 13
Cover with a lid and cook on low heat until the water is almost gone. Remove the lid and continue cooking until the bottoms are as crispy as you like.
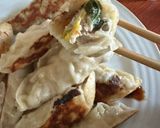
- 14
After all that hard work, it’s finally time to enjoy!
Cooksnaps
Keywords
Similar Recipes
More Recipes
-

Chicken Pesto Stuffed Portobello Mushrooms

-


-
")
Aloo Paratha (Stuffed Flatbread)

-


-

Refreshing Summer Onion & Tomato Salad

-


-


-


-

California Farm Air Fryer Bread

-

California Farm Rotisserie Chicken in the Air Fryer
-


-


-

California Farm Air Fryer Rack of Lamb Dinner
-


-
-


-


-

-


-


-


")


