Easy chocolates, fasting or milk + chocolate spread
A recipe for delicious, melt-in-your-mouth or chewy chocolates + chocolate spread for crepes and more. Ideal for sudden cravings, birthdays, celebrations and more.
It is recommended to use a silicone mold for chocolates.
As you get closer to the end, be very careful with the tests in step 8 and 9. As I learned the hard way, every minute counts, especially in the final stages.
Steps
- 1
In a bowl or measuring cup, sift the cocoa and sugar using a sieve or small strainer and set aside.
- 2
In a small saucepan, add the butter. Wait until it reaches room temperature or heat it up by setting the heat to low for about a minute.
- 3
When the butter is warm enough, add the honey and the chocolate. Mix with a small wire whisk, until the butter and the chocolate completely melt.
- 4
While stirring, slowly add the cocoa and sugar.
- 5
Mix until all ingredients are completely melted. Stir constantly to prevent the mixture from burning.
- 6
Depending on the time we boil it, the mixture can yield chocolate spread, melt-in-the-mouth chocolates, chewy chocolates, or hard chocolates.
For chocolate spread, a few minutes after all the ingredients have melted, pour as much mixture as you want into a jar. Leave the jar open until the spread cools. This spread is perfect for the easy crepes, which you can find in the link below. - 7
CAUTION: The time required may vary depending on the conditions. If the room is cold it may take longer, while if the heat is too high or the room is warm, it may take less time.
In any case, keep testing frequently, according to the steps below for best results. - 8
After about 6 minutes, to make sure the chocolates are as soft or hard as you want them, drop a few drops of the mixture into the bowl of cold water. Once a solid piece of chocolate has formed, let it sit for about 10 seconds to become hard enough. Then you can either test it in your hand or eat it.
- 9
If the piece dissolves immediately, the chocolates will be melt-in-the-mouth, while if it is slightly hard, they will be chewy or hard, depending on the hardness of the piece you tested. Depending on the result, proceed to the next step, or continue mixing for about 2 minutes and test again.
If you want, you can make several versions at once, pouring a little of the mixture into the mold holes (step 11) and continuing mixing with the rest of it. - 10
As you get closer to the end, check more and more often for better results. If the piece of chocolate becomes too hard, you can make chocolate candies instead, according to the recipe in the link below (starting at step 8).
- 11
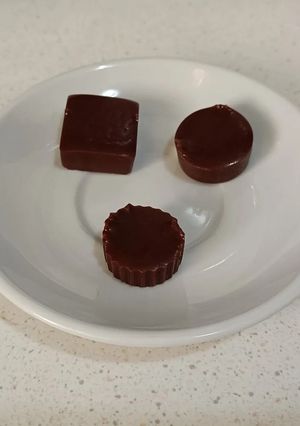
When the mixture is ready, pour it into the mold holes (as much as you want in each).
- 12
If you want hard chocolates, you can give them shapes with your hands before they harden completely, (be careful, they are hot), otherwise, simply let them cool and harden.
- 13
If there are any leftovers in the pot, after emptying, you can add a little water (just enough to cover the bottom) and boil for a few minutes on low heat, stirring constantly with the wire whisk, until the leftovers soften. When the water evaporates, the mixture will have a creamy texture and will be ideal for chocolate spread. Pour it into a jar and let it cool with the lid open.
- 14
When the chocolates have set and cooled completely, cover the mold with a piece of parchment paper, or a lid that does not touch them.
Alternatively, wrap each chocolate bar with a piece of parchment paper. To make wrapping easier, crumple the piece in your hands and then straighten it out and wrap the chocolates.
If they seem too big or you want to change their shape, you can cut them carefully with a knife. - 15
The chocolates are kept in a cool place for 1-2 weeks.
If the weather is quite warm, put them in the fridge. In that case, leave them out for a while to soften before eating.
Whenever you want, unmold/unwrap and enjoy.
Tips
CAUTION: The longer we boil the mixture, the faster it will harden after removing it from the heat to pour it out. Therefore, make sure you have the mold ready in advance, so you can pour the mixture in time.
Linked Recipes
Cooksnaps
Similar Recipes
More Recipes
-


-


-


-
")
MOTHER'S DAY SPECIAL, MOM'S FAV PATISAPTA PITHA (#CA26 #mother's_day'26)

-


-

-


-


-


-


-

Brown Butter Seared Scallops with Asparagus

-


-


-

-


-


")


Christmas special Kuswar traditional crunchy sweet of Goa and Mangolorean")


Comments