Better than Salt Dough Holiday Ornament Clay
Non-edible recipe for making ornaments for holidays or any other variety of craft for any occasion. Not gonna take credit for the original recipe. I found that online. I added the color and glitter options though. Lol. This is soooo smooth and soft, easy to work with, and not grainy like salt dough always seems to be. I do always get some cracking, but I feel the end result is just better than salt dough overall. I love it.
Steps
- 1
In a medium saucepan over medium-low heat use a rubber spatula/scraper to stir together baking soda, cornstarch, and water until combined.
- 2
Heat until consistency resembles thin mashed potatoes, stirring constantly. Remove from heat and continue stirring until consistency is like a soft putty.
- 3
Transfer mixture to a medium sized mixing bowl. Cover directly with plastic wrap. Let sit until completely cooled.
- 4
Once cooled turn clay out onto a smooth surface and knead until smooth. Add additional cornstarch if clay is too sticky/wet.
- 5
Preheat oven to 200°F. Line a baking sheet with parchment paper. Roll out dough to 1/4" thick. Use cookie cutters to make desired shapes.
- 6
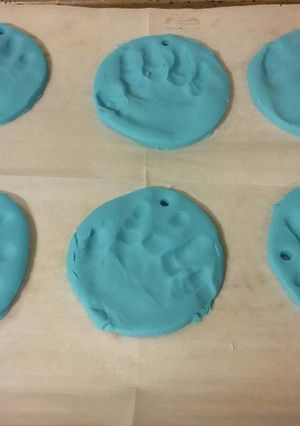
Place pieces on baking sheet, poke a hole in the top of each piece with a skewer or drinking straw so you can thread ribbon/string through for hanging when done.
- 7
Bake in oven until pieces are dry and hardened, usually takes about 1 hr at 1/4" thick. Be sure to flip pieces over halfway through baking for even drying.
- 8
Let cool completely on baking sheet. Decorate as desired.
- 9
See note below ⤵
- 10
Note: To make ornaments colored before baking add desired amount of food coloring (in any color you want) to water before mixing with baking sold and cornstarch. To make glittery ornaments, add glitter while kneading.
Cooksnaps
Top Search in
Similar Recipes
More Recipes
-

Honey-Glazed Pork Ribs with Roasted Brussels Sprouts

-


-


-


-


-


-


-


-


-


-


-

-

Barley Mushroom Vegan winter soup

-


-

Nepali Timur / sichuan pepper and tomato ki chutney

-

Restaurant Style Kadai Aloo,Gobi and Methi

-

 Chinwe
 -


-


-

-
 mjr55
mjr55 -


- mjr55
-


Comments