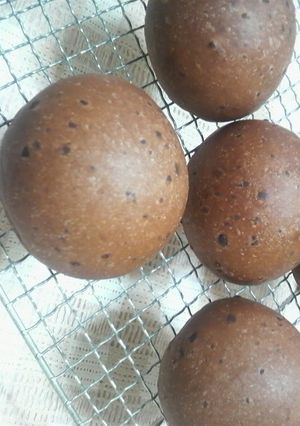
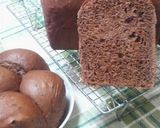
Chocolate Rolls
If you have a sugar-resistant yeast, use that.
Since the dough has quite a lot of sugar and cocoa powder, it's quite sticky. It also takes some time to rise, but please wait patiently. I wanted to make a chocolate flavored dough rather than a cocoa dough, but to get a rich chocolate taste you may have to add a ton of chocolate. While it's not quite rich, I think it's delicious in a different way from the usual cocoa dough.
I have a list of bread-making directions on my recipe for "Simple Square Loaf".
Please adjust the amount of liquid added and the temperature depending on the type of flour you use as well as the season and the weather.
I used a conventional oven. Please adjust the baking time and temperature according to your oven.
If you are using unsalted butter, just use the same amount of salt as in this recipe or increase it by about .1%. Recipe by SALASA
Steps
- 1
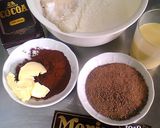
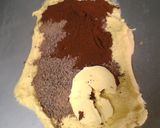
Mix the flours up lightly. Put the yeast on top of the sugar, away from the salt. Mix the ◎ ingredients together well and heat up to body temperature (35-38 °C). ※I used milk chocolate. I wrote heavy cream in the ingredients, but I actually used a vegetable base whipped cream and it turned out fine.
- 2
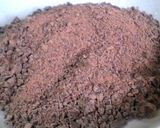
Chop up the chocolate very finely by hand or using a food processor etc. so that it will melt as much as possible with your body or the temperature of your machine when kneading. A few bits of unmelted chocolate are fine.
- 3
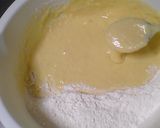
Pour the ◎ liquids into the bowl aiming for the yeast. Mix in half the flour until the mixture is sticky, then mix in the salt and the rest of the flour to form one mass. Transfer the dough to a work surface and knead until smooth. It's a soft and sticky dough, so scrape off any dough that sticks to the work surface as you knead.
- 4
Add the ☆ ingredients and keep kneading until smooth. Please see "Simple Square Loaf "for reference. Scrape off and add in the dough that's stuck to your hands before introducing the fats.
- 5
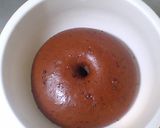
When the dough is done kneading, form it into a smooth ball with a taut surface. Put the dough ball into an oiled bowl with the seam side down, and leave for the 1st rising. Cover with a tightly wrung out moistened kitchen towel during this 1st rising and the resting time later.

- 6
Leave to rise until it has increased to 1.5 to 2 times its original volume. Poke the dough with a finger, and if the hole doesn't fill back in it's done rising. Using my microwave's dough-rising setting at 40 °C it took about 70 minutes. This dough doesn't rise that much.
- 7
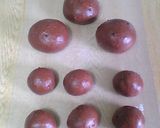
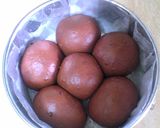
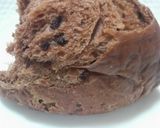
When the 1st rising is done, round off the dough lightly to deflate it, divide into 15 pieces, cover with plastic wrap and a tightly wrung out moistened kitchen towel, and let rest for 15 minutes. I made three 134 g pieces and six 45 g pieces this time.
- 8
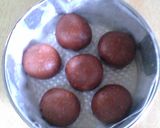
I put the six 45 g dough balls (using a total of 120 g of flour) in a 15 cm-diameter round cake tin. I lined the tin with kitchen parchment paper beforehand.
- 9
Leave to rise (2nd rising) until 1.5 to 2 times its original volume. (Using my microwave's dough-rising setting at 40°C it took about 60 minutes. )
- 10
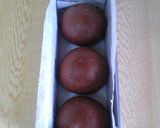
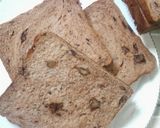
I put the three 134 g balls into an 8.2 x 21.2 x 7 cm high poundcake tin, lined with kitchen parchment paper.
- 11
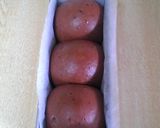
I let it rise with the Step 9 dough. It also took 60 minutes at 40 °C. If the dough rises to about 1 cm below the rim of the pan, it's ready.
- 12
Preheat oven to 180 °C. Then lower to 170 °C and bake for 5 minutes. Cover the tops with aluminium foil to prevent the crust from hardening. Lower the temperature to 160 °C and bake for another 21 minutes or so to finish. Once you take them out of the oven, drop each pan onto your work surface from about a height of 30cm to "shock" the bread into releasing its steam.
- 13
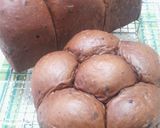
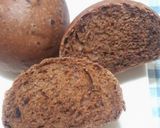
I baked loaves with different heights at the same time, so the crust on the round one was a bit softer. It may be better to bake the round one at 170 °C, and to cover the surface with foil about 8 minutes in.
- 14
Moist and fluffy. Warm the rolls up in a oven once they have cooled. If you have a sweet tooth, add chocolate chips for an even more chocolately flavor.
- 15
This is made with 300 g of dough divided into 15 pieces, and baked in a 150°C oven (preheated at 160°C) for 5 minutes, then at 140°C for 10 to 12 minutes. If it looks like the rolls are getting burned on top, cover with foil.
- 16
This is a shokupan (square loaf bread) made with a different ratio of ingredients.
Cooksnaps
Did you know that you can import recipes from anywhere into Cookpad with one click?
https://blog.cookpad.com/us/cookpad-recipe-import-feature-save-recipes-from-anywhere/
Download Cookpad app to plan your meals and store your cooking ideas in one safe place! https://cookpad.wasmer.app/us/download
Keywords
Similar Recipes
More Recipes
-


-


-
")
French fries (they are actually Belgian)
 Maximilian
 -

Smoked Salmon & Egg Toast with Arugula and Sprouts

-

Grandma O's Frozen Pink Lemonade Daiquiri

-


-


-


-

Avocado, Tomato, Mozzarella, & Bacon Sandwich

-


-

Vickys Valentine Chocolate Shortbread Hearts, GF DF EF SF NF

-

Comforting Caramelized Apple Poundcake

-

Boiled Chestnuts Using a Pressure Cooker
-

-
")
Whole Wheat Walnut Bagels (Soft Bagels)
-


-

Macrobiotic Whole Wheat Tofu Bagels
-

Sesame Crackers with Ginger and Toasted Barley Flour
-

Kabocha Squash No-Bake Cheesecake
-

Kiriboshi Daikon & Olive Oil Stir-Fry
-


 Recipe")


Comments