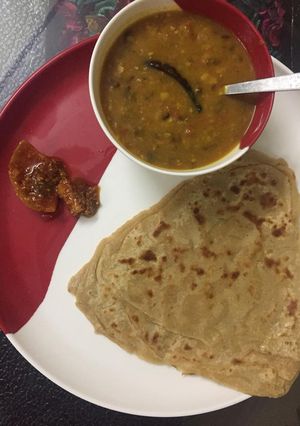
Lachha Paratha
#MMC
A recipe so easy, you’ll never order it from a restaurant again! ♥️
Lachha Paratha
#MMC
A recipe so easy, you’ll never order it from a restaurant again! ♥️
Steps
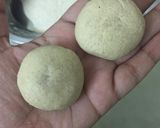
- 1
Make 2 balls of dough, both just slightly smaller than what you take for a Roti...
I take them smaller so that the final parantha doesn’t get as heavy as 2 roties, and also fits the tawa when I cook.
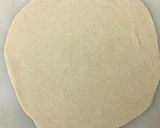
- 2
Roll a chapati out of 1 of those balls.
Chalaaki : This is a trick I learnt with time. I deliberately pinch or stretch to disfigure my roties and make them asymmetric. That way, when I process (craft) them further, the loose edges are left out, turning crunchier with time. ;-)
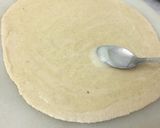
- 3
Give a generous dash of desi ghee to this roti.
While keeping a heavier hand at this step, we also have to remember that it finally needs some more rolling. That pressure shouldn’t make it a messy job.
- 4
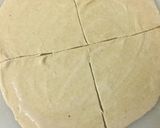
Take a knife, and mark a deep ‘+’ sign in the roti, running from edge to edge. This will give you 4 little portions.
- 5
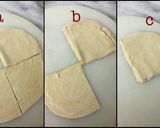
The next task is to stack them all one over the other, while keeping the main shape the same (triangular with a rounded edge).
The idiot-proof way to do that is to lock one piece in place (the upper right piece here). Now place all the other slices over it in a way that the ‘+’ center of every slice remains locked too.
- 6
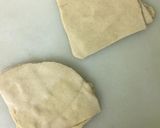
Do the same for the other dough ball too.
This will give you 2 sets of 4 ghee-smeared layers each. Maybe you can see the parantha taking shape now. :)
- 7
Put both stacks together, following the same trick as in the a-b-c collage. The 8 layers would come edge to edge... (minus the slight disfigurations I deliberately created. Remember?)
- 8
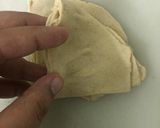
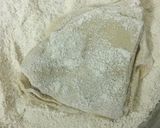
Toss the 8-layer set into dry wheat flour. We all know this part like the back of our hand.
- 9
Roll the set into a moderately thick parantha, with gentle hands.
Any more pressure could squeeze the ghee out, so be careful there!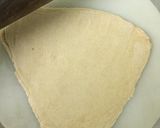
- 10
Place the parantha on a pre-heated tawa.
Label the 2 sides in your mind, and follow the steps ahead for the perfect crunch.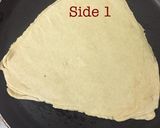
- 11
Flip the sides in about 30sec. This side would be half-cooked.

- 12
You get just 20sec to work on this side. Dash some desi ghee and spread it around from corner to corner.
Agar corner se layers me desi ghee hi riske nahi gaya to lachha parantha kis kaam ka!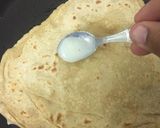
- 13
Flip the side again and let that ghee cook for 10sec.
- 14
In this 10sec duration, layer this side with ghee too.
- 15
Flip the side again and let this ghee cook for 10sec. Put the flame off.
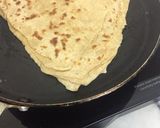
- 16
Before any of the sides turns too crunchy or overcooked, take it off the tawa onto a plate as it is. Let it rest for 30sec.
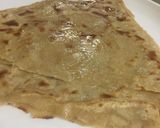
- 17
And once the immediate heat of the tawa subsides, pour some more ghee onto the parantha. This is something we won’t cook unlike the previous servings of ghee.
Kyunki lachha parantha khao to ghee haathon par lagna bahut zaruri hai! ♥️
- 18
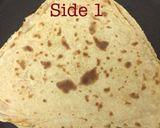
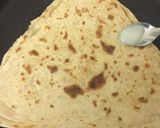
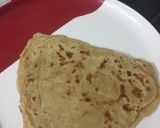
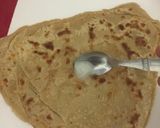
Tilt it against the light to be sure. ;-)
- 19
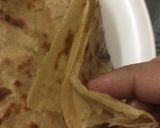
Enjoy your flaky lachchha parantha, watch how it's layers open up as you pull a bite! 😍
Similar Recipes
More Recipes
-


-

Punjabi Soya-Veggie Pakoda Kadi Platter

-


-

Desi Nariyal Chai or Coconut Shell Nariyal Chai

-


-


-


-

Julia Child's Chicken with Hollandaise Sauce

-

-


-


-


-


-


-


-


-

 Sommy
Sommy -


-


-


")


Comments