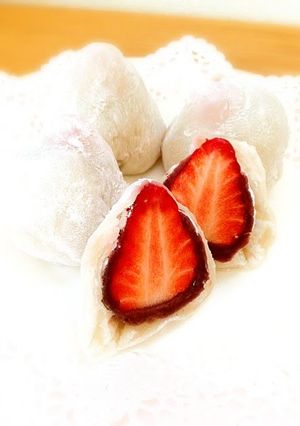
For Mother's Day! Strawberry Daifuku For Beginners
I had a hard time making strawberry daifuku, even though I mixed the rice flour and adjusted the amounts of water and sugar. Finally, I came up with this recipe! Even I could make them this way, and my family loved it too.
Be sure to mix and pound the dough carefully.
Firm dough is easier to wrap, easier to eat and is delicious!
Spring strawberries have lots of vitamin C and are good for your skin!
Strawberries:
[Temperature: Cold. Season: Spring. Flavors: Sweet, Sour] Recipe by Soreiyu
Steps
- 1
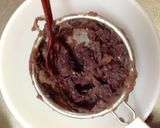
Wash the strawberries, pat dry and remove the hulls. Divide the sweet bean paste into 4 to 6 portions.

- 2
The finished daifuku will look more smooth and less lumpy if you use koshi-an (smooth sweet red bean paste). If you want to make tsubu-an (chunky sweet red bean paste) into koshi-an, just pass it through a tea strainer.
- 3
Cover the strawberries with the sweet bean paste. If you leave some parts where you can see the strawberry, the red color will show when the daifuku are done, which will look cute.

- 4
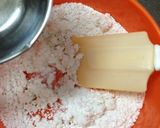
Put the shiratamako in a microwave-safe container. Add water a little at a time and mix, being careful to break up lumps.
- 5
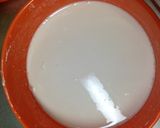
Add sugar and mix, again, breaking up lumps. It should turn into a silky liquid.
- 6
Cover with plastic wrap and heat in a 600W microwave for 3 minutes. Take it out and mix it well using a rubber spatula. It will stick to the spatula, but mix it thoroughly.
- 7
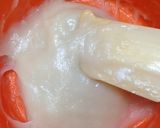
Cover with plastic wrap and microwave again. Heat for 2 minutes at 500W. Take it out and mix well using a wooden dowel or the equivalent.
- 8
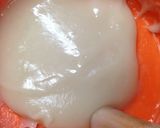
Stir and pound to mix it well. Mix for a few minutes until the dough becomes shiny and firm.

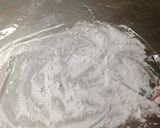
- 9
When it becomes firm, spread plastic wrap on a table and sprinkle plenty of katakuriko. Then, transfer the dough onto it. You can also do this on a cutting board.
- 10
Divide the dough into 4 to 6 portions and flatten each one. If you make the middle a little thicker and the outside a little thinner, it's easier to wrap the filling.
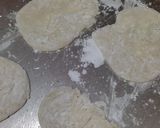
- 11
Rather than flattening the dough with your hands, it might be easier to hold the dough up at one end and let gravity do the work.
- 12
Place the filling from step 3 in the middle of the dough and wrap the dough around it. The wrapped edges should go on the bottom of the daifuku. Pinch the edges together so that they won't fall apart, and the daifuku are done.
Cooksnaps
Did you know that you can import recipes from anywhere into Cookpad with one click?
https://blog.cookpad.com/us/cookpad-recipe-import-feature-save-recipes-from-anywhere/
Download Cookpad app to plan your meals and store your cooking ideas in one safe place! https://cookpad.wasmer.app/us/download
Keywords
Similar Recipes
More Recipes
-


-


-


-


-


-

")
-

Egg Chicken Moglai Kolkata Street Style

-
")
Chicken Zucchini Bake with Cheese and Tomatoes (Oven Recipe)

-


-


-

pineapple upside down cupcake/muffin

-


-

Slow Cooker - Middle Eastern Stew

-

Classic Chestnuts Simmered in Inner Skins

-
Slow Cooker- Coconut Curry Shrimp
-

Snowman Shaped...White Chocolate Daifuku
-
 jscott2012
 -

Easy and Delicious! Black Sesame Pudding
-

-

-

")


, Japanese Confectionery Style")

Comments