CookpadCookpad
Guest
Register or Log In
Save and create recipes, send cooksnaps and more
  • Search
  • Premium
    • Top Cooksnapped Recipes
    • Top Viewed Recipes
  • Premium
  • Challenges
  • FAQ
  • Send Feedback
  • Region
  • Your Collection
Your Collection
To start creating your recipe library, please register or login.
Garlic Chips and Garlic Oil
Save this recipe to come back to it later.
  • Add Cooksnap
  • Add to folders
  • Print
  • Share
    • Copied!
    • Email
    • Facebook
    • Pin it
    • Twitter
  • Report Recipe
  • See report
  • Edit recipe
  • Delete
CookpadCookpad
A picture of Garlic Chips and Garlic Oil.

Garlic Chips and Garlic Oil

cookpad.japan
cookpad.japan @cookpad_jp

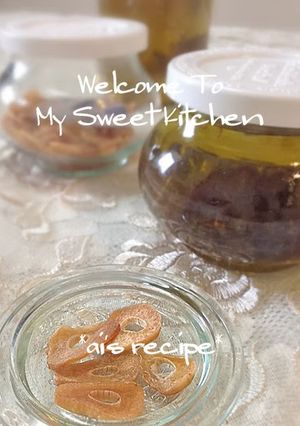
In our house, we use both garlic chips and garlic oil a lot, so they are indispensable condiments. The oil is also convenient to have on hand.

To prevent the garlic from burning, start with a cold pan or frying pan, use extra virgin olive oil, and heat on low.
To make the garlic chips turn out crisp when stored, follow Steps 11 and 12.
Recipe by *ai*.

In our house, we use both garlic chips and garlic oil a lot, so they are indispensable condiments. The oil is also convenient to have on hand.

To prevent the garlic from burning, start with a cold pan or frying pan, use extra virgin olive oil, and heat on low.
To make the garlic chips turn out crisp when stored, follow Steps 11 and 12.
Recipe by *ai*.

Read more

Garlic Chips and Garlic Oil

cookpad.japan
cookpad.japan @cookpad_jp

In our house, we use both garlic chips and garlic oil a lot, so they are indispensable condiments. The oil is also convenient to have on hand.

To prevent the garlic from burning, start with a cold pan or frying pan, use extra virgin olive oil, and heat on low.
To make the garlic chips turn out crisp when stored, follow Steps 11 and 12.
Recipe by *ai*.

In our house, we use both garlic chips and garlic oil a lot, so they are indispensable condiments. The oil is also convenient to have on hand.

To prevent the garlic from burning, start with a cold pan or frying pan, use extra virgin olive oil, and heat on low.
To make the garlic chips turn out crisp when stored, follow Steps 11 and 12.
Recipe by *ai*.

Read more
Saved
Save this recipe to come back to it later.
Edit recipe
See report
Add to folders
Add CooksnapAdd Cooksnap
ShareShare
  • Copied!
  • Email
  • Facebook
  • Pin it
  • Twitter
PrintPrint
  • PrintPrint
  • Add CooksnapAdd Cooksnap
  • Report Recipe
  • See report
  • Delete
Share
  • Copied!
  • Email
  • Facebook
  • Pin it
  • Twitter
Save this recipe to come back to it later.
  • Add Cooksnap
  • Add to folders
  • Print
  • Report Recipe
  • See report
  • Edit recipe
  • Delete

Ingredients

1 serving
  • Pure Garlic Oil Version 1
  • 1Extra virgin olive oil
  • 1Garlic
  • Pure Garlic Oil Version 2
  • 200 mlExtra virgin olive oil
  • 1/2to 1 bulb Garlic
  • The garlic chips
  • 1Garlic, as desired -- I used 1.5 bulbs (not cloves)
  • 1Extra virgin olive oil
  • Garlic Oil with Garlic Bits
  • 200 mlExtra virgin olive oil
  • 1/2to 1 bulb Garlic
Cookpad Open in Cookpad App
Saved
Save this recipe to come back to it later.

Steps

  1. 1

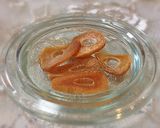
    The garlic chips can be stored for some time. The garlic chips in the top photo have been stored for a month, but they are still crisp.
    A picture of step 1 of Garlic Chips and Garlic Oil.
  2. 2

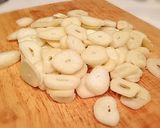
    Slice the garlic thinly, and remove the core using a toothpick.
    A picture of step 2 of Garlic Chips and Garlic Oil.
  3. 3

    Set a heatproof sieve inside a heatproof bowl.
    A picture of step 3 of Garlic Chips and Garlic Oil.
  4. 4

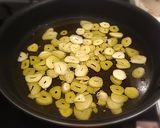
    Put the sliced garlic in a cold frying pan. Pour in the extra virgin olive oil (at least 2 cm worth) and heat over low.
    A picture of step 4 of Garlic Chips and Garlic Oil.
  5. 5

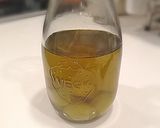
    The left over olive oil will becomes garlic oil later.
    A picture of step 5 of Garlic Chips and Garlic Oil.
  6. 6

    If you want to make a large batch of garlic oil, add more extra virgin olive oil.

  7. 7

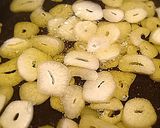
    Once the Step 4 oil starts to smell aromatic, stir occasionally with cooking chopsticks. Small bubbles should start appearing on the surface.
    A picture of step 7 of Garlic Chips and Garlic Oil.
  8. 8

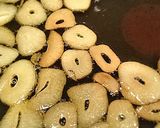
    Once the garlic starts to slightly brown, turn up the heat to medium high.
    A picture of step 8 of Garlic Chips and Garlic Oil.
  9. 9

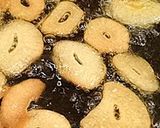
    Constantly stir the pot and watch over the garlic. Once it browns to your preference, turn off the heat.
    A picture of step 9 of Garlic Chips and Garlic Oil.
  10. 10

    Drain the garlic and oil into the Step 3 sieve and bowl immediately. Draw up the sieve immediately so the bottom is not touching the oil in the bowl.
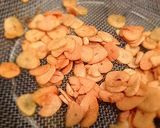
    A picture of step 10 of Garlic Chips and Garlic Oil.
  11. 11

    Note: The temperature of the oil is raised in Step 8 to evenly color the garlic chips and to make them crispy.
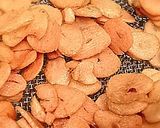
    A picture of step 11 of Garlic Chips and Garlic Oil.
  12. 12

    Garlic browns really fast in hot oil. Keep an eye on the garlic and drain it quickly as soon as it's done in Step 9.
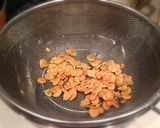
    A picture of step 12 of Garlic Chips and Garlic Oil.
  13. 13

    Pat dry the oil from the garlic chips. Drain off more oil by putting the chips on paper towels, and leave them to cool down to room temperature.
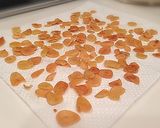
    A picture of step 13 of Garlic Chips and Garlic Oil.
  14. 14

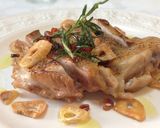
    If you are using the chips right away, use them while they are still warm.
    A picture of step 14 of Garlic Chips and Garlic Oil.
  15. 15

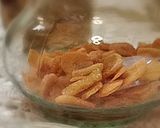
    When the chips have cooled down to room temperature, put in a sealable container to store. I stored with a pack of silica gel (desiccant).
    A picture of step 15 of Garlic Chips and Garlic Oil.
  16. 16

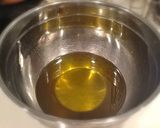
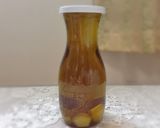
    Next is the Pure Garlic Oil. This is the oil left over from making the garlic chips.
    A picture of step 16 of Garlic Chips and Garlic Oil.
  17. 17

    Use this garlic oil in cooking.

    A picture of step 17 of Garlic Chips and Garlic Oil.
  18. 18

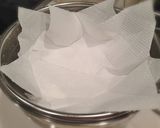
    Strain the oil from Step 10 through a paper towel lined sieve.
    A picture of step 18 of Garlic Chips and Garlic Oil.
  19. 19

    Let the oil cool down to room temperature, and store in a sterilized jar with a tight lid. This is version 1 of Pure Garlic Oil.
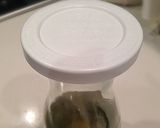
    A picture of step 19 of Garlic Chips and Garlic Oil.
  20. 20

    I added some cloves of raw garlic to infuse in the oil, but this is optional.
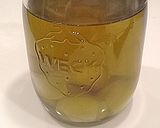
    A picture of step 20 of Garlic Chips and Garlic Oil.
  21. 21

    If you add raw garlic to the oil to infuse, you can always pour in more olive oil when your batch runs low. This also adds fragrance to the oil.

  22. 22

    However, make sure to add oil when your batch is running low as the exposed garlic cloves may mold and may flame up when heated.

  23. 23

    If you are adding garlic to infuse, peel the cloves, chop off the ends, and wash well. Pat dry and drop into the jar.
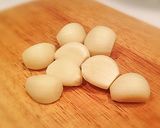
    A picture of step 23 of Garlic Chips and Garlic Oil.
  24. 24

    Make sure the garlic cloves in the bottom of the jar are not exposed to air. When the oil in the jar runs low, add more extra virgin olive oil.
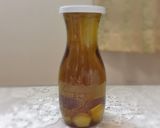
    A picture of step 24 of Garlic Chips and Garlic Oil.
  25. 25

    Sometimes I replenish the infused oil when I make more garlic chips. I also use garlic oil to make garlic chips occasionally.

  26. 26

    How to make Version 2 of Pure Garlic Oil: This method is recommend if you don't like garlic chips or don't need to make them.

  27. 27

    Prep the garlic cloves as in Step 23, and cut in half. Use small whole cloves.

  28. 28

    Put the garlic cloves in a sterilized jar, add extra virgin olive oil, and it's done.

  29. 29

    The garlic flavor and fragrance will be infused after about 2 days. It's ready to be used after the 4th day. Just use the oil and not the garlic.

  30. 30

    Make sure that the cloves in the jar are not exposed to air. Add more oil if it runs low.

  31. 31

    Note: Do not expose olive oil to sunlight. Store the jars of garlic oils in a cool and dark place.

  32. 32

    For Garlic Oil with Garlic Bits.

    A picture of step 32 of Garlic Chips and Garlic Oil.
  33. 33

    Mince the garlic. The key is to use a lot so that you can enjoy it in the oil.
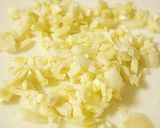
    A picture of step 33 of Garlic Chips and Garlic Oil.
  34. 34

    Put the chopped garlic and extra virgin olive oil in a cold and deep pan. Turn the heat to low.
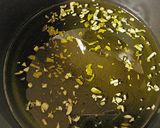
    A picture of step 34 of Garlic Chips and Garlic Oil.
  35. 35

    Resist the urge to turn up the heat to make it cook faster, just let it cook very slowly so that the garlic doesn't burn.
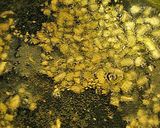
    A picture of step 35 of Garlic Chips and Garlic Oil.
  36. 36

    After about 5 minutes or so, the garlic will turn a light beig with lightly browned edges. Turn off the heat, and leave the oil to cool.
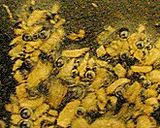
    A picture of step 36 of Garlic Chips and Garlic Oil.
  37. 37

    Even when the oil has cooled, the garlic will continue to cook in residual heat and turn a slightly darker shade of brown.
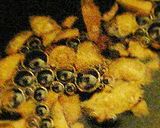
    A picture of step 37 of Garlic Chips and Garlic Oil.
  38. 38

    Note: If you don't stop the heat soon enough, the garlic will brown too much.

  39. 39

    In that case, transfer the pan on a cold wrung out kitchen towel to cool the oil quickly and to prevent the garlic from burning.

  40. 40

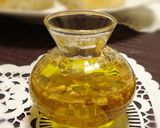
    Transfer the oil and garlic bits in a sterilized jar. I added red chili peppers to infuse.
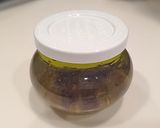
    A picture of step 40 of Garlic Chips and Garlic Oil.
  41. 41

    Mix garlic oil and garlic chips with rock salt and black pepper, and dip into a crusty bite of focaccia.
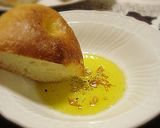
    A picture of step 41 of Garlic Chips and Garlic Oil.
  42. 42

    I recommend drizzling the chunky garlic oil on salads and pasta dishes. When using garlic oil for cooking, I recommend using just the oil.
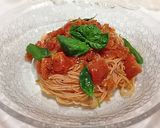
    A picture of step 42 of Garlic Chips and Garlic Oil.
  43. 43

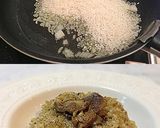
    Use the Pure Garlic Oil to cook steak or for garlic flavored sautéed dishes such as risotto, pasta, etc. It's really useful.
    A picture of step 43 of Garlic Chips and Garlic Oil.
  44. 44

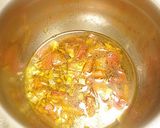
    All purpose garlic oil is also useful for making cold dishes like cold pasta, carpaccio, etc.
    A picture of step 44 of Garlic Chips and Garlic Oil.
Saved
Save this recipe to come back to it later.
Edit recipe
See report
Add to folders
Add CooksnapAdd Cooksnap
ShareShare
  • Copied!
  • Email
  • Facebook
  • Pin it
  • Twitter
PrintPrint
  • PrintPrint
  • Add CooksnapAdd Cooksnap
  • Report Recipe
  • See report
  • Delete

Cooksnaps

Saved
Save this recipe to come back to it later.
  • Add Cooksnap
  • Add to folders
  • Print
  • Share
    • Copied!
    • Email
    • Facebook
    • Pin it
    • Twitter
  • Report Recipe
  • See report
  • Edit recipe
  • Delete

Copied!

cookpad.japan
cookpad.japan @cookpad_jp
on April 07, 2014 05:29

Did you know that you can import recipes from anywhere into Cookpad with one click?
https://blog.cookpad.com/us/cookpad-recipe-import-feature-save-recipes-from-anywhere/

Download Cookpad app to plan your meals and store your cooking ideas in one safe place! https://cookpad.wasmer.app/us/download

Read more

Comments

Guest
Add a comment
0/0

Top Search in

  1. 8th for garlic oil

Keywords

Chips Garlic

Similar Recipes

More Recipes

  1. A picture of Soupy veg noodles.

    Soupy veg noodles

    Sarvat Hanif Sarvat Hanif
  2. A picture of Potato Wedges.

    Potato Wedges

    Bennett Bennett
  3. A picture of Passion fruit Cream cheese Cake.

    Passion fruit Cream cheese Cake

    Lakshmi Sridharan Ph D Lakshmi Sridharan Ph D
  4. A picture of Nigerian Chicken Stew.

    Nigerian Chicken Stew

    Pinkblanket's Kitchen Pinkblanket's Kitchen
  5. A picture of Apple Pomegranate Smoothie.

    Apple Pomegranate Smoothie

    Archana Agrawal Archana Agrawal
  6. A picture of Poule ar Tamarin ek Brèdes Chinois – Mauritian chicken with tamarind and pak choi.

    Poule ar Tamarin ek Brèdes Chinois – Mauritian chicken with tamarind and pak choi

    Laura Laura
  7. A picture of Mini Burger.

    Mini Burger

    Nana Aliyu Nana Aliyu
  8. A picture of Besan ki roti.

    Besan ki roti

    Kulsoom Bukhari Kulsoom Bukhari
  9. A picture of Easy Sausage and Veggies Sheet Pan Meal.

    Easy Sausage and Veggies Sheet Pan Meal

    Mad Cook Mad Cook
  10. A picture of Brown Sugar Baked Carrots.

    Brown Sugar Baked Carrots

    cindybear cindybear
  11. A picture of Old Fashion Biscuits.

    Old Fashion Biscuits

    yumalicious yumalicious
  12. A picture of D.I.Y Spice Blends (No°2).

    D.I.Y Spice Blends (No°2)

    Rae Rae
  13. A picture of Berry Brownie Torte.

    Berry Brownie Torte

    fenway fenway
  14. A picture of The Best Ever Chocolate Pudding.

    The Best Ever Chocolate Pudding

    Taylor Topp Comacho Taylor Topp Comacho
  15. A picture of D.I.Y Spice Blends (No°3).

    D.I.Y Spice Blends (No°3)

    Rae Rae
  16. A picture of Restaurant-style Crab Cream Pasta with Canned Crabmeat.

    Restaurant-style Crab Cream Pasta with Canned Crabmeat

    cookpad.japan cookpad.japan
  17. A picture of Shrimp and Pork Filled Chinese Chive Dumplings.

    Shrimp and Pork Filled Chinese Chive Dumplings

    cookpad.japan cookpad.japan
  18. A picture of The Perfect "Sunny Side Up" Egg.

    The Perfect "Sunny Side Up" Egg

    Taylor Topp Comacho Taylor Topp Comacho
  19. A picture of Foolproof Ume Plum Compote.

    Foolproof Ume Plum Compote

    cookpad.japan cookpad.japan
  20. A picture of Plump and Shiny Kuromame Simmered Black Soy Beans.

    Plump and Shiny Kuromame Simmered Black Soy Beans

    cookpad.japan cookpad.japan
  21. A picture of How to Freeze Leftover Egg Yolks.

    How to Freeze Leftover Egg Yolks

    cookpad.japan cookpad.japan
  22. A picture of Refreshing! Crispy Chinese Cabbage Salad.

    Refreshing! Crispy Chinese Cabbage Salad

    cookpad.japan cookpad.japan
  23. A picture of Refreshing Kabocha Ice Cream with Yogurt.

    Refreshing Kabocha Ice Cream with Yogurt

    cookpad.japan cookpad.japan
  24. A picture of Fluffy Omelette.

    Fluffy Omelette

    cookpad.japan cookpad.japan
  25. A picture of Easy Two Layer Bavarois Done in 10 Minutes.

    Easy Two Layer Bavarois Done in 10 Minutes
    cookpad.japan cookpad.japan
https://cookpad.wasmer.app/us/recipes/154290
Cookpad Open in Cookpad App

About Us

Our mission at Cookpad is to make everyday cooking fun, because we believe that cooking is key to a happier and healthier life for people, communities and the planet. We empower home cooks all over the world to help each other by sharing their recipes and cooking experiences.

Subscribe to Premium for exclusive features & benefits!

Cookpad Communities

🇺🇸 United States 🇬🇧 United Kingdom 🇪🇸 España 🇦🇷 Argentina 🇺🇾 Uruguay 🇲🇽 México 🇨🇱 Chile 🇻🇳 Việt Nam 🇹🇭 ไทย 🇮🇩 Indonesia 🇫🇷 France 🇸🇦 السعودية 🇹🇼 臺灣 🇮🇹 Italia 🇮🇷 ایران 🇮🇳 India 🇭🇺 Magyarország 🇳🇬 Nigeria 🇬🇷 Ελλάδα 🇲🇾 Malaysia 🇵🇹 Portugal 🇺🇦 Україна 🇯🇵 日本 See All

Learn More

Cookpad Premium Careers Feedback Blog Terms of Service Community Guidelines Privacy Policy Frequently Asked Questions

Download our app

Open Cookpad App on Google Play Open Cookpad App on App Store
Copyright © Cookpad Inc. All Rights Reserved
close