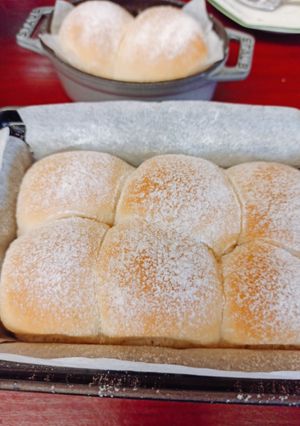
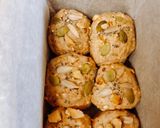
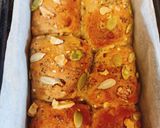
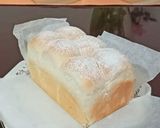
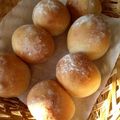
Japanese Angel Soft Milk Loaf
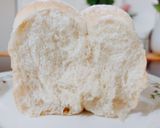
It is a Japanese style super soft milk bread. It is perfect as dinner rolls. It reminds me of my childhood!
Here is the video to show you how soft they are:
https://www.instagram.com/p/B_YWiW6nIfo/?utm_source=ig_web_copy_link
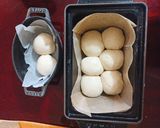
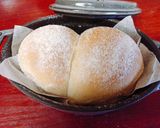
As I live alone, I used small bakeware which is 9x14x7cm and I used six balls and two balls in 11cm cocotte. So, they are quite a small portion. They will serve for only one or two people.
Japanese Angel Soft Milk Loaf

It is a Japanese style super soft milk bread. It is perfect as dinner rolls. It reminds me of my childhood!
Here is the video to show you how soft they are:
https://www.instagram.com/p/B_YWiW6nIfo/?utm_source=ig_web_copy_link
As I live alone, I used small bakeware which is 9x14x7cm and I used six balls and two balls in 11cm cocotte. So, they are quite a small portion. They will serve for only one or two people.
Cooking Instructions
- 1
Lay parchment sheet or oil the bread tin
- 2
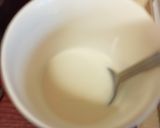
Heat the milk in a microwave about 20 (40) seconds to make it warm. Or just heat it up in a pan. Please never make it too hot as yeast will die at 60 degrees. Around the temperature of bath would be perfect. If it is too hot, leave it till it becomes warm.
- 3
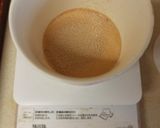
Add yeast into the warm milk and mix well.
- 4
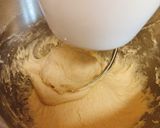
Add flour, sugar, salt in a bowl or on board and mix them. Then, add the warm milk and mix them. Then, knead by hands for about 10 mins on a board or knead for about 7-10 mins with a stand mixer using a kneading hook until gluten has created and the dough does not stick to the bowl. The time will depend on your machine.
- 5
Please knead well here until the dough becomes stretchy and gluten is formed. When gluten is formed, you touch the dough and it doesn't stick to your hand. Also if you stretch it becomes very thin sheet almost see-through it. I use speed 2 or 3 on my stand mixer. If you too strong, it becomes very sticky.

- 6
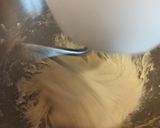
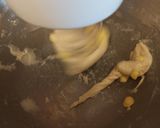
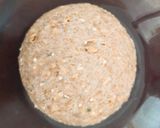
Add chopped or soft butter and knead further for about 3-5 mins until the dough becomes smooth and not stick to the bowl like the last photo. It should look silky and smooth.
- 7
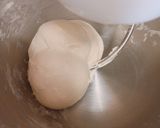
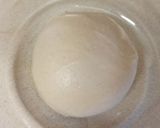
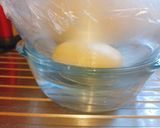
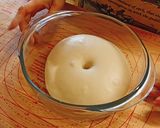
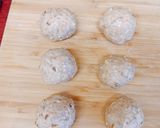
Take the dough out and make it round with the motion on tucking inside at the bottom. It should become smooth like the photos below. If it is still too sticky, you need to knead with hands until it becomes easier to handle it. I usually hit it like a ball and it will become less sticky and smooth.
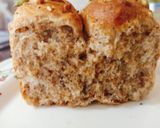
Add seeds or nuts if you wish. Cover it with cling film and leave it for 30-40 mins until it becomes about twice. It can take much longer. I put a hot water with 36-45℃ beneath like the last photo.
- 8
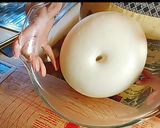
Test the fermentation with a finger coated by flour. If it is the hole remains, the first fermentation has been done.
- 9
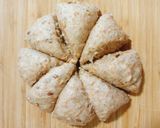
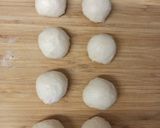
After having tested the fermentation, take out the dough and punch it down. Make it round again. Cut it into 8 (16) or 6 (12) pieces depends on how you like. Make them round. Place them in with the tucked parts as the bottom. Cover it with a damp cloth and leave 15 mins.
(You could omit this resting step. However, you will get a better result if you do. When I prepare at night and leave them in the fridge, I omit it as it seems it does not make many differences, if I leave them in the fridge.)
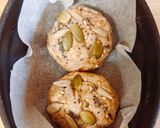
- 10
Make them round again with the motion of tucking and place them in the bread tin with the tucked parts on the bottom. Add some more seeds on the top, if you wish.
(If you wish to bake them in the morning, you could leave them overnight in the fridge till next morning.)
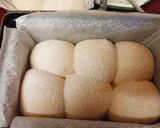
- 11
Leave it in a warm place until it becomes 2-2.5 times, usually for about 30-60 mins, depends on the room temperature and the yeast. Dust them with flour. (The second fermentation)
If you left them in the fridge overnight, please put them in a warm water bath beneath or something. Otherwise, it will take for ages to get this second fermentation done. When the yeast was strong, it is already ready to bake when you take out from the fridge. Then, omit the second fermentation. )
- 12
Preheat the oven at 180℃.
- 13
Put the bread tin in the oven and turn down the temperature as 160℃.
Then, bake at 160℃ for about 18 mins. Please make sure you reduce the temperature to 160℃. If you bake at 180℃, your bread becomes harder. If your oven is powerful enough and it does not go down the temperature when you open, just preheat it as 160℃.
- 14
After having baked for 18 mins, it is done. You can see the video of how soft they are at: https://www.instagram.com/p/B_YWiW6nIfo/?utm_source=ig_web_copy_link
- 15
You can make character breads with this dough such as bear, cat, Totoro, rabbits etc which children love.
Bear recipe is here. https://cookpad.wasmer.app/uk/recipes/12351787-milk-bear-loaf


- 16


- 17
Decorated with those.


Similar Recipes
-

Milk Loaf Bread in a Bread Maker Milk Loaf Bread in a Bread Maker
I wanted to try baking a bread with both skim and regular milk.As for the amount of sugar, it is delicious with a tablespoon each of sugar and honey.Use the normal bread course on your bread maker. Bake for as long as you prefer. Recipe by Yuukarikoara
-

Hotel-Quality Pullman Loaf Hotel-Quality Pullman Loaf
I love hotel bread that is sweet, soft and fluffy all the way to the crusts. I will keep increasing the sliced bread recipes.Because we are using super strong bread flour, it will affect the oven spring if you don't knead it properly!!It should rise to approximately 2cm from the top of the pan. Since this is a combination with good oven spring, be careful not to let it over rise!!Milk can be reduced by up to 55 depending on the flour used and experience.This time I used shortening for the top butter. Recipe by mayumi -

Pan Cubano / Cuban Loaf Bread Pan Cubano / Cuban Loaf Bread
This is a very traditional bread from Cuba. Similar to a soft Italian loaf of bread. It takes time to make but well worth the effort. Each step is actually quick and simple. The time is waiting for the starter and the different risings. Bake this once and you'll be hooked! I suggest making several loaves at once and freezing them after they are baked. Never be without!
-

Reco's Family's Favorite Fluffy and Crisp Whole Grain Loaf Reco's Family's Favorite Fluffy and Crisp Whole Grain Loaf
Usually, it takes 2 to 3 days to consume one and a half loaves. I needed to make a loaf which keeps soft and tasty after several days. I tried to find the best recipe for it and now I've settled for this This loaf looks dense but the crust is thin and crisp and the inside is meltingly soft.When you shape the dough this way, the bread will come out softer than if you shape them into ovals. It is fluffy as it is, but after toasting it crisps up surprisingly. If you like butter, replace half of shortening to butter. Recipe by Recoty -

Jason's Ciabatta Buns Jason's Ciabatta Buns
My daughter Calley loves Ciabatta bread so I made up this one for her. This was a combination of two different bread recipes, combining the best of both ideas. The result is a fantastic flavor with a crisp outside and a extremely soft inside.
-

Waste-free Bread Rolls with Raisin Leaven Waste-free Bread Rolls with Raisin Leaven
I used to always make bread with dry yeast, but I wanted to try using natural wet yeast leavens, so I made many types of bread with natural yeast leavens. However, it is wasteful if you fail from using too much ingredients, and it all stuck to my hands no matter which recipe I used, so I came up with my own combination. Butter is in short supply today. I wanted to make a bread that tastes good with a small amount of butter, and is a straight version that even beginners will want to eat over and over again, so I thought this up.Using a domestic flour blend with about 40 g of water should be sufficient. Please decide on your own amount based on your own bread flour, climate, and humidity. Even if you let it rise the first time for longer, it will still turn into a delicious bread so long as the second rise isn't too long. Keep an eye on it during the second rise. Recipe by Choco dayo -

Basic Square Bread Loaf Basic Square Bread Loaf
This is a delicious plain bread for sandwiches or morning toast that uses basic ingredients. It practically goes with anything!I used a blend of 2 types of bread flour - 150 g of "Golden Yacht" and 100 g of "Haruyutaka".With this recipe as a base, you can vary things by using milk or milk + egg instead of the water, and so on. For 1 loaf's worth. Recipe by Natsumi -

Milk Butter Rolls Milk Butter Rolls
I thought that, "Sugar topped milk bread" should work well as butter rolls too, so I adjusted the amount of fat in the dough to create this recipe. My hubby declared this "Delish!" so I decided to upload the recipe!The kneading and rising times are guidelines. Please check the state of the dough. The baking time also varies depending on your oven, so please keep checking and adjust if needed. The amount of milk needed depends on the type of flour you use and how humid it is that day, so please adjust it between 145 and 150 g! Recipe by Lesser Panda -

Baking Bread Straight from Liquid Bread Starter - Simple and Basic Rolls Baking Bread Straight from Liquid Bread Starter - Simple and Basic Rolls
I'm into baking bread from natural leaven, but when I tried baking from a liquid starter, it was hard to knead and took too much time. Bread baking is tricky, but by using this moderate amount of bread flour (160 g), which is what they use in my basic cooking class, it will be easier to knead.Using a domestic flour blend (I used "Haruyutaka"), about 60 g of flour was sufficient. Use a tad more in the winter. Adjust the amount of water depending on your bread flour and climate. While you may allow a lot of time for the first proofing, time for the second proofing should be shorter in order for a tasty result. Keep an eye on the dough during the second proofing. For 190°c, about 14 minutes. Recipe by Choco dayo -

Square Bread Loaf (Bread Maker Dough) Square Bread Loaf (Bread Maker Dough)
*I made this simple since its heartiness and flavor will vary depending on what you put on top of it or what you serve with it.*When you are using flour that's milled from domesticaly grown wheat, use slightly less water.*The temperature and baking time are just suggestions since they will differ depending on the oven. If the surface is getting burnt, cover with aluminium foil, and turn down the temperature.*When you are turning the pan during Step ⑦, do it quickly so that the inside temperature of the oven won't drop. Recipe by putimiko -

Strawberry Milk Bread in a Bread Maker Strawberry Milk Bread in a Bread Maker
I tried making this since strawberries were cheap. Even small strawberries were more than enough.The strawberries start off at 130 g, but after heating they reduced to 112 g.I used one 50 g egg.Please use the strawberries after they've cooled.This has a light sweetness, so if you want a sweeter bread, please add 10 g of sugar.If you're using large strawberries, 5 or 6 should be enough. Recipe by Mokobu- mama -

“Japanese” Brioche!! “Japanese” Brioche!!
My previous recipe was for French toast made with regular bread, but since it’s now so popular to make it with brioche, here’s a brioche recipe that turns out super soft and incredibly flavorful!It’s made using the Japanese TANGZHONG technique, that’s why I named it “Japanese Brioche”. That technique is an Asian-origin method, specifically Japanese, used in baking to achieve softer, tender, and fluffier doughs. It involves cooking a portion of the flour and liquid in the recipe (water or milk) before incorporating them into the rest of the ingredients).You can’t even imagine how amazing the house smells while it’s baking—just like a small-town bakery!It takes a little longer to make because the dough needs to rest twice, but it’s totally worth it!Shall we get started?#january2026
More Recipes
- Chicken Alfredo in a garlic parm & herb bread bowl
- My Chilli & Lime Chicken with Spinach and plenty flavouring. 💜
- Dalgona Coffee Cake frosting
- Chocolate chip cookies
- Zinger roll with tortilla bread
- Pori with halwa and sour potatoes curry
- Lachha paratha
- Qeema stew
- My ground beef taco
- Kung pao Noodles

Comments (11)