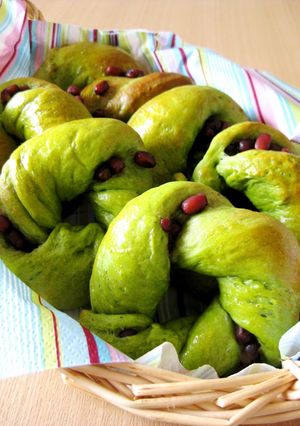
Matcha Milk Adzuki Bread
I originally had kept the adzuki beans for making dessert, but I noticed that they're nearing their expiration date, so I used it for making bread! I added matcha for color. They taste mild from the milk.
When you shape the dough, cover the unused dough with cling film to prevent from drying.
Place each dough onto a baking tray with a spaces in between as the dough puffs up while proofing and baking.
The proofing time differs according to the season so always check to see how they're progressing. For 8 pieces. Recipe by yaburie
Cooking Instructions
- 1
Beat the egg. Set aside one tablespoon of the beaten egg for finishing. Heat milk in a microwave until warmed to the touch.

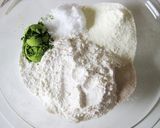
- 2
Put the bread flour, skim milk powder, sugar, salt and matcha in a bowl. Add the yeast at the end along the edge.
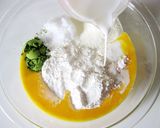
- 3
Pour the beaten egg and milk over the yeast. Mix the ingredients with a scraper.
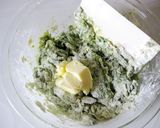
- 4
After the ingredients are incorporated, add the butter and beat using a cutting motion. After everything is combined, tip over onto your work space.
- 5
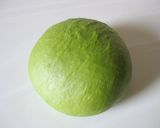
Using the palm of your hand, knead the mixture. The mixture is wet at first, but it gradually starts to form into a dough.

- 6
Keep kneading for about 10 minutes until the dough is no longer sticky and is smooth and elastic like in this picture.
- 7
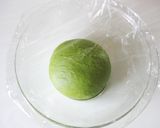
Put the dough into a bowl and cover with cling film. Leave to rise in a warm place. It takes about 30 minutes to 1 hour, depending on the temperature.
- 8
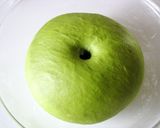
After the dough is doubled in volume, dust your forefinger with bread flour and poke the dough. If the dough doesn't spring back, the proofing has completed.
- 9
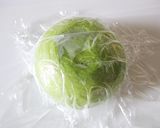
Punch the gas down with your fist, remove from the bowl, and shape into a ball. Cover with cling film and leave to rest for 10 minutes.
- 10
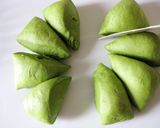
Divide into 8 portions with a bench scraper.
- 11
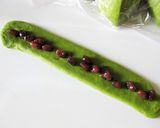
Roll out into 4 x 20 cm oblongs using a rolling pin. Place the adzuki beans on top.
- 12
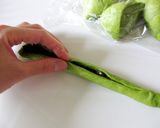
Cover the azuki beans with dough and seal loosely (you don't have to seal tightly).
- 13
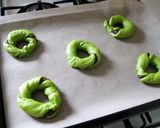
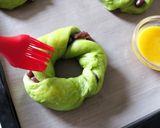
Grab both ends, twist and join the ends. Place the prepared dough onto a baking tray lined with parchment paper.

- 14
Repeat the same process with the rest of the dough (cover with a moistened tea towel if possible). Leave the dough in a warm place to let rise a second time.
- 15
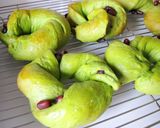
Depending on the temperature, it can take another 30 minutes to an hour until it doubles in size. Brush the beaten egg on top for a shiny finish.
- 16
Bake in an oven preheated to 180°C for about 15 minutes until nicely golden brown. Place onto a cooling rack after baking!
Cooksnaps
Did you make this recipe? Share a picture of your creation!

Similar Recipes
-

Rolled Matcha Bread with Sweet Potatoes and Adzuki Rolled Matcha Bread with Sweet Potatoes and Adzuki
I wanted to bake a "Japanese" bread.By separating the kneaded dough into two and mixing one with dissolved matcha, it makes the process easier and you can get a nicely kneaded dough.Scatter sweet potatoes and adzuki beans evenly all the way to the edges.Make sure no air gets in when rolling the dough. Recipe by kurikuro
-

Ogura (Japanese Adzuki Bean Paste) and Green Tea Bread Ogura (Japanese Adzuki Bean Paste) and Green Tea Bread
I like similar bread sold at my neighbor bakery. They sell a loaf for about 400 yen, so I tried to make one for myself.I still have to improve how to shape the bread.If you don't have a loaf tin, divide the dough into 8 portions at Step 5 and bake in a baking tray. Or you can use an empty biscuit tin lined with baking paper. Recipe by Mamu -

Adzuki Bean Bread (Using a Bread Maker) Adzuki Bean Bread (Using a Bread Maker)
One Cookpad user wrote that when she added water from a can of boiled adzuki beans to the bread, it tasted like an adzuki bean ice cream bar, so I wanted to try making it. I decided to combine the adzuki bread with some matcha bread dough. I played with different amounts of canned adzuki beans and water, and unexpectedly came up with a good combination, so I uploaded it.I think the amount of water in the adzuki beans varies slightly from maker to maker. After the bread maker starts the kneading process, open the lid and be ready to add some milk if necessary. There isn't much green tea dough, so you can knead it well while keeping an eye on the bread maker. Even when I made 1.5 loaves with just ◎, it turned out to be a rather delicious bread. Recipe by Osshosan -
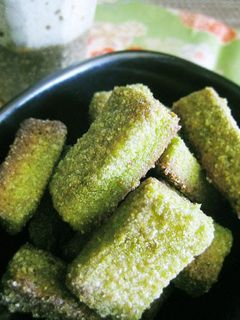
Japanese-Flavored Bread Crusts - Matcha Milk Rusk Japanese-Flavored Bread Crusts - Matcha Milk Rusk
I love rusk using leftover crust, so I devised this recipe.Please check the bread crusts once after baking for 20 minutes as it is burns easily. Enjoy the crispiness after if cools down. Recipe by Monstera USA -

Matcha Green Tea Milk French Bread with White Chocolate Matcha Green Tea Milk French Bread with White Chocolate
I love the combination of green tea and white chocolate & I love bread with crispy, hard crusts.Combining both of those flavors produces a slightly bitter + very sweet elegant French bread.The dough is so easy to work with that you don't even need to add extra water!!!You can chop up a white chocolate bar to use as well.If you use the milk right out of te fridge it will be too cold, so let it warm a little bit and the fermentation processes will go smoothly.To learn more details about the baking process, refer to. Recipe by Youtank -

-

Matcha and White Chocolate Buns Bread Machine Version Matcha and White Chocolate Buns Bread Machine Version
I wanted to eat bread with matcha and white chocolate, so I made this.I have a Panasonic bread machine (1 loaf type), and used the "bread dough" setting.I brought the unsalted butter to room temperature.I have a Sharp oven for the second rising of the bread.I usually use white sugar for bread, but in this recipe I used light brown sugar. Use whichever you like. Recipe by Banyangarden -

Pancake Mix Matcha Melon Bread Pancake Mix Matcha Melon Bread
I tried making melon bread with green tea powder while keeping the melon bread flavor intact.Letting the dough sit for 15 minutes makes it moist and easy to form into round shapes. Recipe by Mamami -

Twisted Soy Milk Bread with Amanatto (Candied Beans) and Green Tea Twisted Soy Milk Bread with Amanatto (Candied Beans) and Green Tea
I like my soy milk bread. In this recipe, I added green tea flavour to it.This bread doesn't rise so much, so if you are worried that the dough might not proof and you leave it longer, it will proof too much. Use your favorite kinds of amanatto. If you don't like too much sugar on the amanatto, rinse first. In that case, pat dry very well. Recipe by La Land -

Green Tea Milk Hearth Bread Green Tea Milk Hearth Bread
After Double Milk Hearth Bread recipeand Chocolate Hearth Bread recipe, I tried this green tea hearth bread recipe.Make the first slit in the middle and then you should be able to make two even slits on both sides of the first. Refer to Double Milk Hearth Bread recipefor more details about shaping the bread dough. For 2 servings. Recipe by itarunrun -

Whole Wheat Flour & Adzuki Sakekasu Soda Bread Whole Wheat Flour & Adzuki Sakekasu Soda Bread
I wanted to use up my sakekasu; I tried adding it to the dough for soda bread I always make, and it came out delicious.I prefer sakekasu with a gentle flavor over yogurt in soda bread.Adjust the oven baking time accordingly.Since this bread is to accompany meals, it uses non-sweetened adzuki beans. It has it's own simple deliciousness, but it's also delicious when eaten with cream cheese.You can also use dry fruit and nuts in place of the adzuki beans.It's also good plain with nothing added to the dough. Recipe by Misoyuuki

More Recipes

Comments