

![A picture of Salted Egg Yolk Lava Bun [Liu Sha Bao].](https://img-global.cpcdn.com/recipes/5a5d55c99dd3d4e1/300x426cq80/salted-egg-yolk-lava-bun-liu-sha-bao-recipe-main-photo.jpg)
Salted Egg Yolk Lava Bun [Liu Sha Bao]

Salted egg yolk lava bun is my all-time favorite dimsum item. In Chinese, it is called liu sha bao that literally means “quicksand bun”. It refers to the molten lava filling that makes this steam bun uniquely tasty. A must-try if you have not 😊
Salted Egg Yolk Lava Bun [Liu Sha Bao]
Salted egg yolk lava bun is my all-time favorite dimsum item. In Chinese, it is called liu sha bao that literally means “quicksand bun”. It refers to the molten lava filling that makes this steam bun uniquely tasty. A must-try if you have not 😊
 Open in Cookpad App
Steps
- 1
Youtu.be/8uDCbmgbT-s
![A picture of step 1 of Salted Egg Yolk Lava Bun [Liu Sha Bao].](https://img-global.cpcdn.com/steps/de7f7587aba32b06/160x128cq80/salted-egg-yolk-lava-bun-liu-sha-bao-recipe-step-1-photo.jpg)
- 2
Make filling: Steam the egg yolks for 10 minutes, then mash them into fine crumbs. In a medium bowl, beat the butter until softened. Add the yolks and the remaining ingredients. Mix until smooth. Cover and refrigerate to firm for about 45 minutes.
![A picture of step 2 of Salted Egg Yolk Lava Bun [Liu Sha Bao].](https://img-global.cpcdn.com/steps/8a33430cc644376b/160x128cq80/salted-egg-yolk-lava-bun-liu-sha-bao-recipe-step-2-photo.jpg)
![A picture of step 2 of Salted Egg Yolk Lava Bun [Liu Sha Bao].](https://img-global.cpcdn.com/steps/fe8d03512890fc15/160x128cq80/salted-egg-yolk-lava-bun-liu-sha-bao-recipe-step-2-photo.jpg)
![A picture of step 2 of Salted Egg Yolk Lava Bun [Liu Sha Bao].](https://img-global.cpcdn.com/steps/6d6cc5b4f245aa82/160x128cq80/salted-egg-yolk-lava-bun-liu-sha-bao-recipe-step-2-photo.jpg)
- 3
Divide the filling into 14 equal portions (about 13g each). Roll each into a smooth round ball. Keep them in the fridge until needed.
![A picture of step 3 of Salted Egg Yolk Lava Bun [Liu Sha Bao].](https://img-global.cpcdn.com/steps/7616594de98344e1/160x128cq80/salted-egg-yolk-lava-bun-liu-sha-bao-recipe-step-3-photo.jpg)
![A picture of step 3 of Salted Egg Yolk Lava Bun [Liu Sha Bao].](https://img-global.cpcdn.com/steps/cbc75ec7410c11b1/160x128cq80/salted-egg-yolk-lava-bun-liu-sha-bao-recipe-step-3-photo.jpg)
- 4
Make dough: Combine warm water (about 110°F/43°C) and 4 grams of sugar. Sprinkle the yeast over. Let sit for 5-10 minutes until it gets foamy and activated.
![A picture of step 4 of Salted Egg Yolk Lava Bun [Liu Sha Bao].](https://img-global.cpcdn.com/steps/a0ab1d12f1fc01c4/160x128cq80/salted-egg-yolk-lava-bun-liu-sha-bao-recipe-step-4-photo.jpg)
![A picture of step 4 of Salted Egg Yolk Lava Bun [Liu Sha Bao].](https://img-global.cpcdn.com/steps/2c62d485a2ad4928/160x128cq80/salted-egg-yolk-lava-bun-liu-sha-bao-recipe-step-4-photo.jpg)
- 5
In a large bowl, whisk the flour, salt, and 8 grams of sugar until combined. Make a well in the center. Pour in the yeast mixture and oil, then mix until the dough comes together.
![A picture of step 5 of Salted Egg Yolk Lava Bun [Liu Sha Bao].](https://img-global.cpcdn.com/steps/f184c9537ad0577f/160x128cq80/salted-egg-yolk-lava-bun-liu-sha-bao-recipe-step-5-photo.jpg)
![A picture of step 5 of Salted Egg Yolk Lava Bun [Liu Sha Bao].](https://img-global.cpcdn.com/steps/76687f98ac2cfae9/160x128cq80/salted-egg-yolk-lava-bun-liu-sha-bao-recipe-step-5-photo.jpg)
- 6
Transfer onto a work surface. Knead the dough until it becomes elastic and smooth for up to 20 minutes.
![A picture of step 6 of Salted Egg Yolk Lava Bun [Liu Sha Bao].](https://img-global.cpcdn.com/steps/9602f932665f8185/160x128cq80/salted-egg-yolk-lava-bun-liu-sha-bao-recipe-step-6-photo.jpg)
![A picture of step 6 of Salted Egg Yolk Lava Bun [Liu Sha Bao].](https://img-global.cpcdn.com/steps/9466a4450c59a5ba/160x128cq80/salted-egg-yolk-lava-bun-liu-sha-bao-recipe-step-6-photo.jpg)
![A picture of step 6 of Salted Egg Yolk Lava Bun [Liu Sha Bao].](https://img-global.cpcdn.com/steps/739d7c4a222e63c2/160x128cq80/salted-egg-yolk-lava-bun-liu-sha-bao-recipe-step-6-photo.jpg)
- 7
Divide the dough into 14 equal portions (about 33g each). Roughly shape each dough into a ball. Cover and rest them for 15 minutes to relax the gluten.
![A picture of step 7 of Salted Egg Yolk Lava Bun [Liu Sha Bao].](https://img-global.cpcdn.com/steps/8f45ce69b0fa7a0a/160x128cq80/salted-egg-yolk-lava-bun-liu-sha-bao-recipe-step-7-photo.jpg)
![A picture of step 7 of Salted Egg Yolk Lava Bun [Liu Sha Bao].](https://img-global.cpcdn.com/steps/4b67782de1fe318a/160x128cq80/salted-egg-yolk-lava-bun-liu-sha-bao-recipe-step-7-photo.jpg)
- 8
Take 1 dough. Roll out the edges keeping the center thicker. Place a portion of the chilled filling onto the center and wrap it. Tightly pinch the seam to prevent any leakage.
![A picture of step 8 of Salted Egg Yolk Lava Bun [Liu Sha Bao].](https://img-global.cpcdn.com/steps/d8ba559a9808ab11/160x128cq80/salted-egg-yolk-lava-bun-liu-sha-bao-recipe-step-8-photo.jpg)
![A picture of step 8 of Salted Egg Yolk Lava Bun [Liu Sha Bao].](https://img-global.cpcdn.com/steps/a1e33367c41cdb9a/160x128cq80/salted-egg-yolk-lava-bun-liu-sha-bao-recipe-step-8-photo.jpg)
![A picture of step 8 of Salted Egg Yolk Lava Bun [Liu Sha Bao].](https://img-global.cpcdn.com/steps/7386c42cc43bd16b/160x128cq80/salted-egg-yolk-lava-bun-liu-sha-bao-recipe-step-8-photo.jpg)
- 9
Round it into a ball and place onto a piece of parchment paper. Set aside with a cover. Repeat with the rest.
![A picture of step 9 of Salted Egg Yolk Lava Bun [Liu Sha Bao].](https://img-global.cpcdn.com/steps/1934a2b9c89ae34f/160x128cq80/salted-egg-yolk-lava-bun-liu-sha-bao-recipe-step-9-photo.jpg)
![A picture of step 9 of Salted Egg Yolk Lava Bun [Liu Sha Bao].](https://img-global.cpcdn.com/steps/644d9dd0a7d2a769/160x128cq80/salted-egg-yolk-lava-bun-liu-sha-bao-recipe-step-9-photo.jpg)
- 10
Let them sit and ferment for 45 – 60 minutes or until the size is 50% larger.
![A picture of step 10 of Salted Egg Yolk Lava Bun [Liu Sha Bao].](https://img-global.cpcdn.com/steps/c5de46591a537f7f/160x128cq80/salted-egg-yolk-lava-bun-liu-sha-bao-recipe-step-10-photo.jpg)
- 11
Steam the bun over medium-low heat (or medium heat depending on your type of steamer) for 6-8 minutes. I suggest doing a test with 1 bun to determine the right timing because the filling will explode when overcooked. Also, wrap the steamer lid with a cloth to prevent water droplets on the buns while steaming.
![A picture of step 11 of Salted Egg Yolk Lava Bun [Liu Sha Bao].](https://img-global.cpcdn.com/steps/bc477099fd3b61aa/160x128cq80/salted-egg-yolk-lava-bun-liu-sha-bao-recipe-step-11-photo.jpg)
- 12
Wait 10 minutes after the heat is off before opening the lid. This will prevent the buns from collapsing. Serve warm to get that tasty molten filling.
![A picture of step 12 of Salted Egg Yolk Lava Bun [Liu Sha Bao].](https://img-global.cpcdn.com/steps/66979b6ec9412dc4/160x128cq80/salted-egg-yolk-lava-bun-liu-sha-bao-recipe-step-12-photo.jpg)
![A picture of step 12 of Salted Egg Yolk Lava Bun [Liu Sha Bao].](https://img-global.cpcdn.com/steps/fc7b938565e9a834/160x128cq80/salted-egg-yolk-lava-bun-liu-sha-bao-recipe-step-12-photo.jpg)
Cooksnaps

Top Search in
Keywords
Similar Recipes
More Recipes
-
Ratalu ki Sabji in different style

-
The Everything Breakfast Stack 🥯

-

-

-
Besan Barfi - Chickpeas Flour Sweet

-

-
 Leahgathukia
 -

-
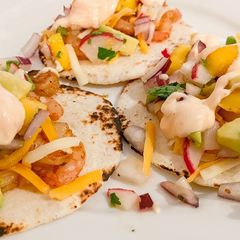
Shrimp tacos with Mango Radish Salsa
-

-

-

-
-

-

-

-
 CHAUNCYG
 -


-
Caramel popcorn (popcorn chikki)

-

-

-





Comments (8)