
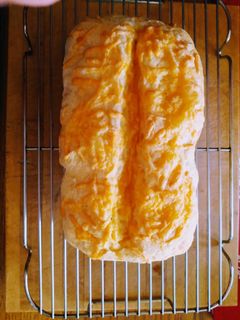
Easy Pão de Queijo (Brazilian Cheese Bread)
If you love carbs, Cheese Bread was probably enough of a hook to get your interest. These warm, cheesy, pull apart little rolls are the perfect accompaniment to Brazilian Churrasco or even just for snacking. This is not a traditional recipe, as the method has been adjusted to make the process easier, and the recipe has been adjusted for high-altitude cooking.
Cooking Instructions
- 1
In a blender, add in your eggs, oil, milk, salt, baking powder and garlic. Blend on a low setting for a few pulses just until combined.
- 2
Add in both cheeses and blend until just combined.
- 3
Next, add in the lightly packed Yuca/Tapioca flour 1 Cup at a time. Once you get to the second cup, you may need to give the batter a stir with a spatula in between pulses to fully hydrate the Tapioca Flour. By the last cup, depending on how big your blender is, you may need to whisk the batter after every few pulses to help it along, as it will be a very thick dense batter at this point. Keep pulsing and repeating the process until the batter is smooth.
- 4
Preheat the oven to 400° F. In a silicone mini muffin or muffin pan, pour batter into cups about 3/4 full. If you choose to pour these into an aluminum tin, beware the removal process is messy and unsatisfying. If you don't have either a silicone or regular muffin tin, you can also pour the batter into a container and let it chill in the fridge overnight or until it sets up. At this point you can scoop them with a small ice cream scoop and place them onto a greased baking sheet or silicone.
- 5
Last, bake the rolls at 400° F for 10 minutes, rotate 180°, and then another 10 minutes. If you like, you can sprinkle more parm on top before rotating to add a little garnish and texture. Let cool for a few minutes and enjoy while warm. These don't reheat super well so cook them to order and keep some batter in your fridge for when you want a snack. :)
Cooksnaps
Did you make this recipe? Share a picture of your creation!

Similar Recipes
-

Brazilian Cheese Bread (PAO DE QUEIJO) Brazilian Cheese Bread (PAO DE QUEIJO)
#breads'Pao de queijo' is a typical Brazilian snack, originally from the states Minas Gerais and Goias.Brazilian cheese bread is tasty as it gets, since they are so flavorful due to the cheese and the tapioca flour.
-

Fluffy & Chewy Pao de Queijo (Cheese Bread) Fluffy & Chewy Pao de Queijo (Cheese Bread)
I was experimenting with shiratamako and tofu, and ended up with this lovely fluffy bread.The dough is a little bit runny during Step 1 and 2, but when the dry ingredients are added during Step 3, it will come together, and will be easy to bring together. Recipe by robicat
-

Red Bean Paste Pão de Queijo-Style Bread Red Bean Paste Pão de Queijo-Style Bread
I thought water might make them more chewy than milk. So I used water for this recipe. For 10 rolls. Recipe by Happa -

Easy Brazilian Cheese Bread Easy Brazilian Cheese Bread
I went to a Brazilian restaurant and couldn’t get enough of these chewy cheese puffs so here’s my take on it
-

Brazilian Pão de Queijo Brazilian Pão de Queijo
Pão de queijo is a common Brazilian snack.In Brazil, they add bacon, oregano, goiabada, and such. You can add basil to the dough, or black pepper to make it spicy. Try out all kinds of variations. Recipe by Ery -

Brazilian Cheesy Bread Brazilian Cheesy Bread
My husband and I LOVE to celebrate our special occasions at the Brazilian Steak House and they provide us with a tray of various breads to accompany our meal. Well, baby! That Cheese Bread is BANGIN!!! I HAD to learn the recipe. I had to share!
-

Cheese & Bacon Pão de Queijo Cheese & Bacon Pão de Queijo
I was given some mochi rice flour, so...It's also delicious if you add some sugar to the mochi rice flour in Step 1. It's probably too difficult to add sugar once cooled... If the dough doesn't come together in Step 2 or 3, add a little milk or vegetable oil. When they rise and the cheese starts to melt, they are done. Recipe by commeline -

Easy with Rice Cakes Pao De Queijo Easy with Rice Cakes Pao De Queijo
Since I'm getting tired of mochi the usual way...Adjust the water according to the mochi!The dough shouldn't stick to your hands but shouldn't be dry either.It's chewy even when cool. Warm up in a toaster oven if you like. For 16. Recipe by ayayanmom -

-
Cheese Bread Cheese Bread
My kid's and Grand kid's love this bread. I'm making 3 for Christmas and 1 for the wife and myself as I type this. Best made in a cast iron loaf pan.
-

Easy Shiratamako Pão de Queijo (Cheese Buns) Easy Shiratamako Pão de Queijo (Cheese Buns)
I wanted to try out a chewy and delicious recipe my friend taught me using shiratamako.Make the balls into whatever sizes you like. They're cute when small, but it's even easier if you go big When it gets hard to mix, knead with your hands! Recipe by Yunachimama -
![A picture of Cheesy Bread [with Homemade Pizza Dough].](https://img-global.cpcdn.com/recipes/5a755a5c30f57580/240x320cq80/photo.jpg)
Cheesy Bread [with Homemade Pizza Dough] Cheesy Bread [with Homemade Pizza Dough]
A simple cheesy bread made with homemade pizza dough. It has a crunchy cheese top and chewy soft texture. 😋
More Recipes

Comments